Lab 2: Shell Scripting & Git
Overview
In this lab, you will learn how to use a linux terminal, practice some git commands, and write regular expressions.
To receive credit for this lab, you MUST show your work to the TA during the lab, and push it to the github before the deadline. Please note that submissions will be due on Wednesday at 11:59 p.m. in the following week.
Please DO NOT close or clear your terminals as you are working through the lab as you may need to export some commands and their outputs for your submission.
Learning Objectives
LO1. Get familiar with git branching, merge conflicts and resolutions.L02. Learn about pull requests and the difference between `git pull` and a pull request.
L03. Hands on practice with frequently used Shell commands
LO4. Learn advanced but commonly used git commands
Part A
Practicing Git commands and learning to deal with merge conflicts
Clone your GitHub repository
Github Classroom Assignment
- Using an SSH key
- Using a Personal Access Token (PAT)
git clone git@github.com:CU-CSCI3308-Spring2026/lab-2-shell-scripting-version-control-<YOUR_USER_NAME>.git
git clone https://github.com/CU-CSCI3308-Spring2026/lab-2-shell-scripting-version-control-<YOUR_USER_NAME>.git
Navigate to the repository on your system.
cd lab-2-shell-scripting-version-control-<YOUR_USER_NAME>
You will be simulating both persons of a pair for this part of the lab.
I. Managing code as a team - Person1's perspective
When working in a team, conflicts usually happen when two working Git branches diverge and the files are not consistent when the two branches are going to merge together. In the next few steps we will be simulating a conflict and learn how to fix it before merging the branches successfully.
i. Making code changes
As Person1: Update the README.md with you name and Github profile.
Format :<Firstname> <Lastname> - <Github username>
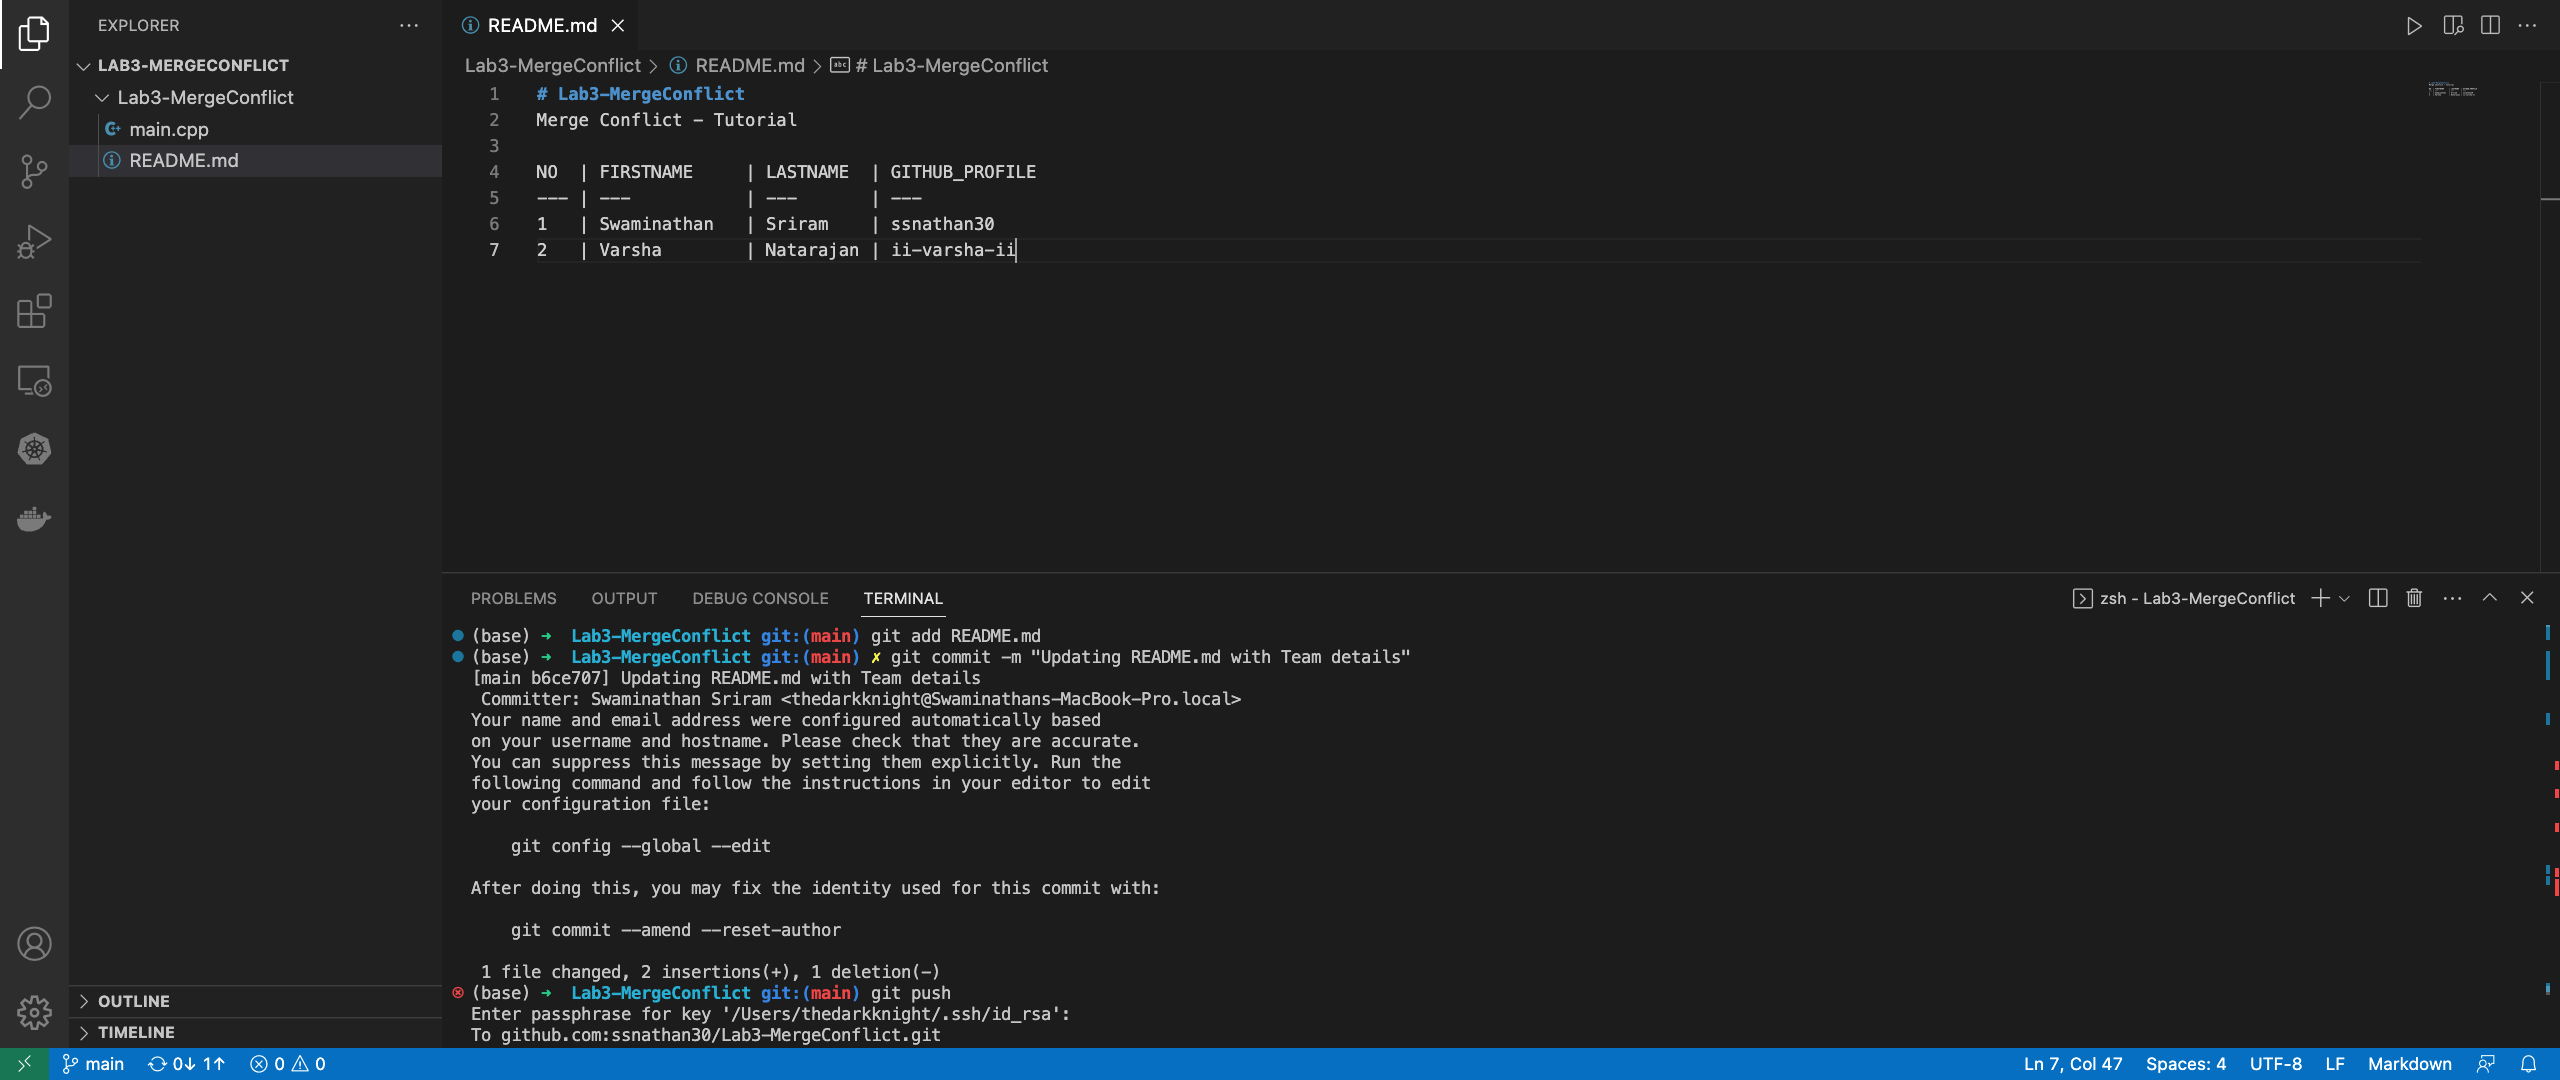
Run the following commands inside your local git directory. Make sure you have made the appropriate edits to the README.md file.
git add .
git commit -m "updated README.md with team details"
git push
ii. Pushing changes
1. As Person1: Create a new branch, with a sensible name of your choice.
git checkout -b "<Person1_branch_name>"
2. As Person1: Make changes to the file - main.cpp
We are updating the return value in main only for demonstration purposes.
Change the return value to "1" in main.cpp
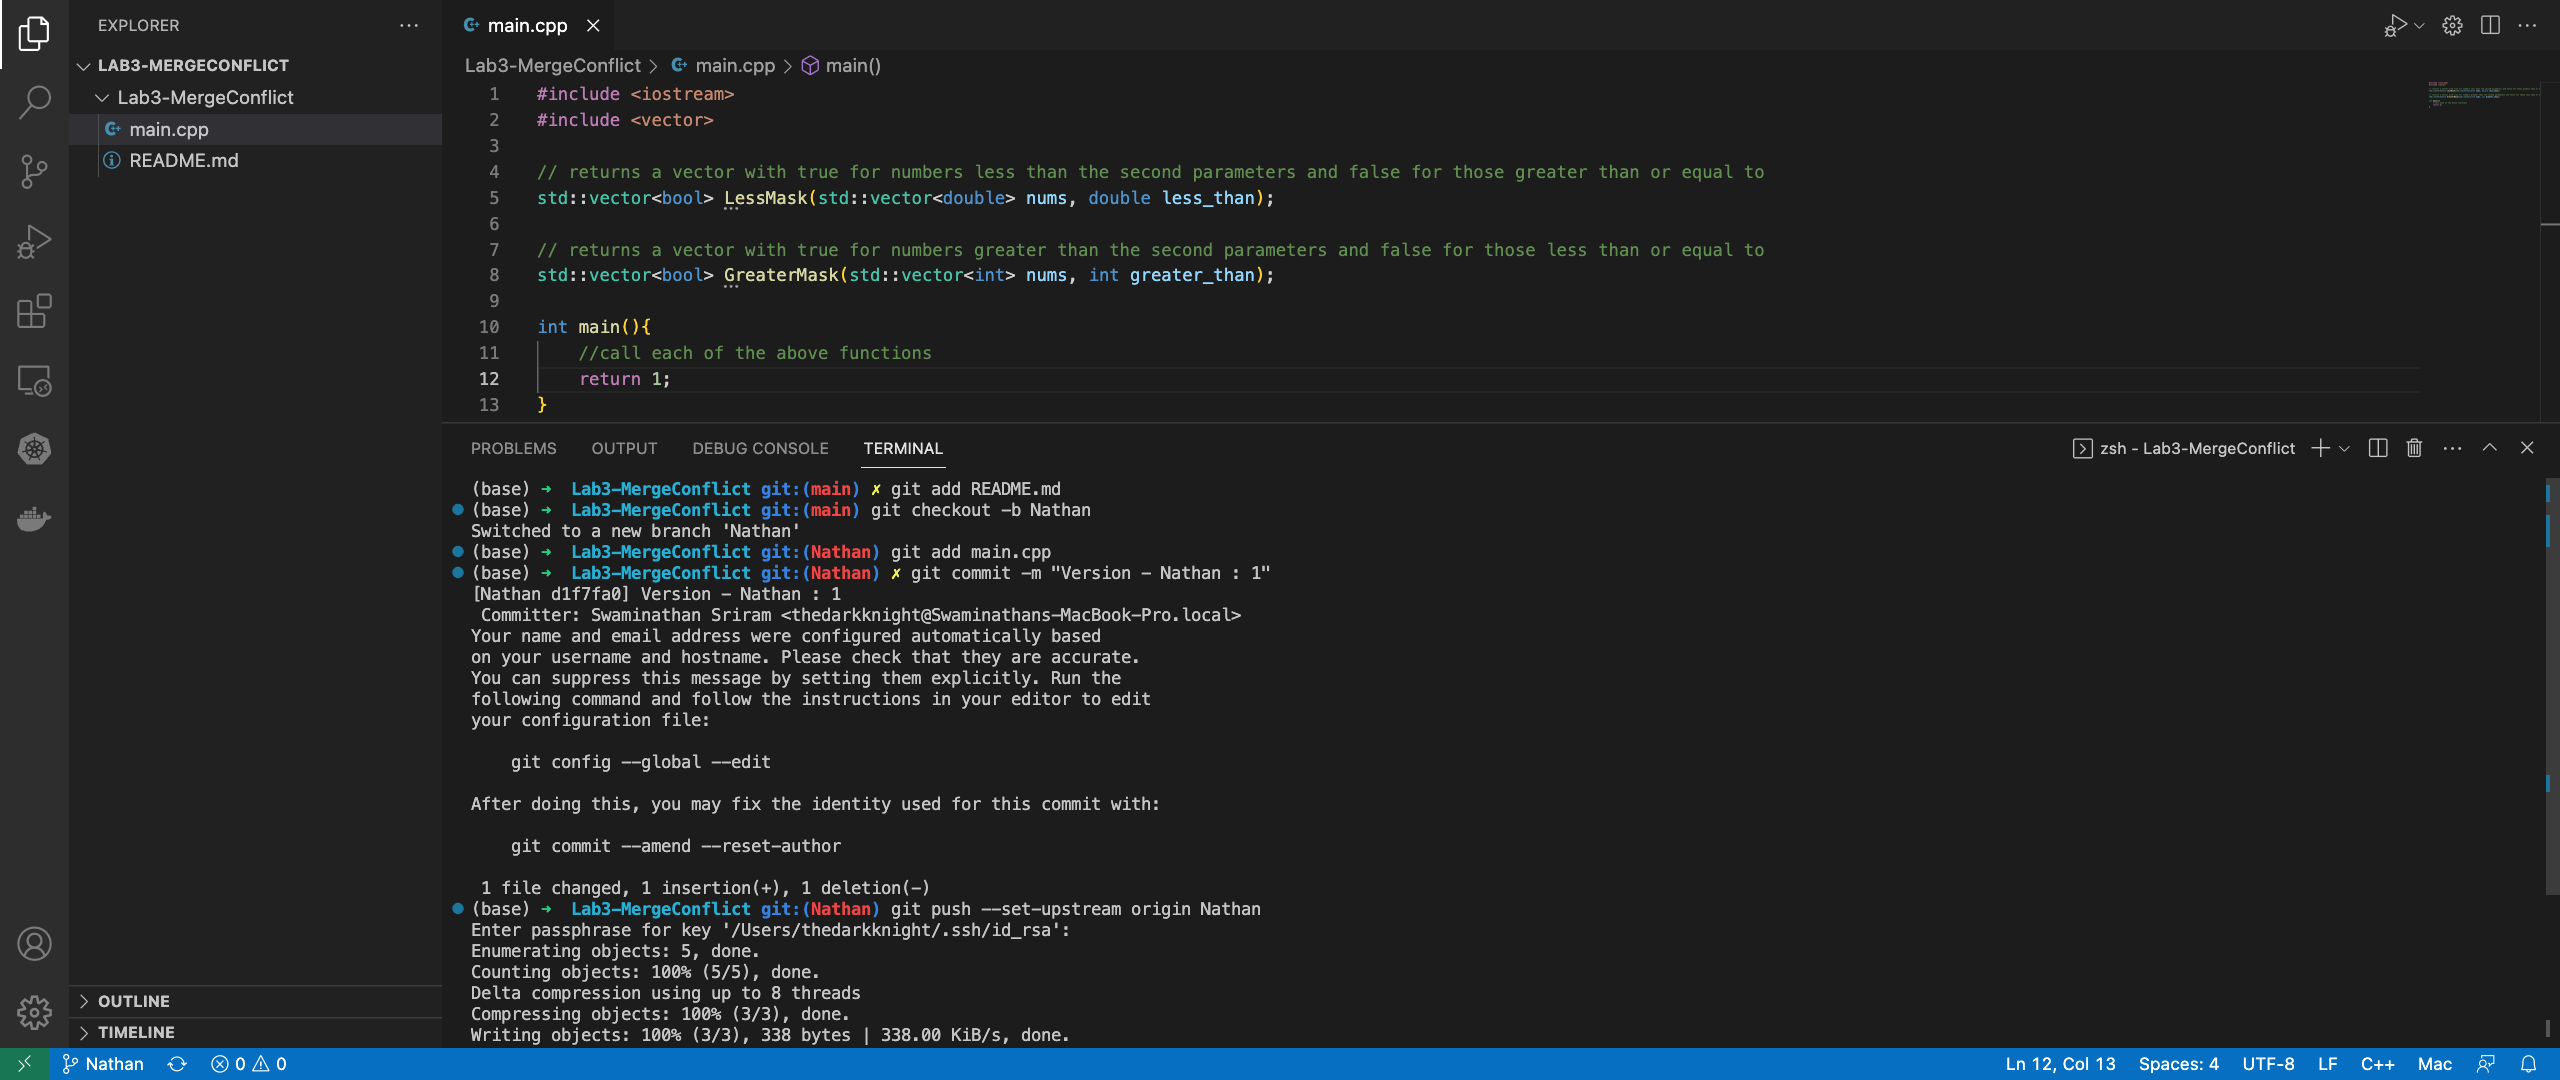
3. As Person1: Stage your changes
The git add command will stage any files you choose to be staged to commit (update) in your local Git repository. The .(period) lets you select all of the files that have been added or modified since the last commit. Here, we are specifying a file name to ensure that we are staging only the main.cpp file for commit.
git add main.cpp
4. As Person1: Commit your changes
Running the git commit command will now update your local git repository with the changes you staged. The -m flag is required and should be followed with whatever message you wish to state for your commit. This is part of your documentation, so try to make commit messages informative! Ideally, your commit message should indicate what changes are being made in this commit.
git commit -m "Version - <Person1> : <return value>"
5. As Person1: Push the branch to the remote repository
The git push command will upload your changes from your local repository to your remote Git repository which is hosted on GitHub. origin is the name of your remote whereas <Person1> is the name of the branch created by you as Person1. --set-upstream flag is used to push this new branch and set it as the default remote branch.
git push --set-upstream origin <Person1_branch_name>
The next time you choose to push to this branch you do not need to use the --set-upstream flag. You could simply use git push origin <Person1_branch_name>.
You will now be Person 2 in this scenario. Switch to the main branch using the following command:
git checkout main
6. As Person2: Make some edits on the main branch
Person2 will be in main branch. Before you start making edits you should pull the latest changes in remote.
git pull
Go ahead and change the return value to "2" in main.cpp
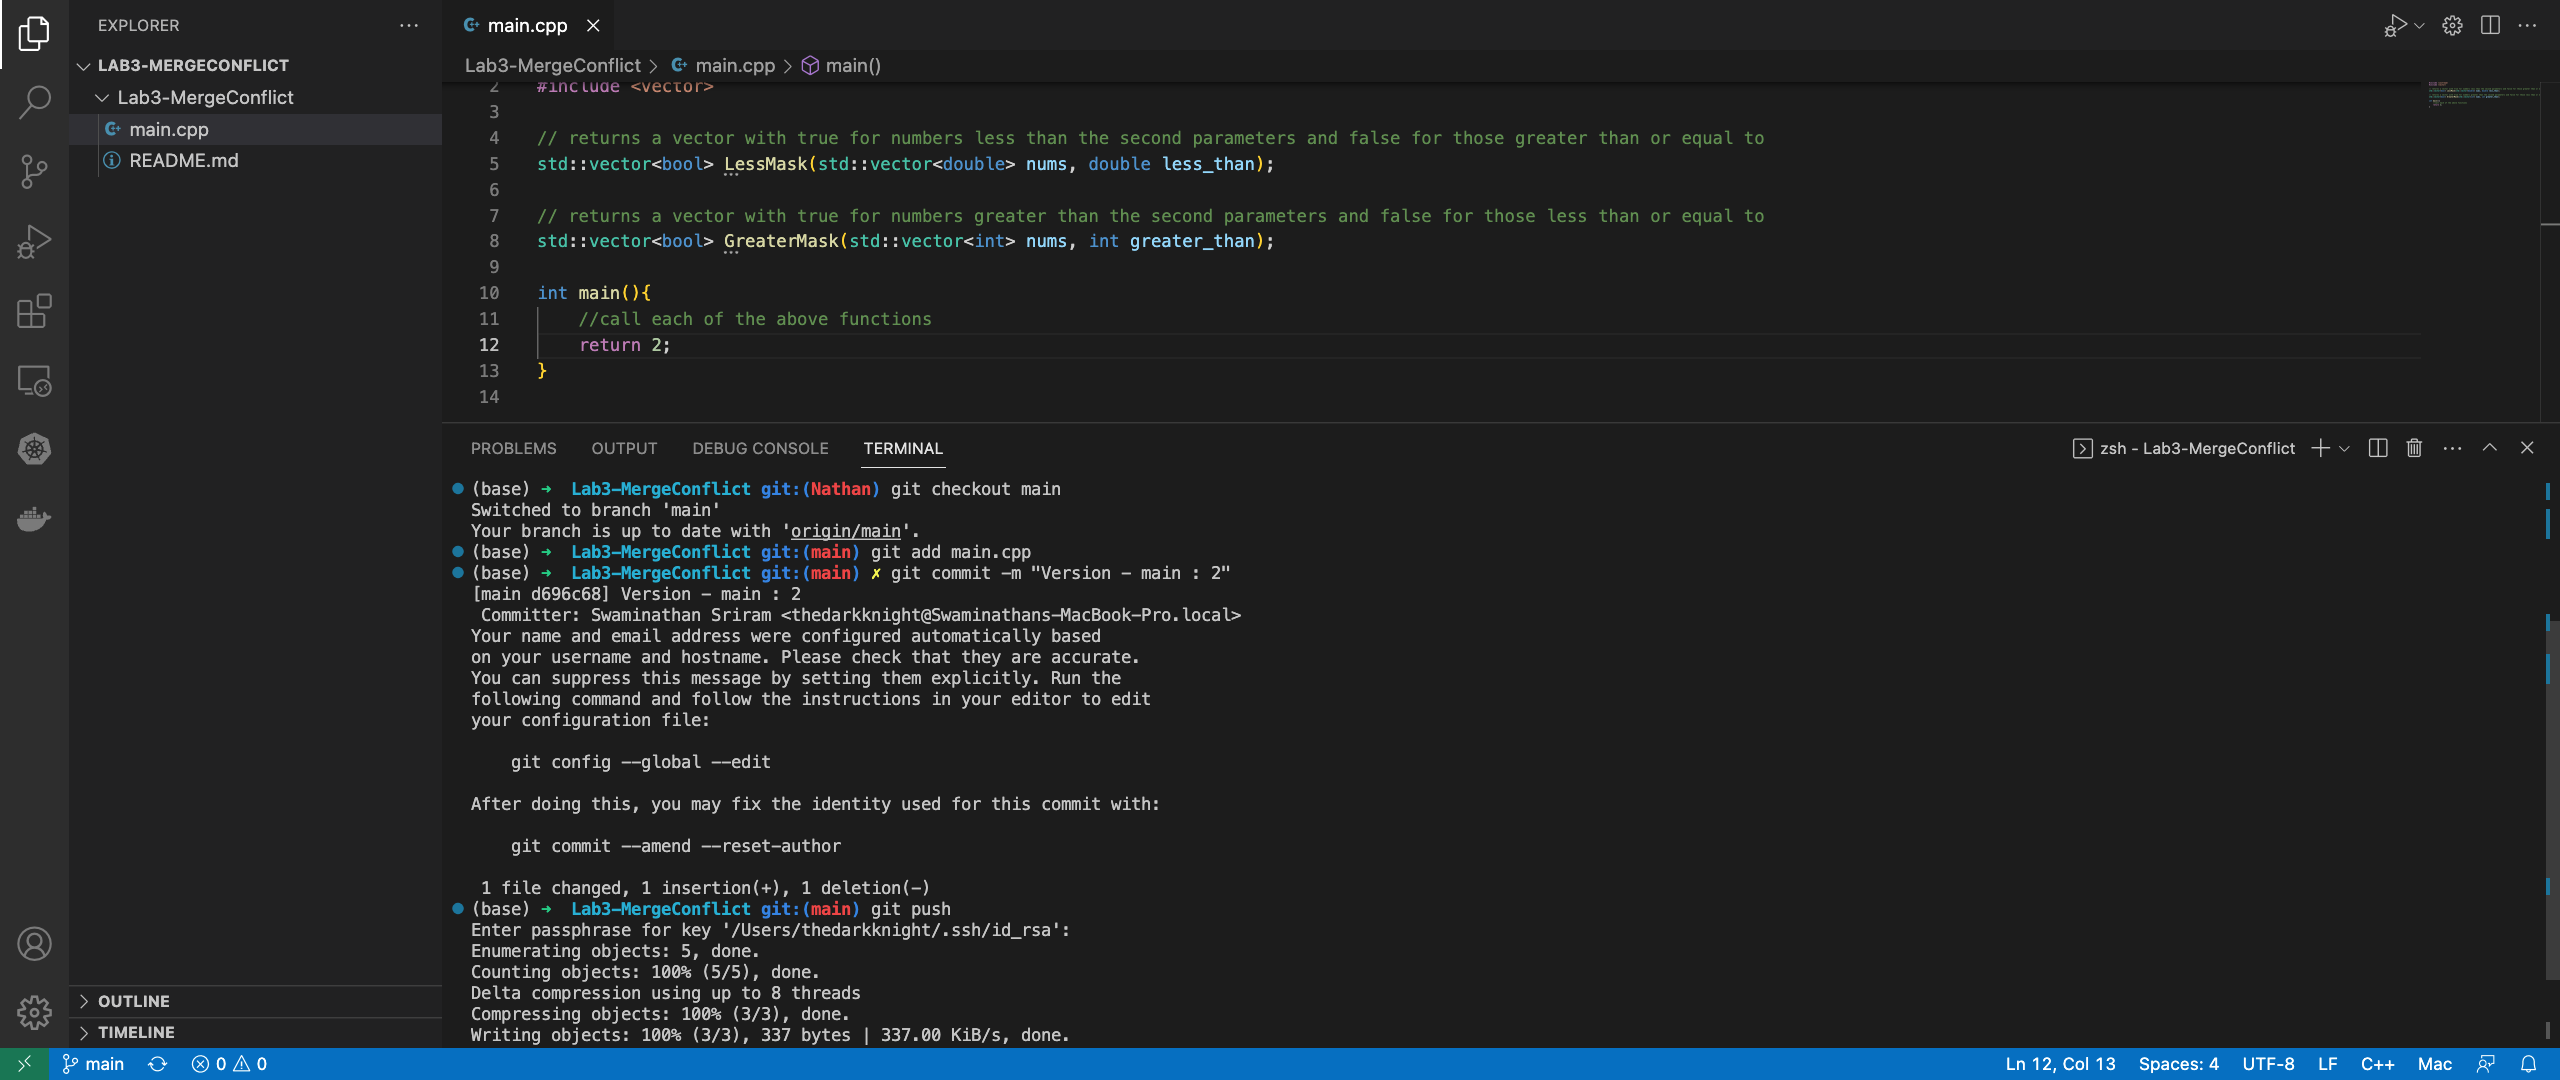
7. As Person2: Stage your changes
git add main.cpp
8. As Person2: Commit your changes
git commit -m "Version - main : <return value>"
9. As Person2: Push the changes to the main branch
git push origin main
iii. Merging Main
You will now switch to being Person 1. Since you are simulating both persons, you already have the updated main. When working with other developers, always remember to run git pull frequently to ensure that your main is updated with the remote repository.
1. As Person1: Switch back to your branch
The following command helps you to toggle between branches.
git checkout <Person1_branch_name>
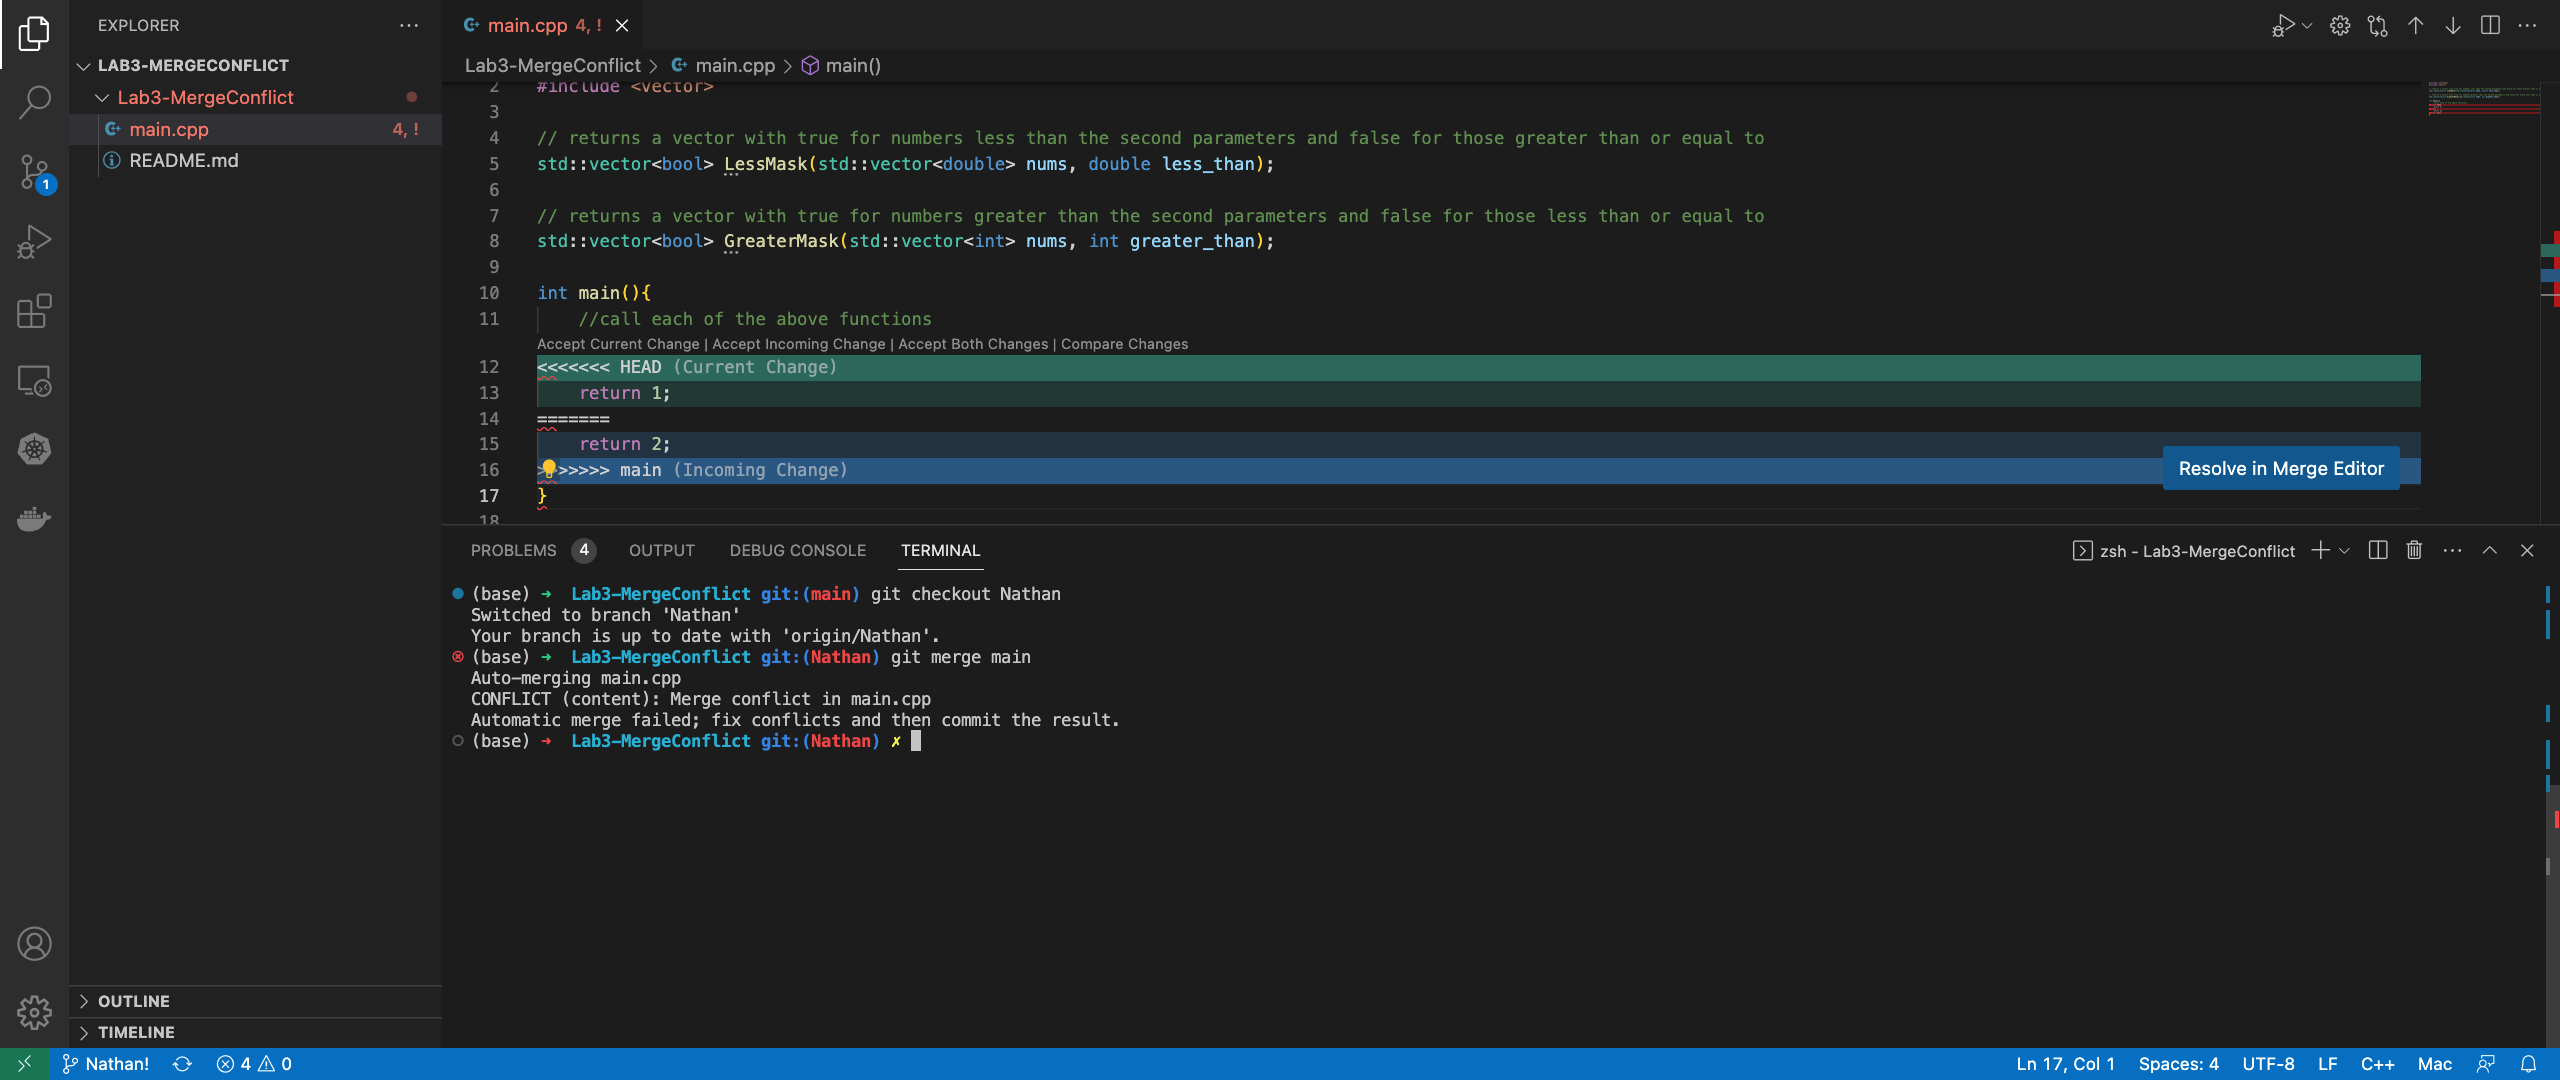
2. As Person1: Merge
Merge main on to your branch. You will come across a conflict.
git merge main
Do NOT resolve conflicts through the GUIs!!
Before we go ahead and resolve merge conflict, let's understand how to inspect changes with the help of an example.
Following is an example showing merge conflict in a 'main.cpp' file.
By using your favorite editor, for instance VS Code, you can easily view the merge conflict on the UI. In the above example 'main.cpp' file, lines (12-14) after <<<< HEAD represents the current changes that you have, while the lines (14-16) represents the incoming changes from the remote repository i.e., changes made by some other person on the same section of code. You can accept either of the changes to resolve the conflict.
When working on an actual project, it is necessary that you contact that author of the code that is conflicting with yours and come to an agreement about how to resolve the conflict. It could mean accepting either solutions or re-writing a solution that includes both pieces of code.
iv. Resolving Conflicts
Now, that you have an understanding of how to view merge conflict(s), let's go ahead and resolve it!
1. View conflicts
Using your favorite editor, edit the "main.cpp" file so that it reflects either of the two changes (i.e. keep return 1 or return 2). Then, stage, commit, and push the "main.cpp" file.
2. Push the final version
git add main.cpp
git commit -m "Merging changes with return value <selected value>"
git push
Copy and Paste the output from your terminal showing the git conflict and then the resolution.
Name this file git_merge_conflict.txt.
v. Create a pull request
1. As Person1: Create a pull request
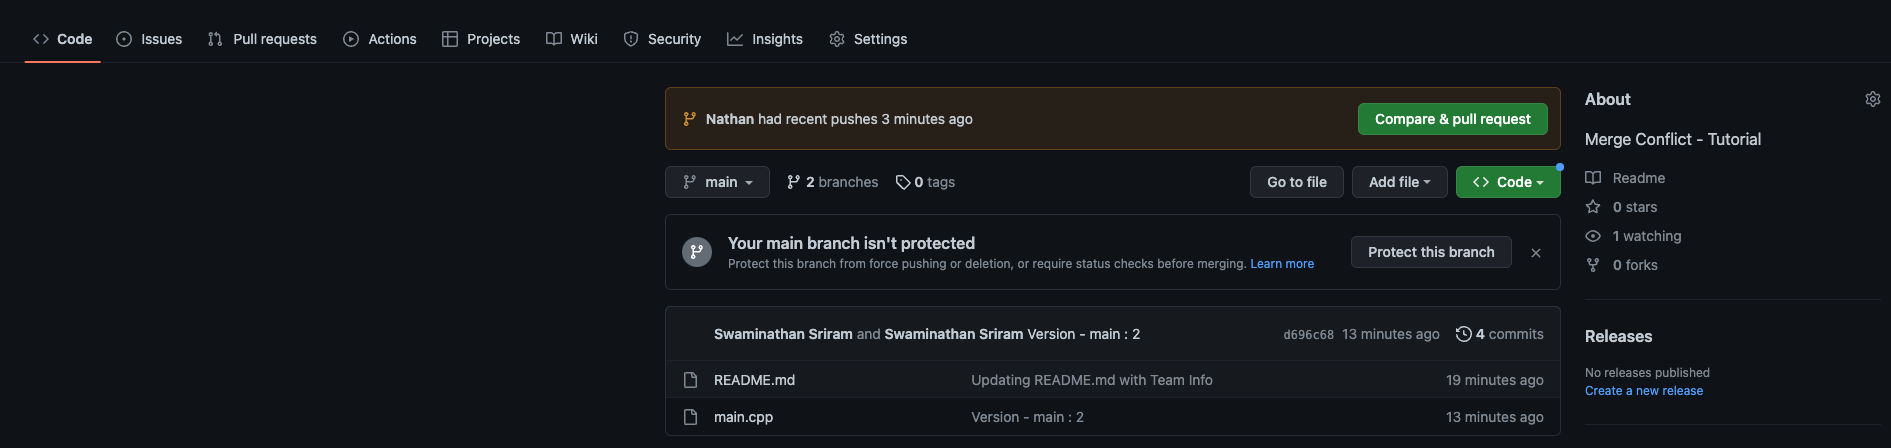
Go the repository using the GitHub UI. Click on the "Compare & Pull request" button.
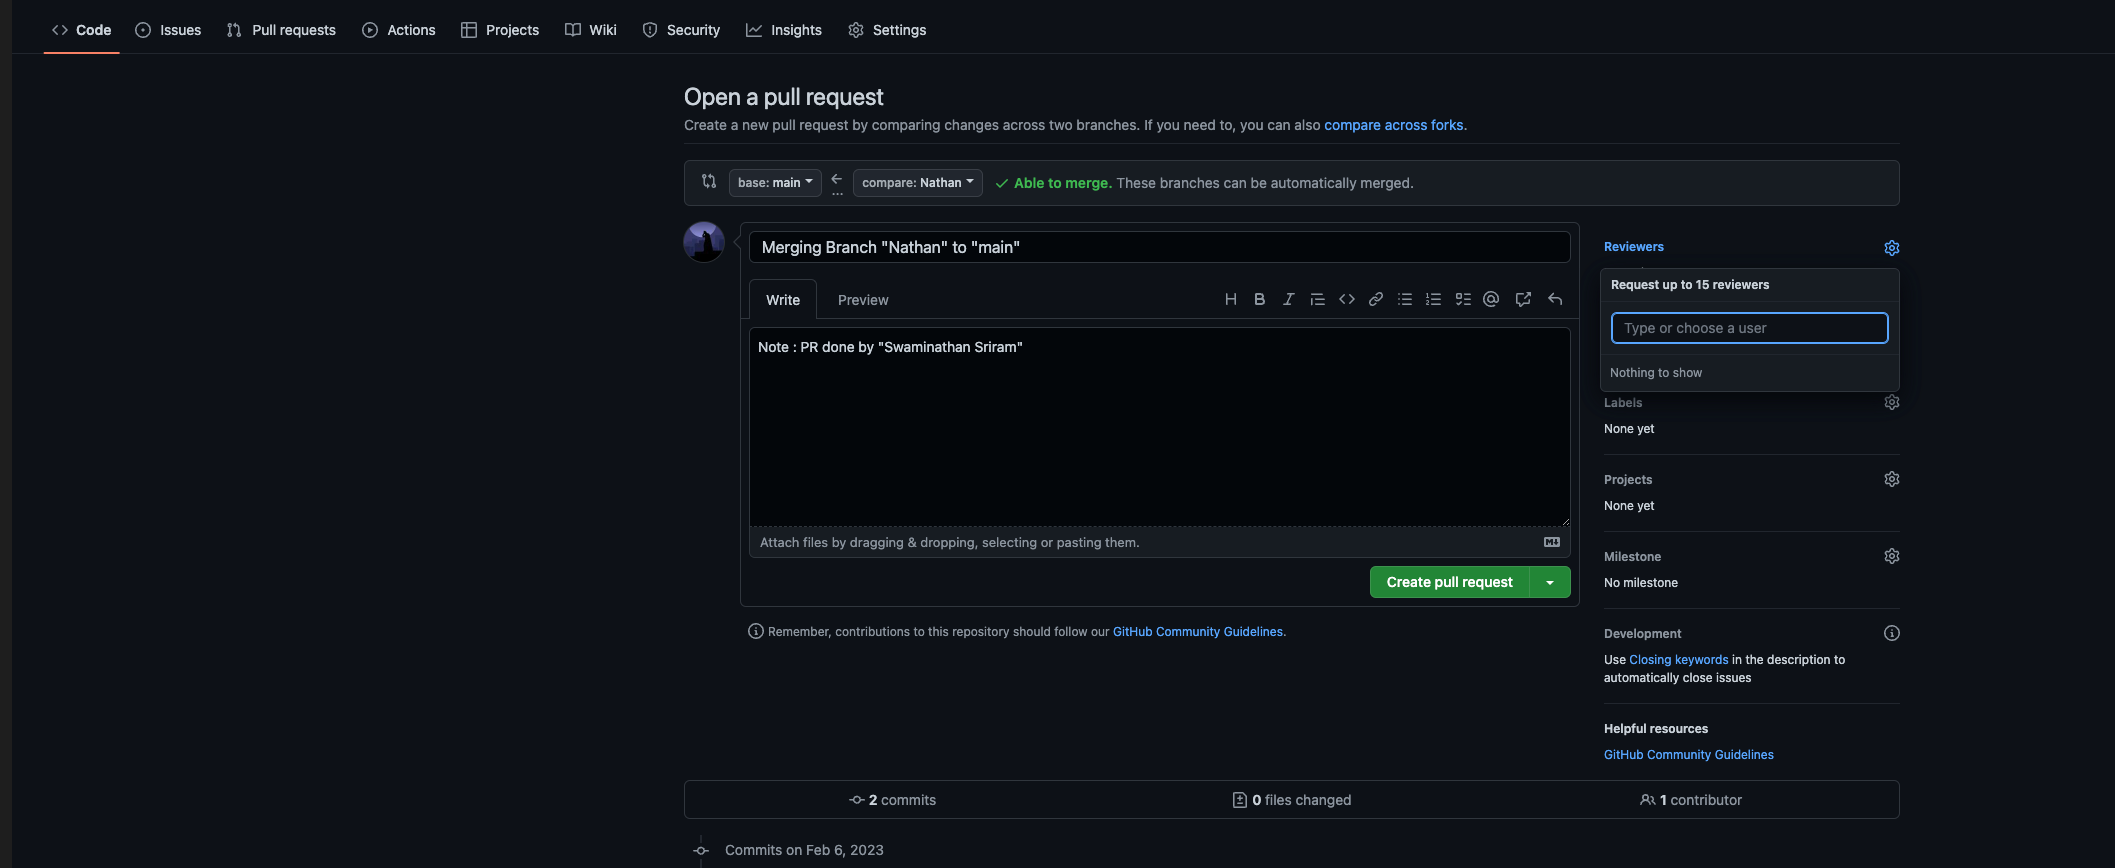
2. As Person1: Write a Description
Write a brief description for the pull request. Then, assign yourself as the assignee and for this example, assign the reviewer as yourself. If you are unable to assign yoursef as the reviewer, you can skip this step.
In the industry, the reviewer would be a dev lead, team lead etc. Create the pull request.
3. As Person2: Review a pull request
Go to the "Pull Requests" tab and choose the pull request you were assigned to review.
Click on "Review changes" and add a comment to your review. Select "Approve" and submit the review.
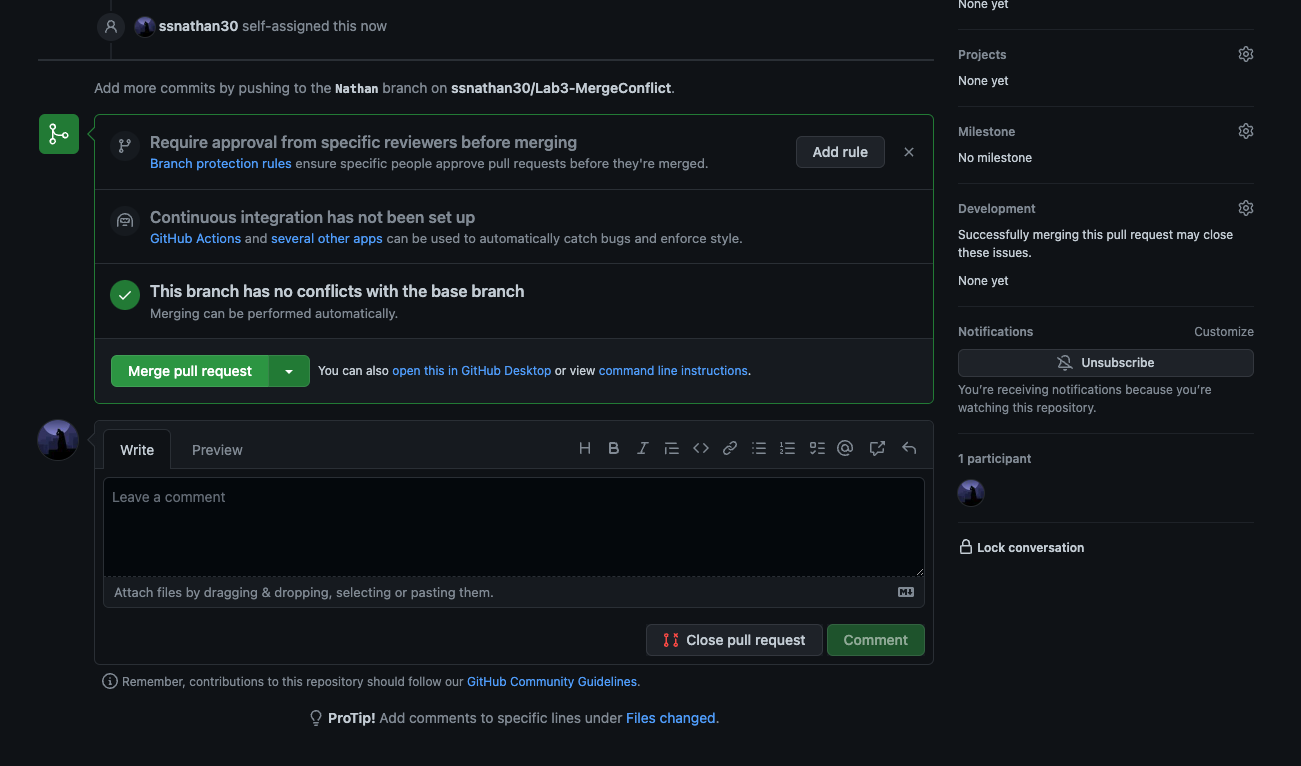
4. As Person1: Merge your branch
Finally, merge the changes by clicking "Merge pull request".
Select "Create a merge commit."
Confirm the merge action.
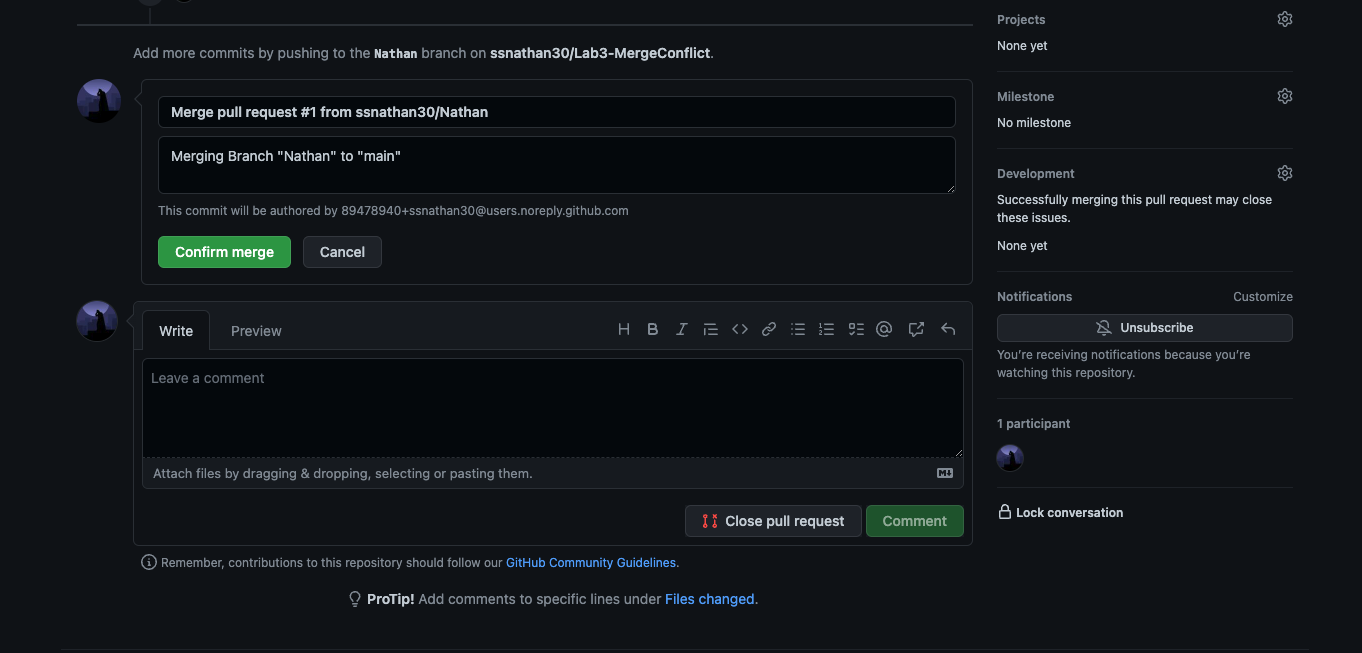
Your PR is now merged. Nice work!
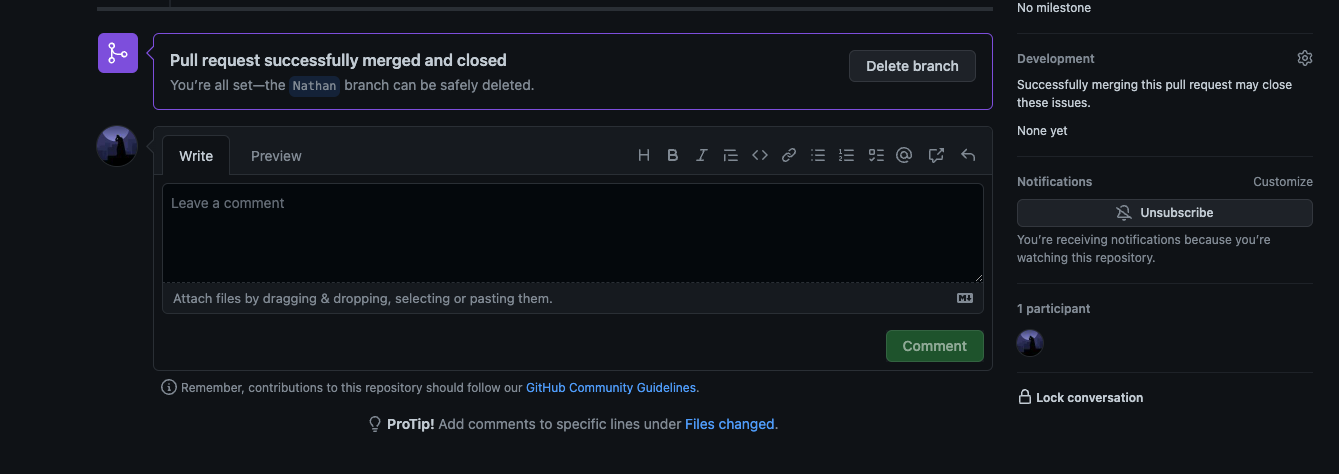
A screenshot of GitHub on your browser showing the log of the git pull
request. Name this file git_pull_request.png.
Writing a Shell Script
We will now write a shell script called git_helper.sh that will help you run all the necessary git commands for a given repository.
Read the notes on Shell Scripting before proceeding to complete this task.
In the script, include the following operations:
Check the status of changes -
git statusStage the changes -
Hint: You may consider requesting a list of files you would like to stage for the commit. You could default to a `.` to stage all updated files.git addCommit the changes -
Hint: You should request an input of commit message.git commitPull changes from the remote repository -
git pullPush the changes to the remote repository -
git push
Note: You will run the script in your terminal (MacOs, Linux) or WSL (Windows).
To be able to execute this script, make sure to add the necessary permission to it.
chmod +x git_helper.sh
To Run/Execute the file
./git_helper.sh
If written well, you can use this script for all future labs/projects to submit your work.
For this section you will submit the git_helper.sh file.
Part B
In this section, we will learn additional git commands to cover some workflows you are likely to encounter working on your projects. We provide a brief summary of different commands and links to related materials. For a more thorough and interactive introduction to git, we recommend the Git branching tutorial. You will be completing activities in this section to learn the usage of each of these commands.
Git Branching tutorial
While the git tutorial is optional, it is highly recommended!
Git Commands
We'll use the lab repository for these activities.
git log - activity
The git log command is used to view the history of committed changes within a git repository.
The git log command only works on the committed history. Git log offers a number of options to customize your log output through filtering, ordering and formatting options.
To Do: Make sure NOT to close the terminal when completing this activity.
- Run the command -
git log --graph
- Now let's see what it looks like for a specific file.
git log main.cpp
Question 1. When was the file main.cpp last modified?
git fetch - activity
Pulls all newly added branches from remote so we can have all the new branches on our local tracking as well!
To Do: Make sure NOT to close the terminal when completing this activity.
Go to GitHub and locate the repository for this lab.
Create a new branch
feature-branch-fetchon the website. You can reference this linkIn your terminal, run the command -
git branch
Question 1. Do you see the branch feature-branch-fetch?
- Now, let's run the fetch command -
git fetch origin feature-branch-fetch
Question 2. Do you see the new branch locally now?
Question 3. What would happen if we run the command git fetch --all?
git rebase - activity
Git rebase is used when there are changes in main that we want to reflect and bring our branch to the same state as main. Rebase helps us create new commits for every commit on the original branch. Rebasing is useful because we have less conflicts and a cleaner structure.

Image Credit: Atlassian Rebase Tutorial
To Do: Make sure NOT to close the terminal when completing this activity.
- Create a new branch called
feature-branch-rebaseand switch into it.
git checkout -b feature-branch-rebase
Switch back into main
Create a new file
file1.txtand commit it to create a version number.Switch into
feature-branch-rebase.Run the following command:
git log --oneline --graph
- Next run a git rebase with main:
git rebase main
- Again, check the git log.
git log --oneline --graph
Questions
- What changed before and after the rebase?
- How is git rebase different from git merge in this context?
git rm - activity
We've already seen how to add files to be committed and pushed to a remote repository. But what if we need to remove any files from our repository that we no longer require? In this case, we can use the git rm command.
The git rm command is used to delete files from the git index. This command can be used to remove files from both the staging index and the working directory, but not only from the working directory.
To Do: Make sure NOT to close the terminal when completing this activity.
To simulate an unneccesary file, let's create a file
remove.txt. Add and commit it to the repository.The above step would ensure that the file is tracked by the git version control. Assuming we do not want to track it anymore, let's remove it from tracking.
git rm remove.txt
To persist this change, you will have to run the git commit command.
Question 1. Does the file exist on your computer after running the git rm command?
- In some cases, we may want to retain some files locally but not want it tracked by git anymore. For that situation we will use -
git rm --cached <filename>
Again, we must run the git commit command to persist this change.
Question 2. When must you use git rm vs. manually deleting a file?
Question 3. How can you undo restore an accidentally deleted, by the git rm command, file?
git stash - activity
While working in a project team, you might run into a situation where, for instance, you're writing your code for a feature Ain your branch, but you are suddenly called by your coworker to give a hand in pushing a bug fix for another feature "B". In this situation, you'd want to save your current code and resume it from where you've left off after completing the bug fix. This is where git stash comes into play. Stash means to store/save your current changes safely in one place (stash stack). git stash temporarily shelves (or stashes) changes you've made to your working copy so you can work on something else, and then come back and re-apply them later on. Once you've stashed your changes, you're free to switch branches, commit new changes, and come back later and resume your saved or stashed work with git stash pop. Popping takes your changes from the stash stack and reapplies them to your current working directory.
By default, git stash does not stash the following: Files that have been ignored New files in your working copy that are not staged yet
So, in cases where you need to stash untracked files as well, you will need to execute the git stash command with the --include-untracked or -u flag at the end of the command.
git stash --include-untracked
# OR: git stash -u
To Do: Make sure NOT to close the terminal when completing this activity.
- To simulate the need for an urgent branch switch, let's say a bug fix, let's checkout into another branch.
git checkout -b bugfix-branch-stash
- Make and save some changes to the
README.mdfile.
git add README.md
git commit -m "updated text in README.md for stash activity"
- Move back to the
mainbranch
git checkout main
Edit README.md in the
mainbranch. Do not stage or commit these changes yet.Now try checking out
bugfix-branch-stashagain
Question 1. Were you able to make the switch?
- Given that we have some uncommitted changes in main, we need to run -
git stash
We can view the stashed changes using -
git stash list
- Now, let's try to switch to the other branch again -
git checkout bugfix-branch-stash
- Assuming the assumed bug, from step 1, has been fixed and the changes have been committed. We'll move back to the
mainbranch.
git checkout main
- We should retrieve the changes that we had previously stashed so we can continue working on them.
git stash pop
Question 2. What is the difference between git stash apply versus git stash pop.
git revert - activity
Git revert is commonly known as a way to "undo" commits in Git. Consider git revert as a "get out of jail free card" whenever you make a mistake while working on a project with others. You use git revert to create new commits that undo the effects of previous commits. For doing this it creates a new commit for undoing the changes, keeping the previous log as it is.
Following is the link that will help you to understand git revert better:
To Do: Make sure NOT to close the terminal when completing this activity.
Create a file
revert-activity.txt. Add some sample text to it. Save and commit the changes. Repeat this a few times to create a commit history of at least 5 commits.Run -
git log --oneline
- Let's say that we would like to undo the changes of a commit -
git revert <revision number>
- To verify that the revert was completed -
git log --oneline
- Review the contents of the
README.mdfile to see if the changes from that commit were undone.
Question 1. Can you revert multiple commits?
Question 2. What happens if there is conflict during a revert?
Submission Guidelines
Create a folder called submission, within the lab repository, and include all the files listed below in that folder.
Expected files:
git_merge_conflict.txt
git_pull_request.png
git_helper.sh
git_rebase.txt
git_fetch.txt
git_rm.txt
git_stash.txt
git_log.txt
git_revert.txt
Commit and upload your changes
1. Make sure you copy your files for submission into your local git directory for this lab, within a "submission" folder that you need to create.
2. Run the following commands at the root of your local git directory, i.e., outside of the "submission" folder.
git add .
git commit -m "add all screenshots and changes for lab 2"
git push
You will be graded on the files that were present before the deadline. If the files are missing/not updated by the deadline, you could receive a grade as low as "Not attempted". This can be replaced by raising a regrade request once you successfully upload your work to Github.
Regrade Requests
Please use this link to raise a regrade request if you think you didn't receive a correct grade.Grading specifications
| Criteria | Not Attempted | Below Expectations | Meets Expectations | Exceeds Expectations |
|---|---|---|---|---|
| Overall Attempt | • Lab not attempted OR • Student did not attend lab without prior approval | — | — | — |
| Attendance & TA Review | — | • Did not attend full lab duration OR • Work not reviewed by TA OR • Attendance not marked on Canvas | • Attended full lab duration AND • Work reviewed by TA AND • Attendance marked on Canvas | — |
| Submission Presence | — | • One or more required files missing from the submission folder | • All required work uploaded to the submission folder | — |
| Merge Conflicts (Git) | — | • One or more required files missing OR • Files are not representative of the student’s attempt | • Demonstrated understanding of merge conflicts, verified via: – git_merge_conflict.txt– git_pull_request.png (showing pull request logs) | — |
| Shell Script | — | • Script not uploaded OR • Script is partially complete or incorrect | • Fully functional git_helper.sh uploaded AND• Script correctly allows checking status, staging, committing, and pushing changes | • Student completes and uploads the shell scripting game from the notes AND • Game is correct and complete AND • Adds one additional feature of their choice AND • Script differs meaningfully from the sample solution |
git log | — | • Answers do not fully or correctly address the questions | • Activity completed and verified via correct answers in git_log.txt | — |
git fetch | — | • Answers do not fully or correctly address the questions | • Activity completed and verified via correct answers to all 3 questions in git_fetch.txt | — |
git rebase | — | • Answers do not fully or correctly address the questions | • Activity completed and verified via correct answers to both questions in git_rebase.txt | — |
git rm | — | • Answers do not fully or correctly address the questions | • Activity completed and verified via correct answers to all 3 questions in git_rm.txt | — |
git stash | — | • Answers do not fully or correctly address the questions | • Activity completed and verified via correct answers to both questions in git_stash.txt | — |
git revert | — | • Answers do not fully or correctly address the questions | • Activity completed and verified via correct answer to both questions in git_revert.txt | — |