Lab 9: Project Requirements
Overview
In this lab, we will be learning some basics of agile project management that will help you lay out the plan for your projects. In this lab you will be working in your project teams to creating project boards to track your progress in the development cycle.
To receive credit for this lab, you MUST show your work to the TA during the lab, and push it to the github before the deadline. Please note that submissions will be due on Wednesday at 11:59 p.m. in the following week. ONE SUBMISSION PER GROUP.
Learning Objectives
All of these tie in closely with the group project.
L01. Demonstrate proficiency with GitHub Projects by setting up a collaborative project board, creating epics, issues, and user stories within a team environment, and effectively using project board functionalities for team collaboration.L02. Apply Agile methodologies by creating and organizing epics, user stories, and assigning story points through the Planning Poker technique, fostering a practical understanding of agile practices in project planning.
L03. Facilitate team collaboration on GitHub by managing access permissions, assigning responsibilities, and using GitHub’s issue tracking and project management tools to monitor and execute tasks within a shared project repository.
L04. Use Acceptance Criteria in Agile by defining and integrating acceptance criteria for user stories, ensuring clear and actionable definitions of completion for each task in alignment with agile principles.
Part A
Today's lab should be done with your project group using your project repository. Please ensure all members of the group have read/write access to the repository.
GitHub Projects
Projects on GitHub help you organize and prioritize your work. You can create projects for specific feature work, comprehensive roadmaps, or even release checklists. With project boards, you have the flexibility to create customized workflows that suit your needs.
Create Project Board
Following is just an example organization and repository. Do not worry about having an organization, or having a similar name. Just make sure to use your group's project repository.
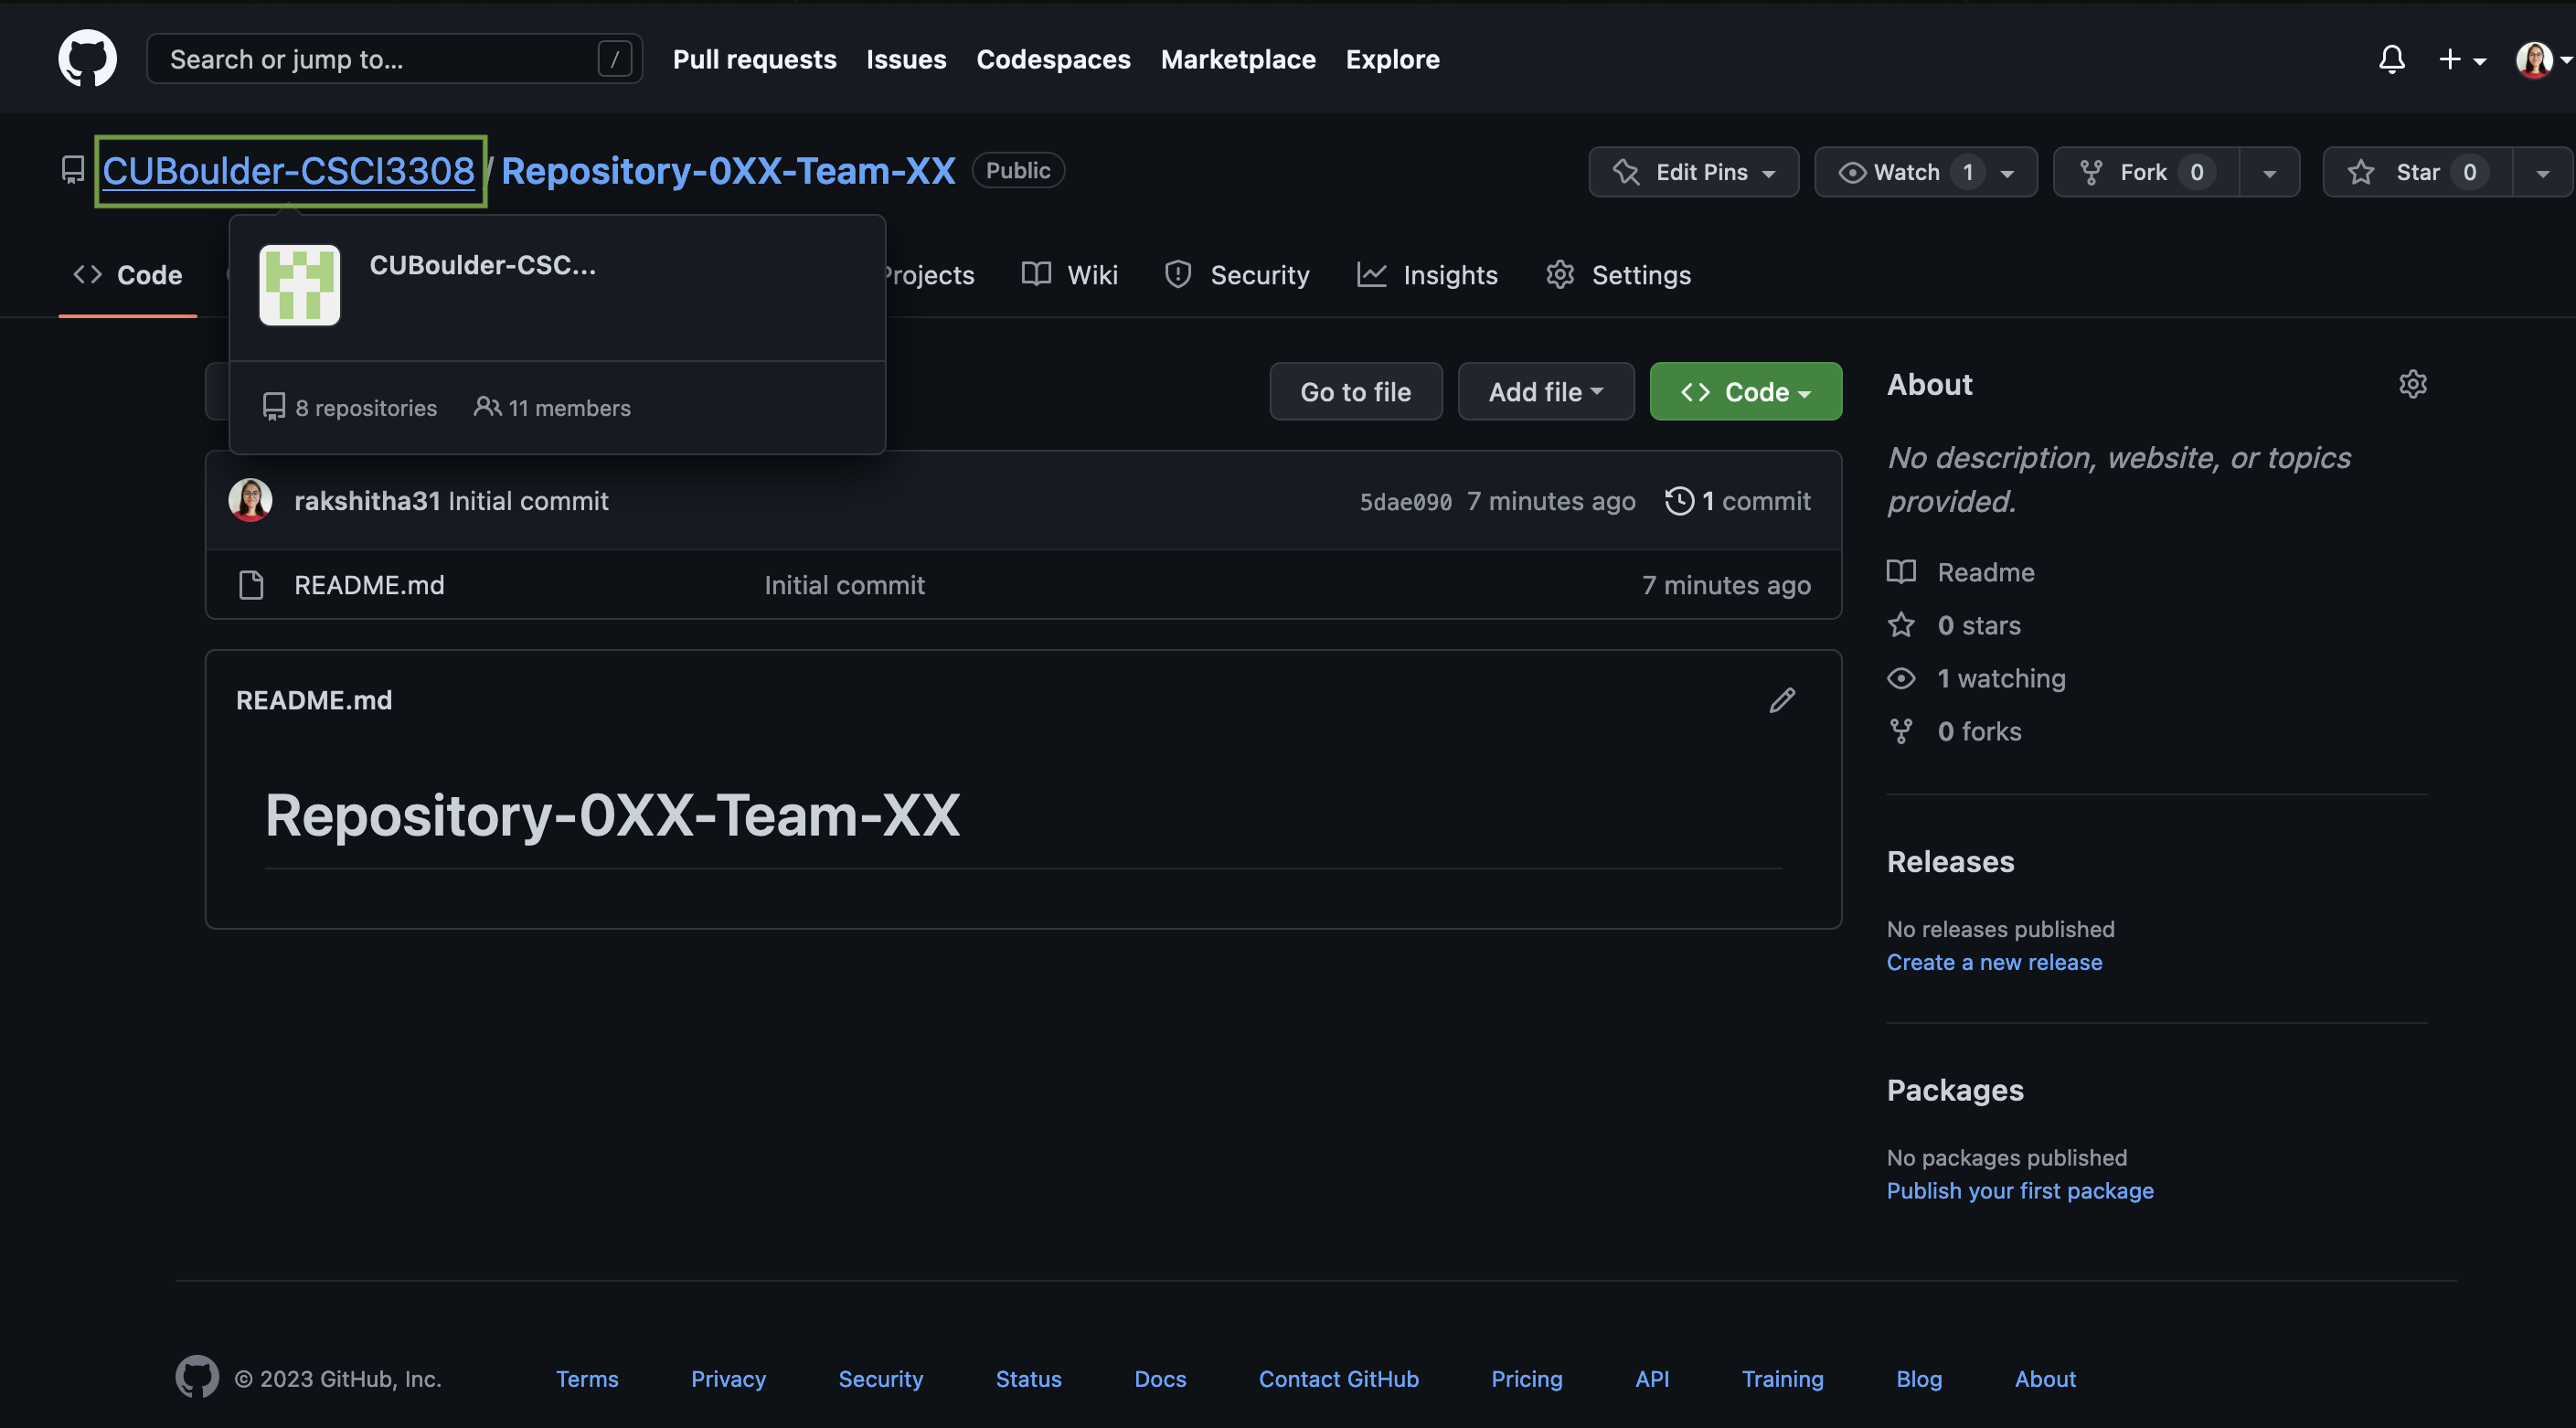
1. Navigate to your repoitory
Navigate to the repository in your browser. It is easiest to host the project and repository under the same account. The owner is shown in the top left next to the repository name. Here the owner is 'CUBoulder-CSCI3308'.
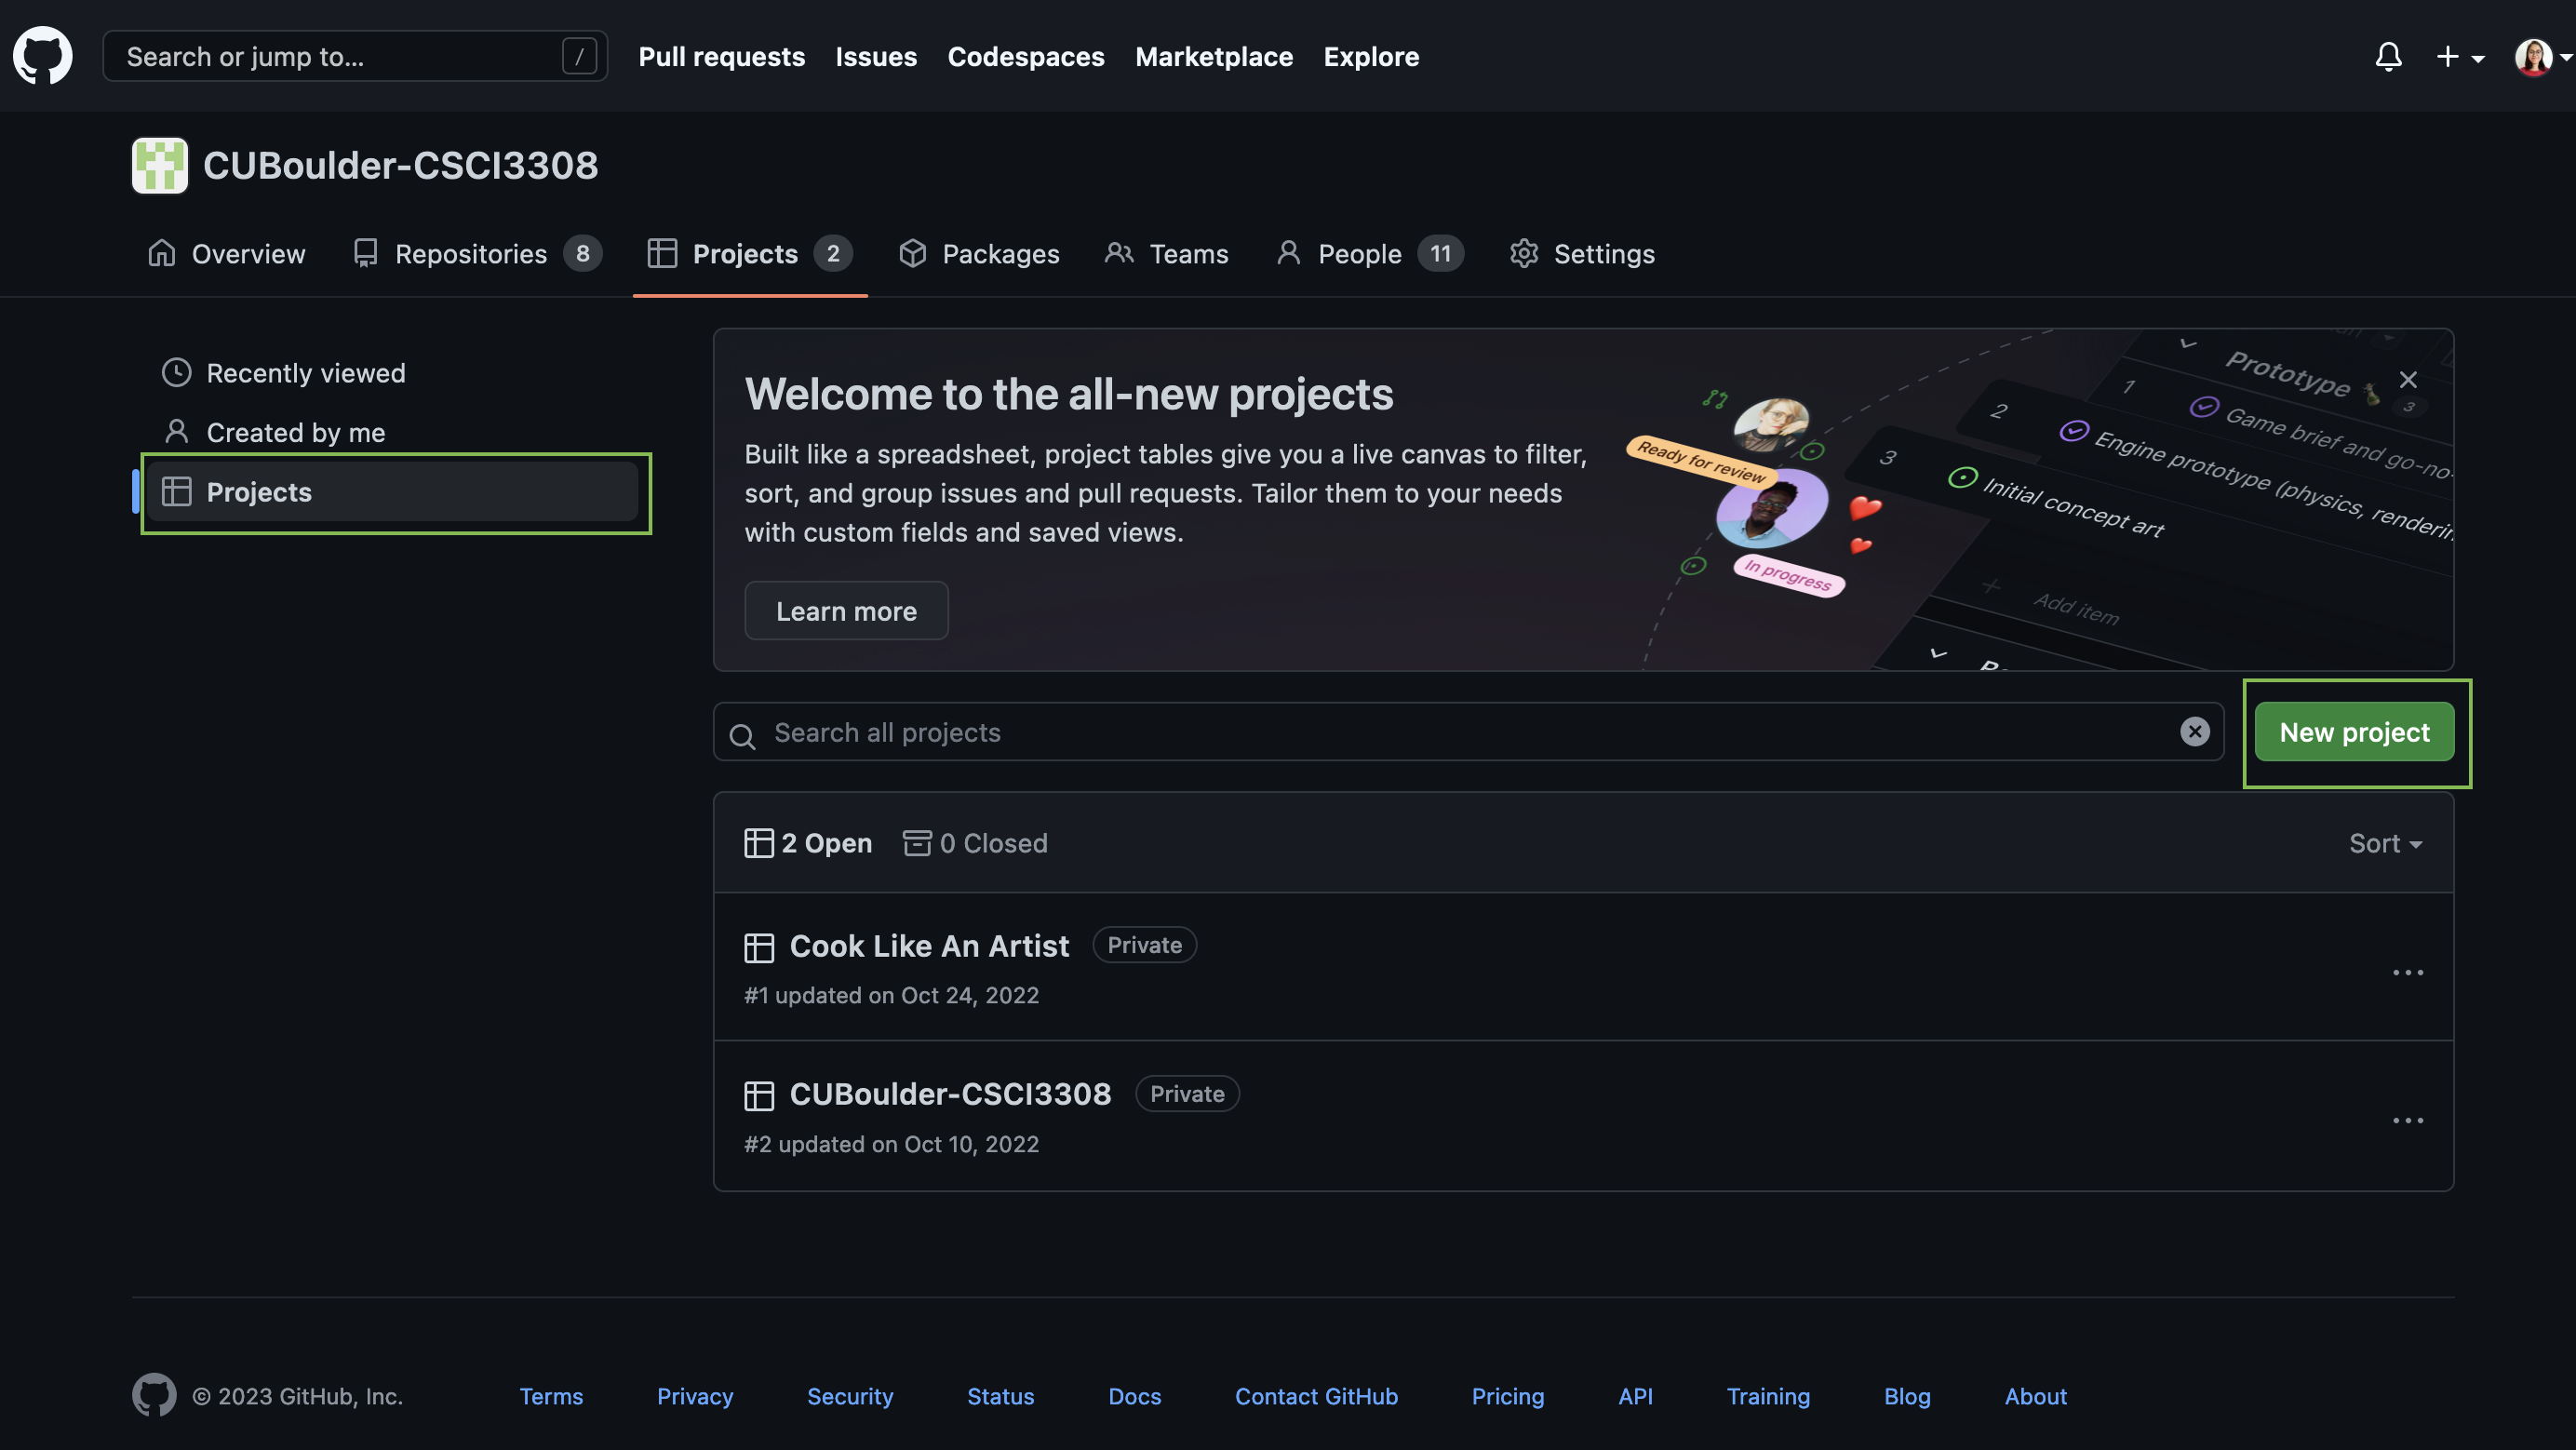
2. Create Project Board
The owner can now navigate to the projects tab by clicking on the user icon (a small circle that shows your avatar/profile picture) that is located on the top right of your webpage and selec the "Your Projects" option.
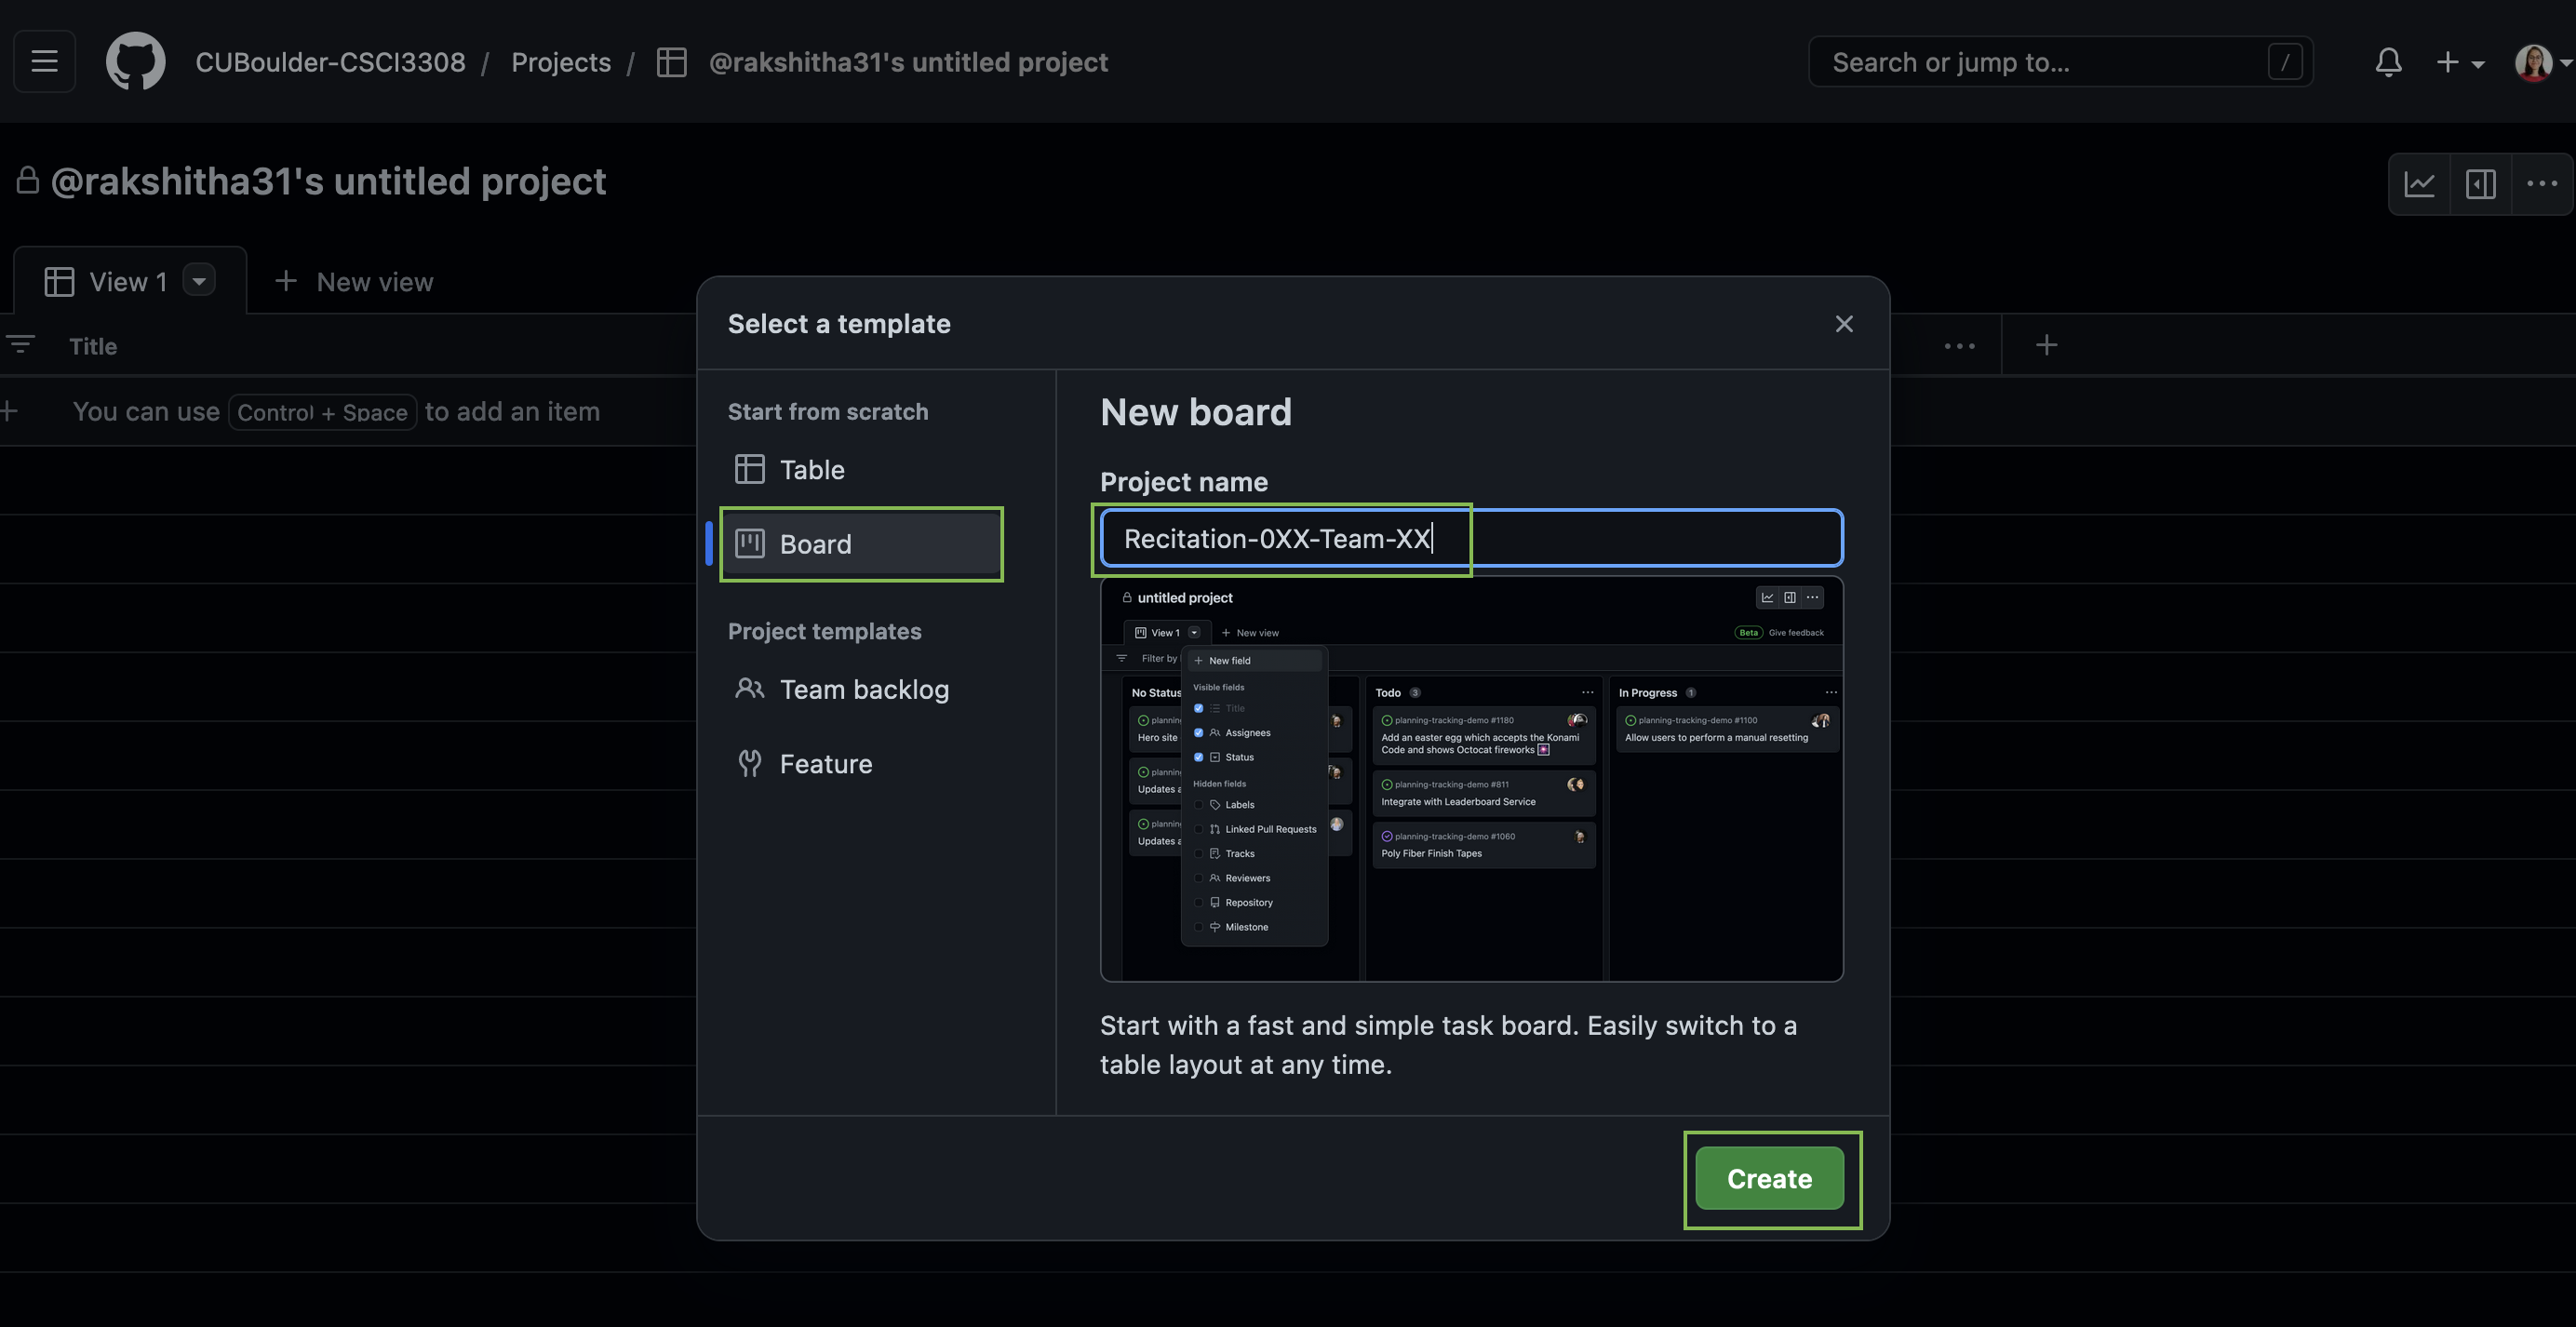
Click on “New Project” -> Select “Board” -> Click on “Create”
Now, change the name of your board to the name of your repository from lab 8. The name does not need to match exactly, but it should be similar or match your team name.

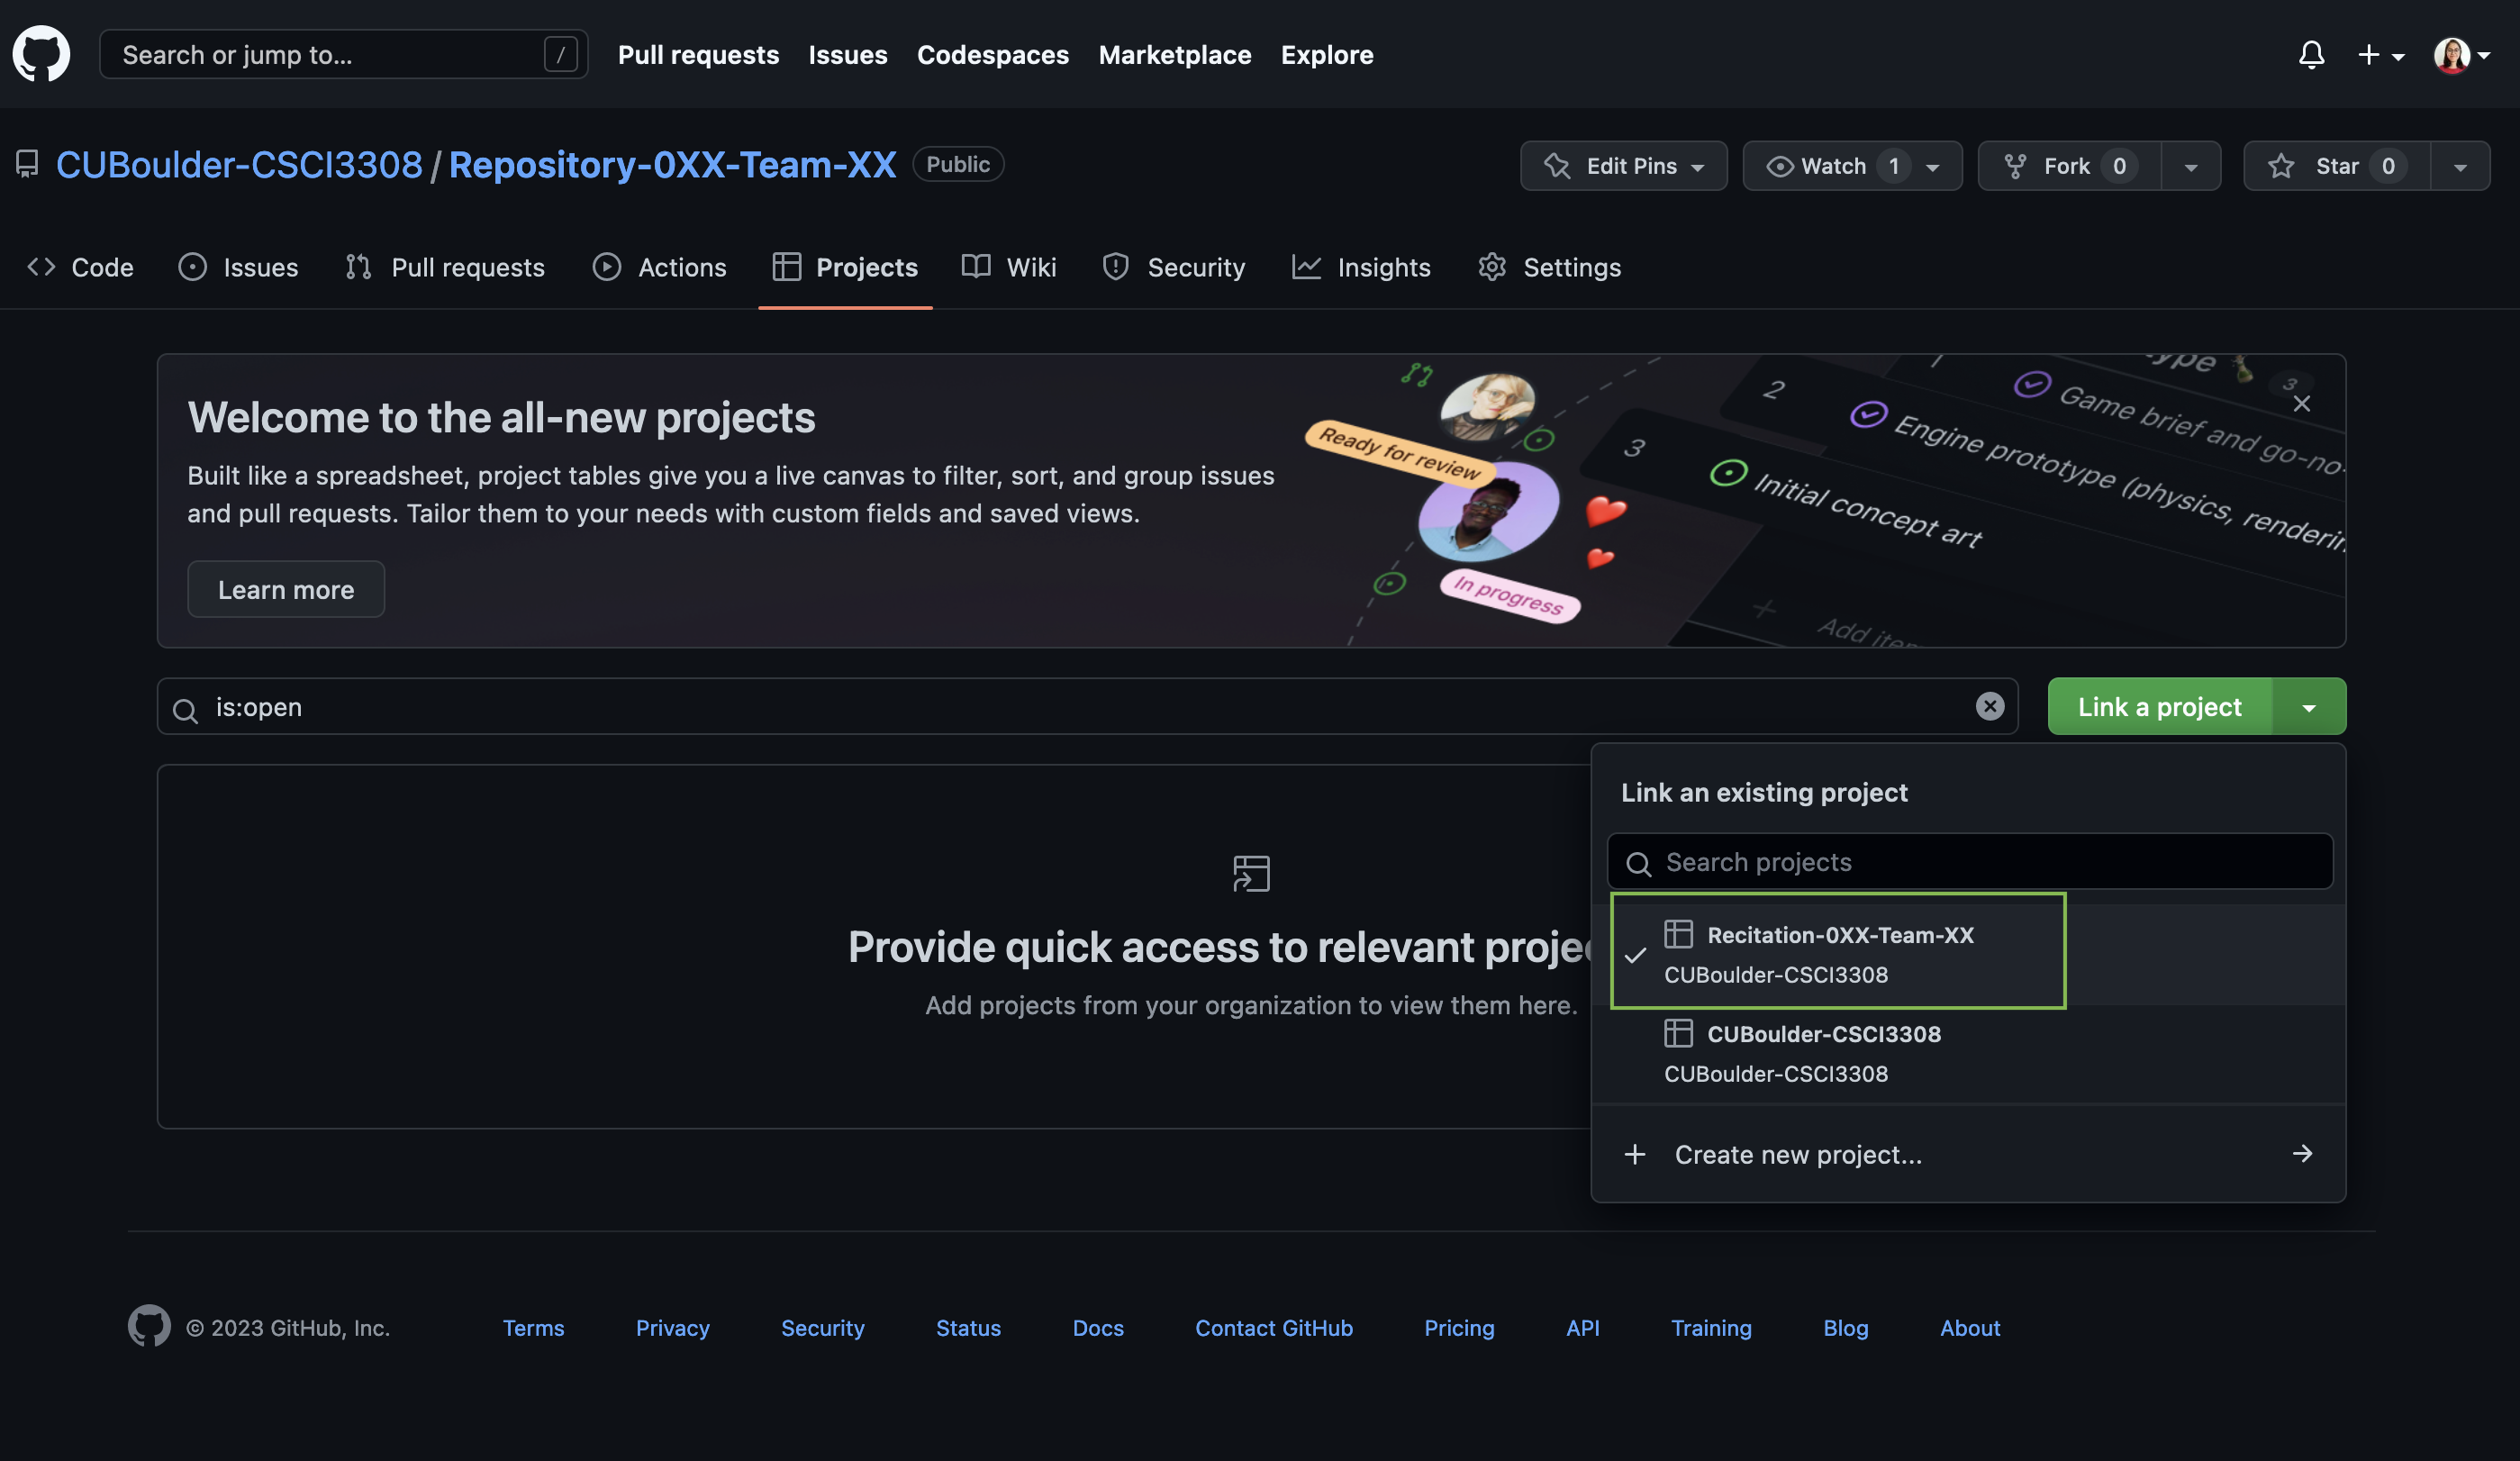
Navigate to your repository and click on the “Projects” tab -> Click on “Add project”.
You should be able to see your team board in the dropdown. Select the project you just added:
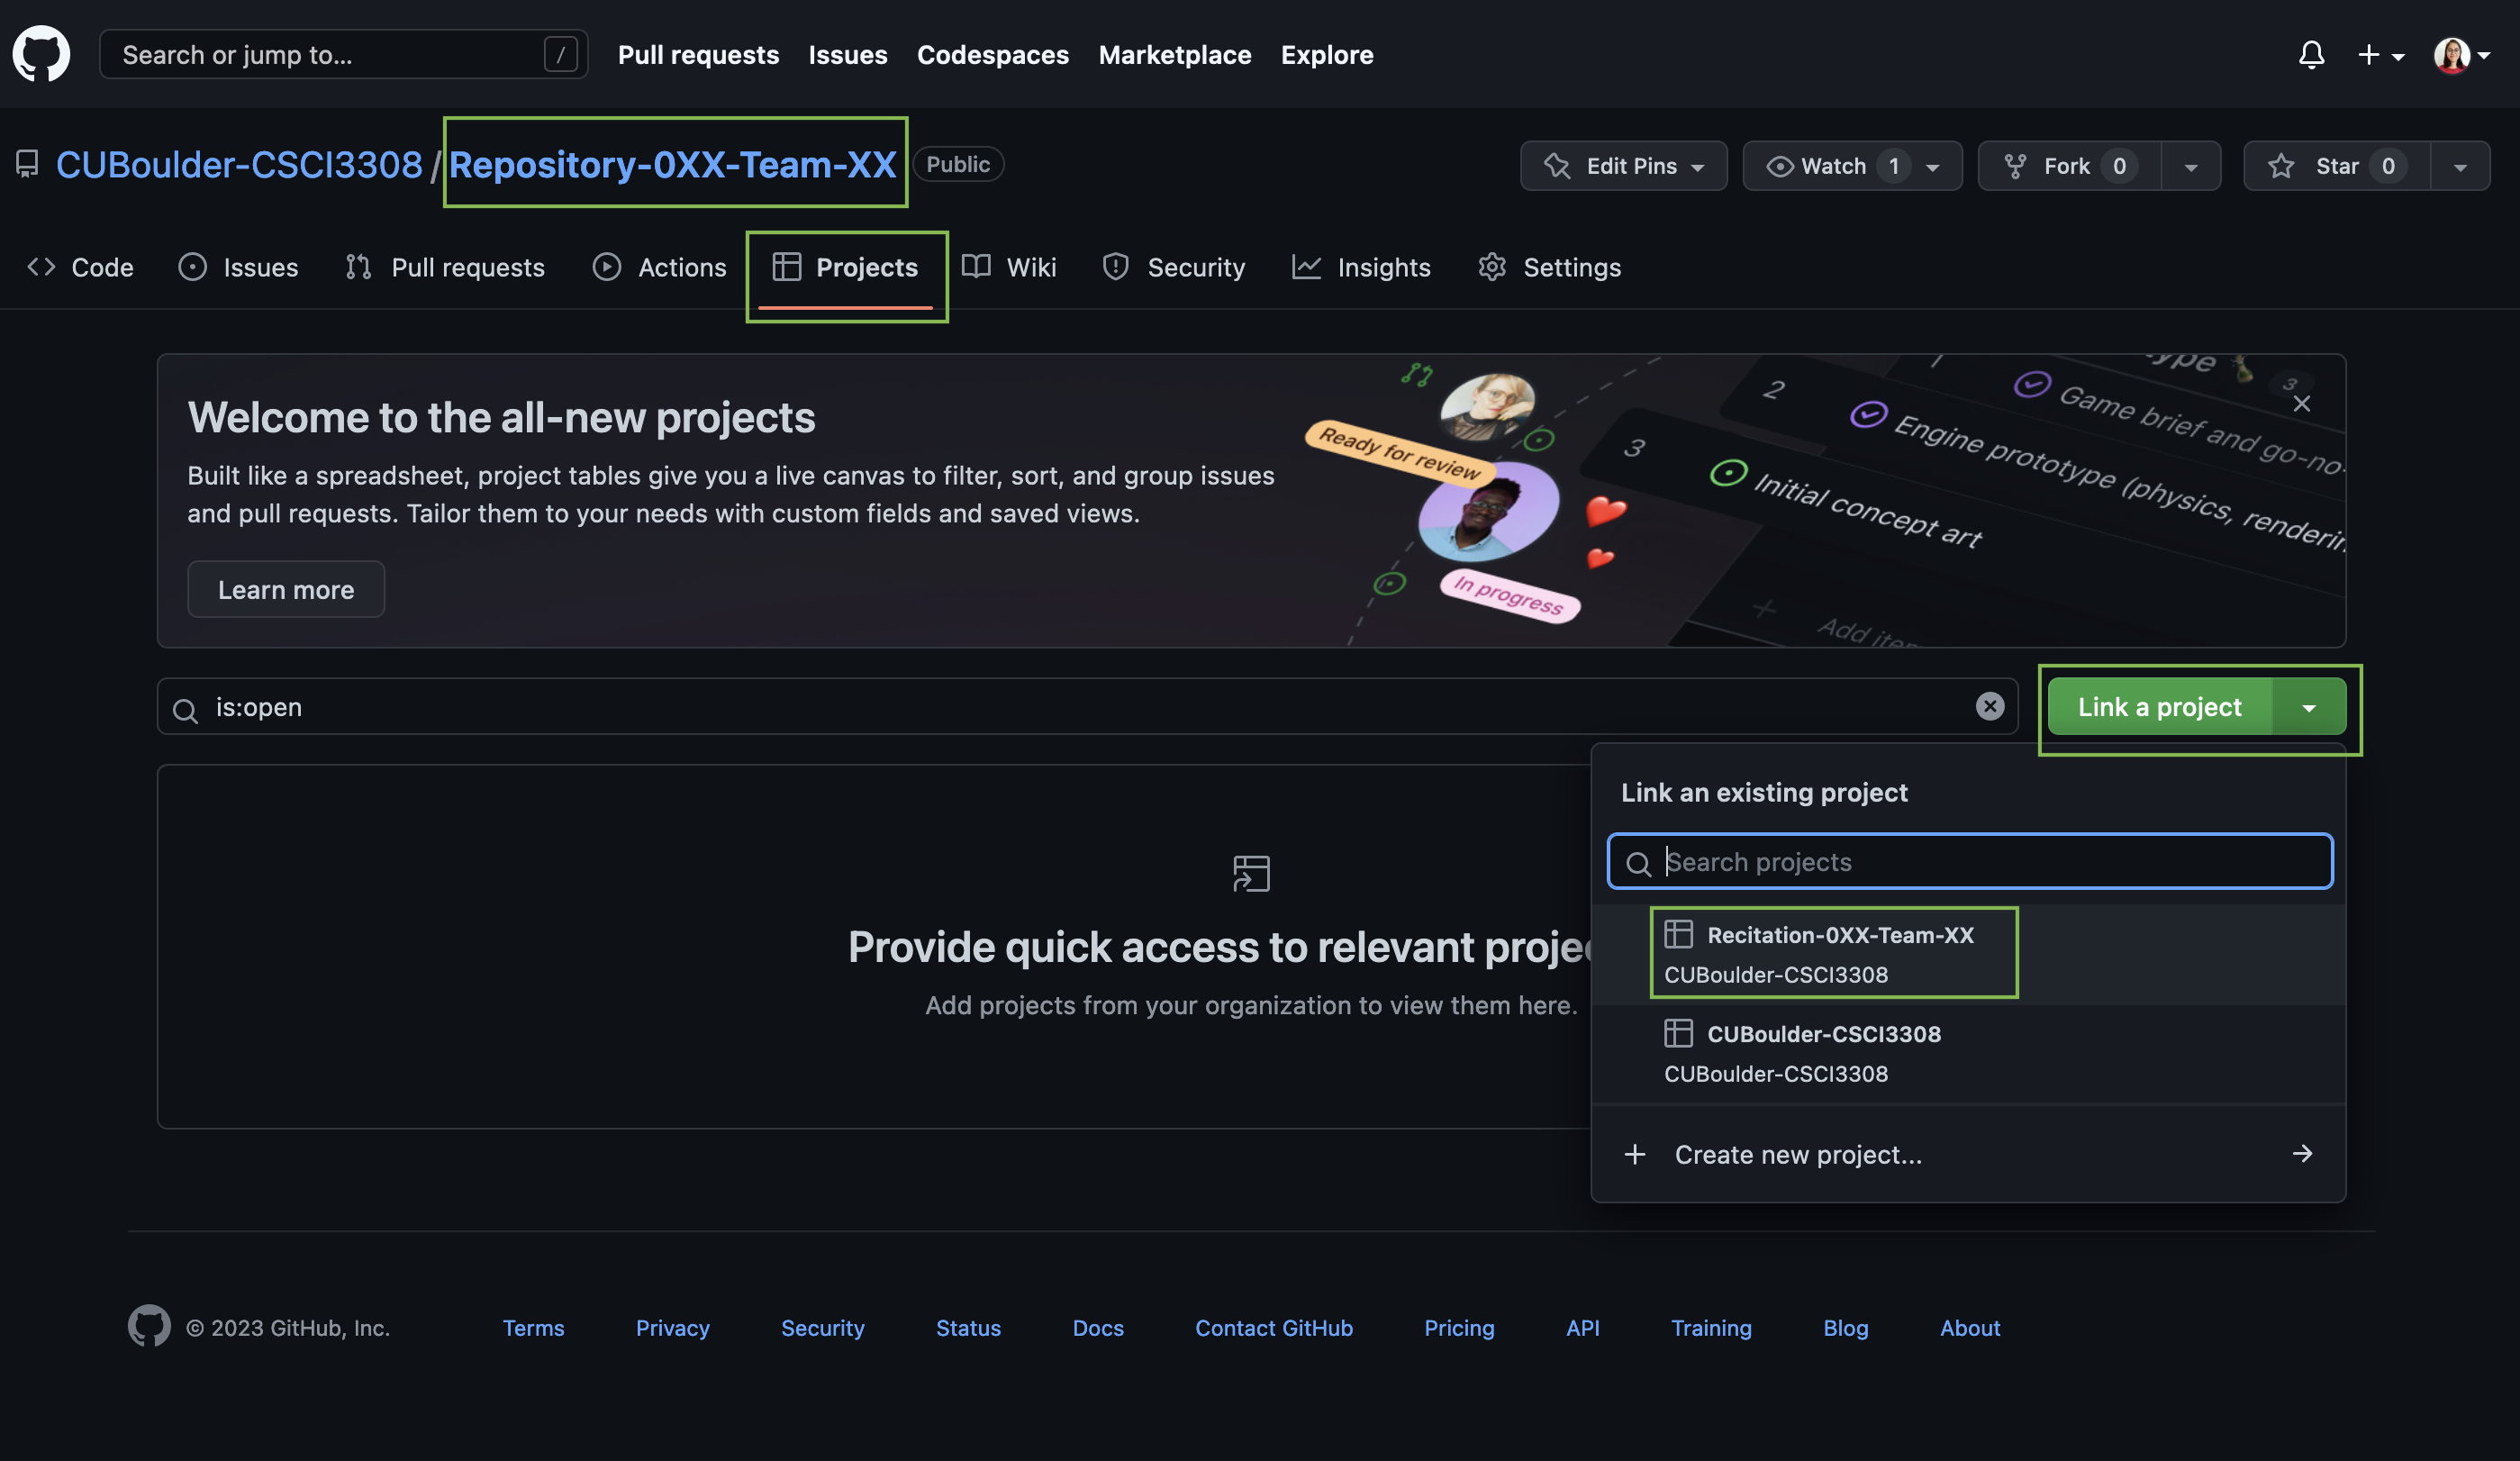
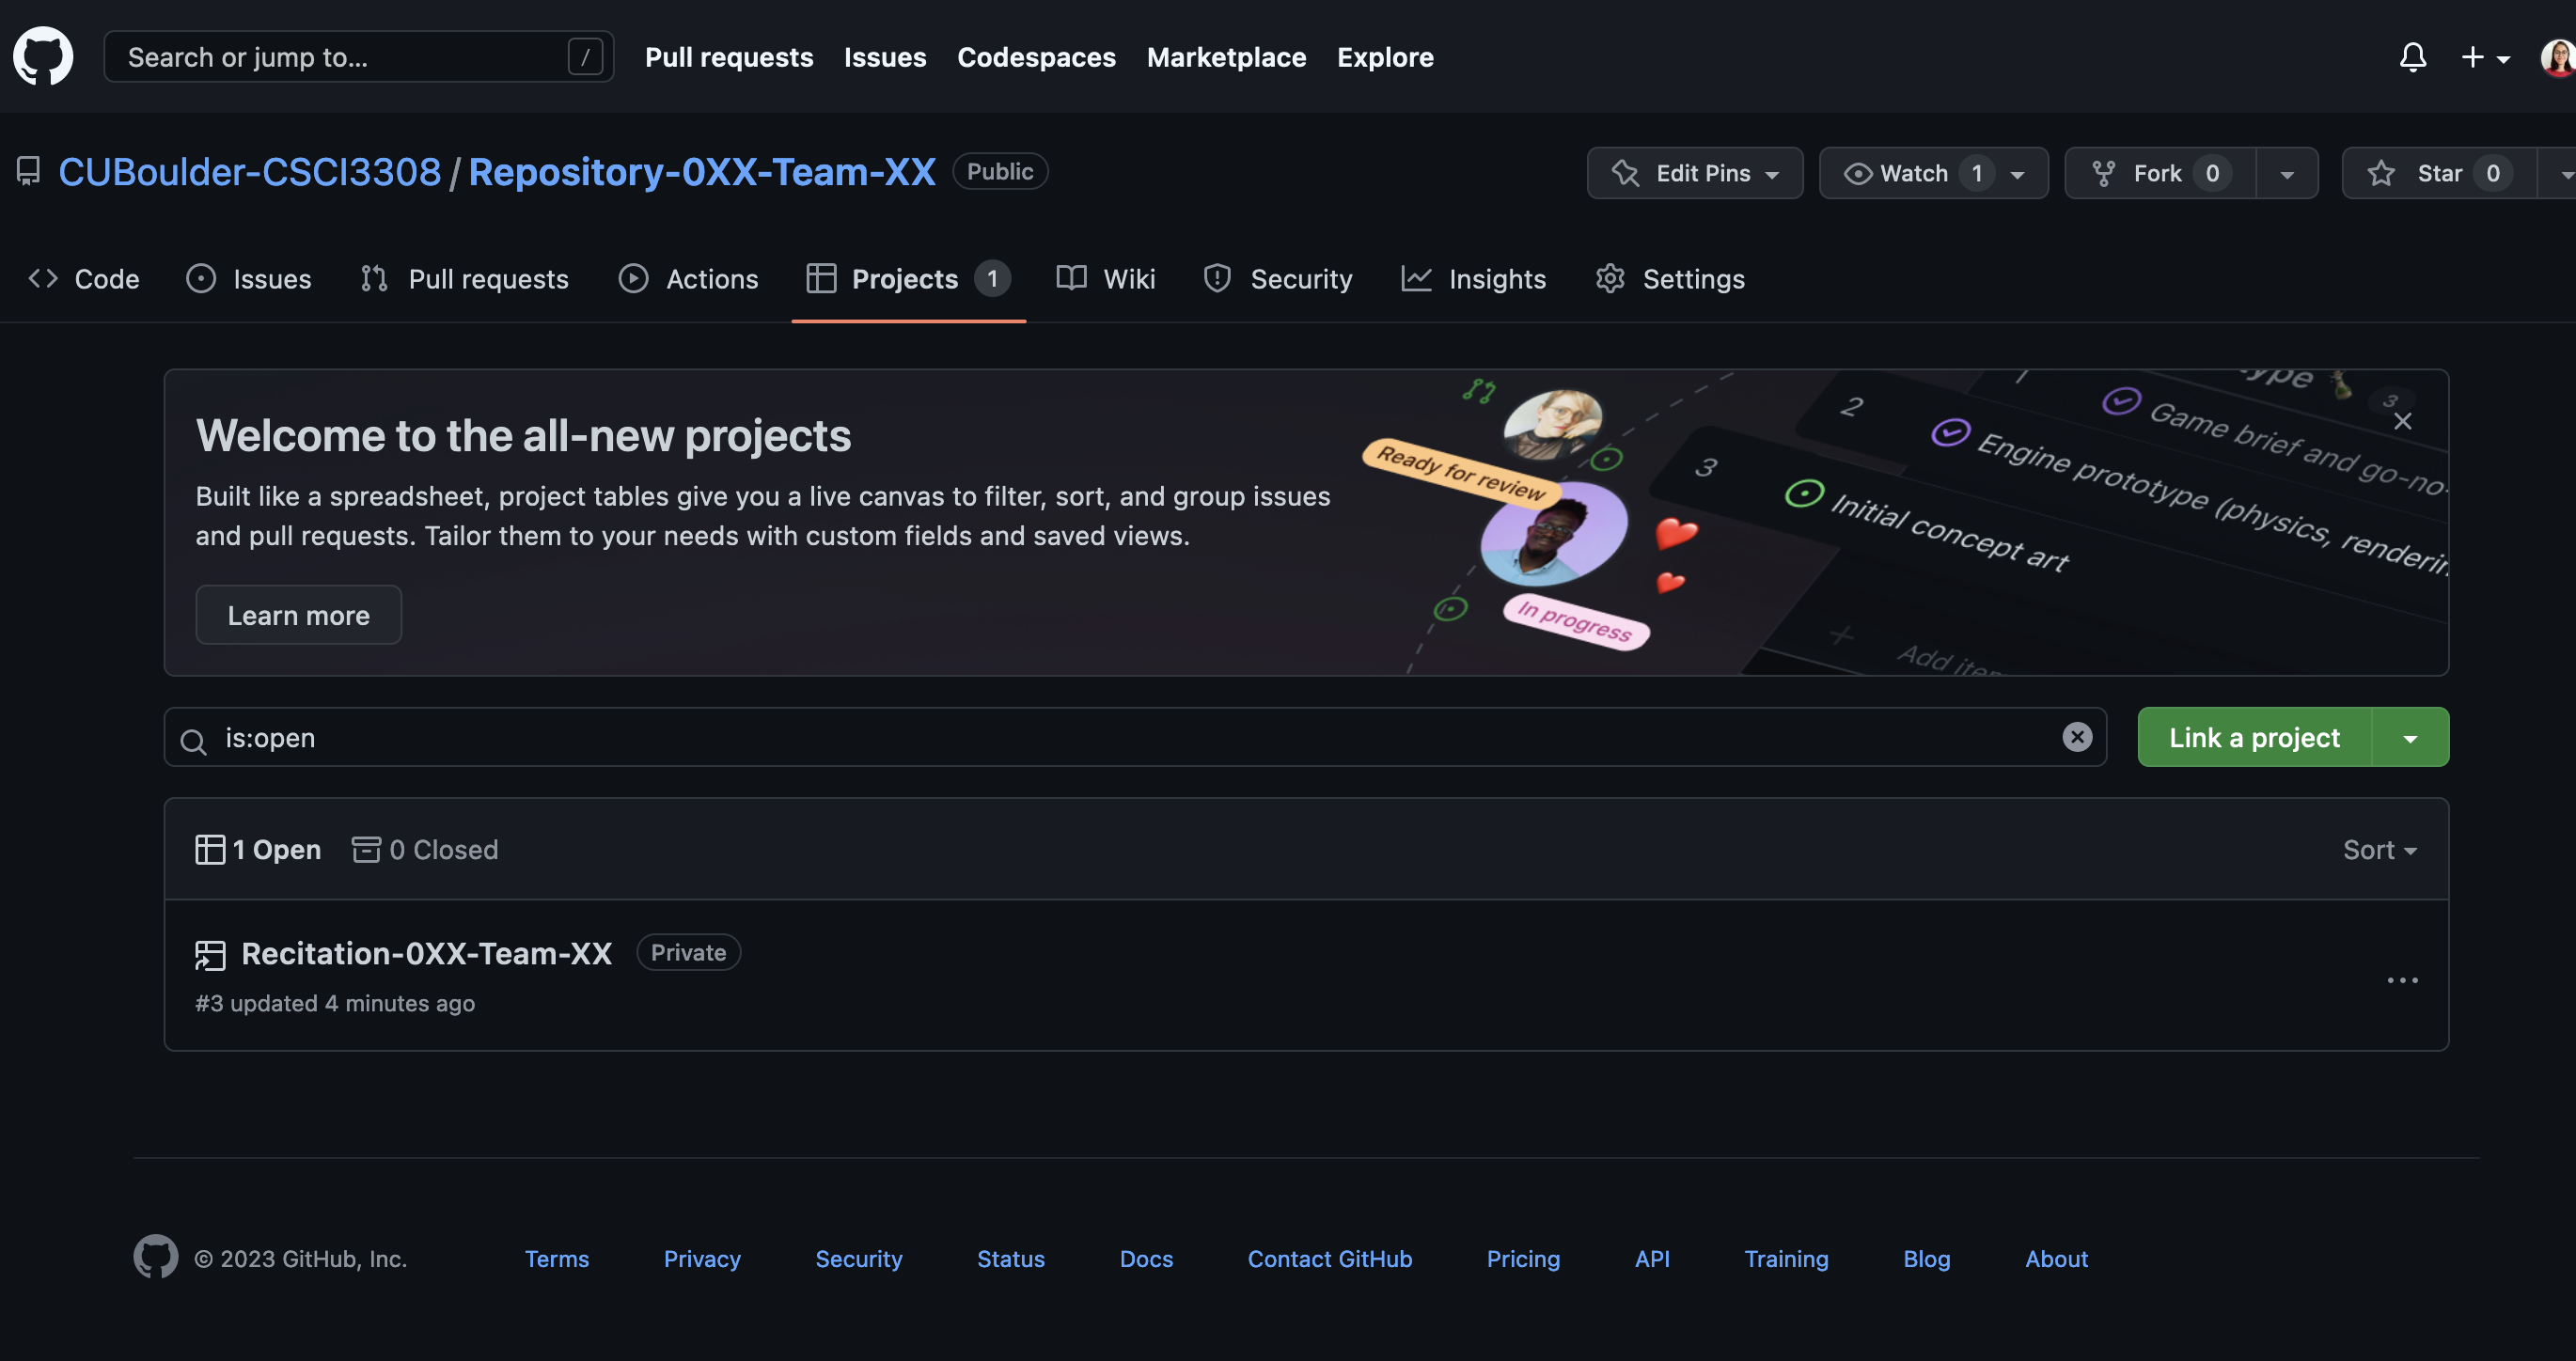
Select the project
You should now have the project board added:
3. Add Members
Before you move on, make sure to add all group members to the project board so they can contribute.
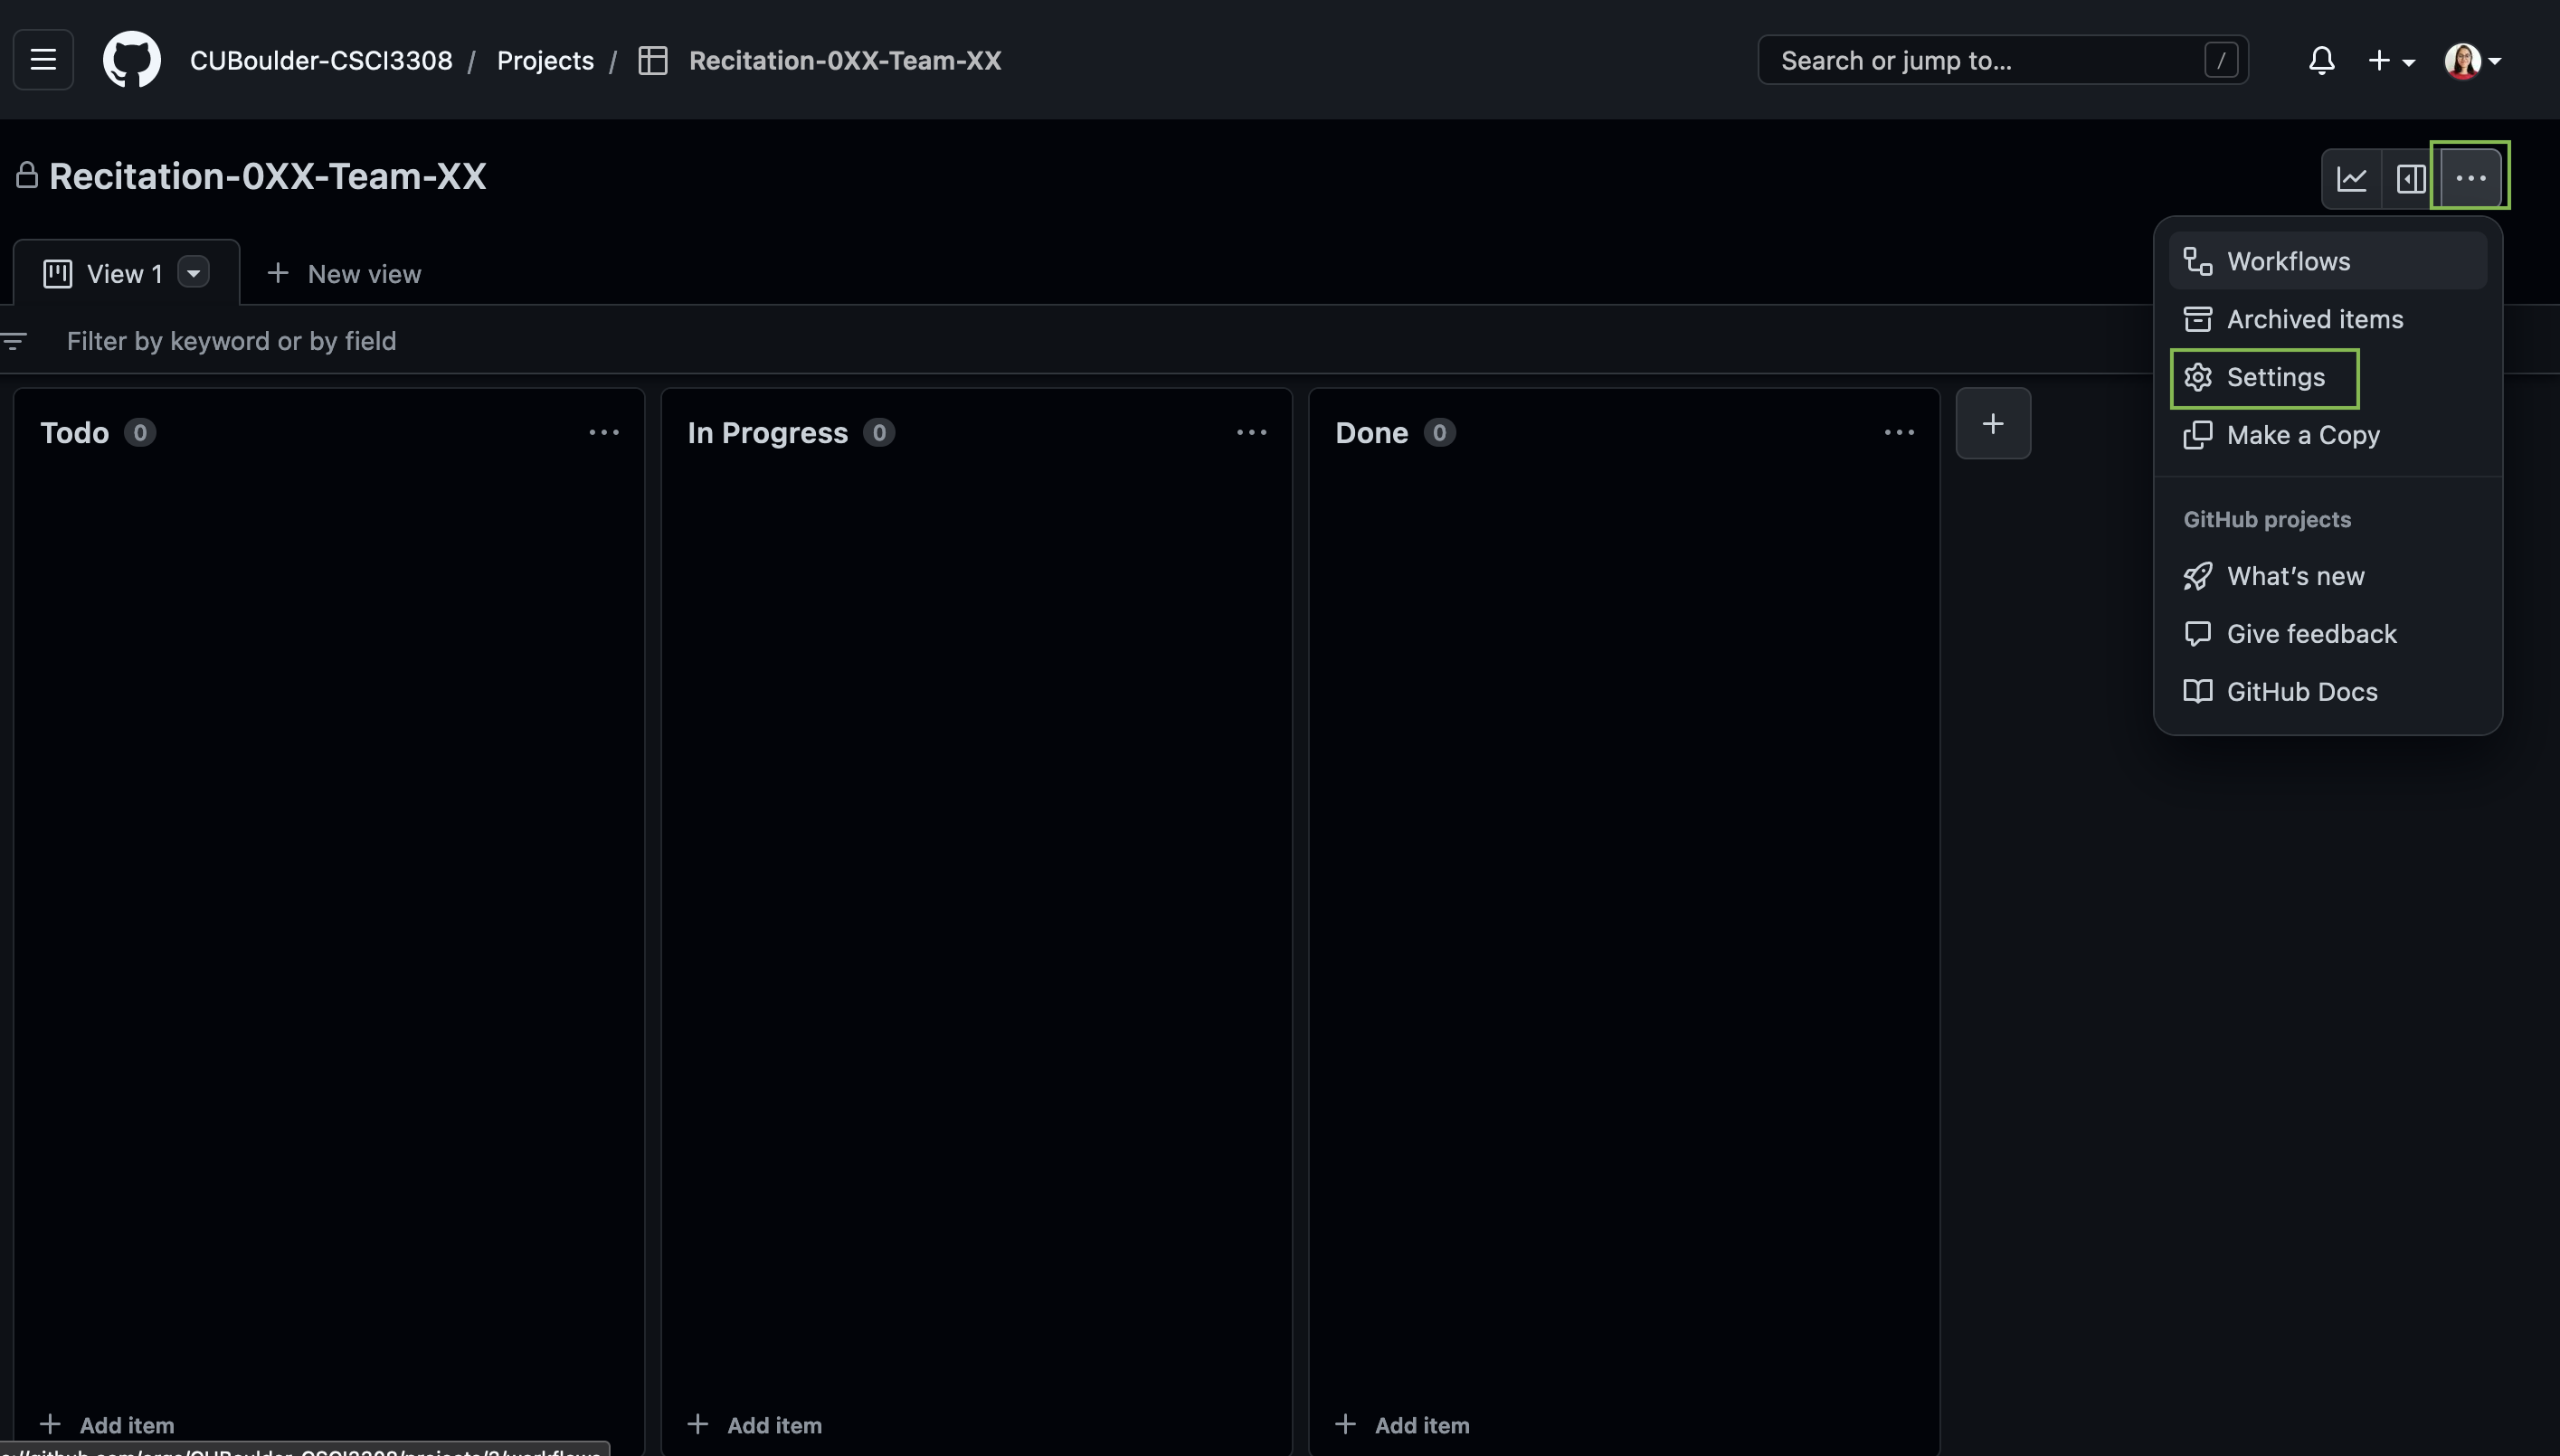
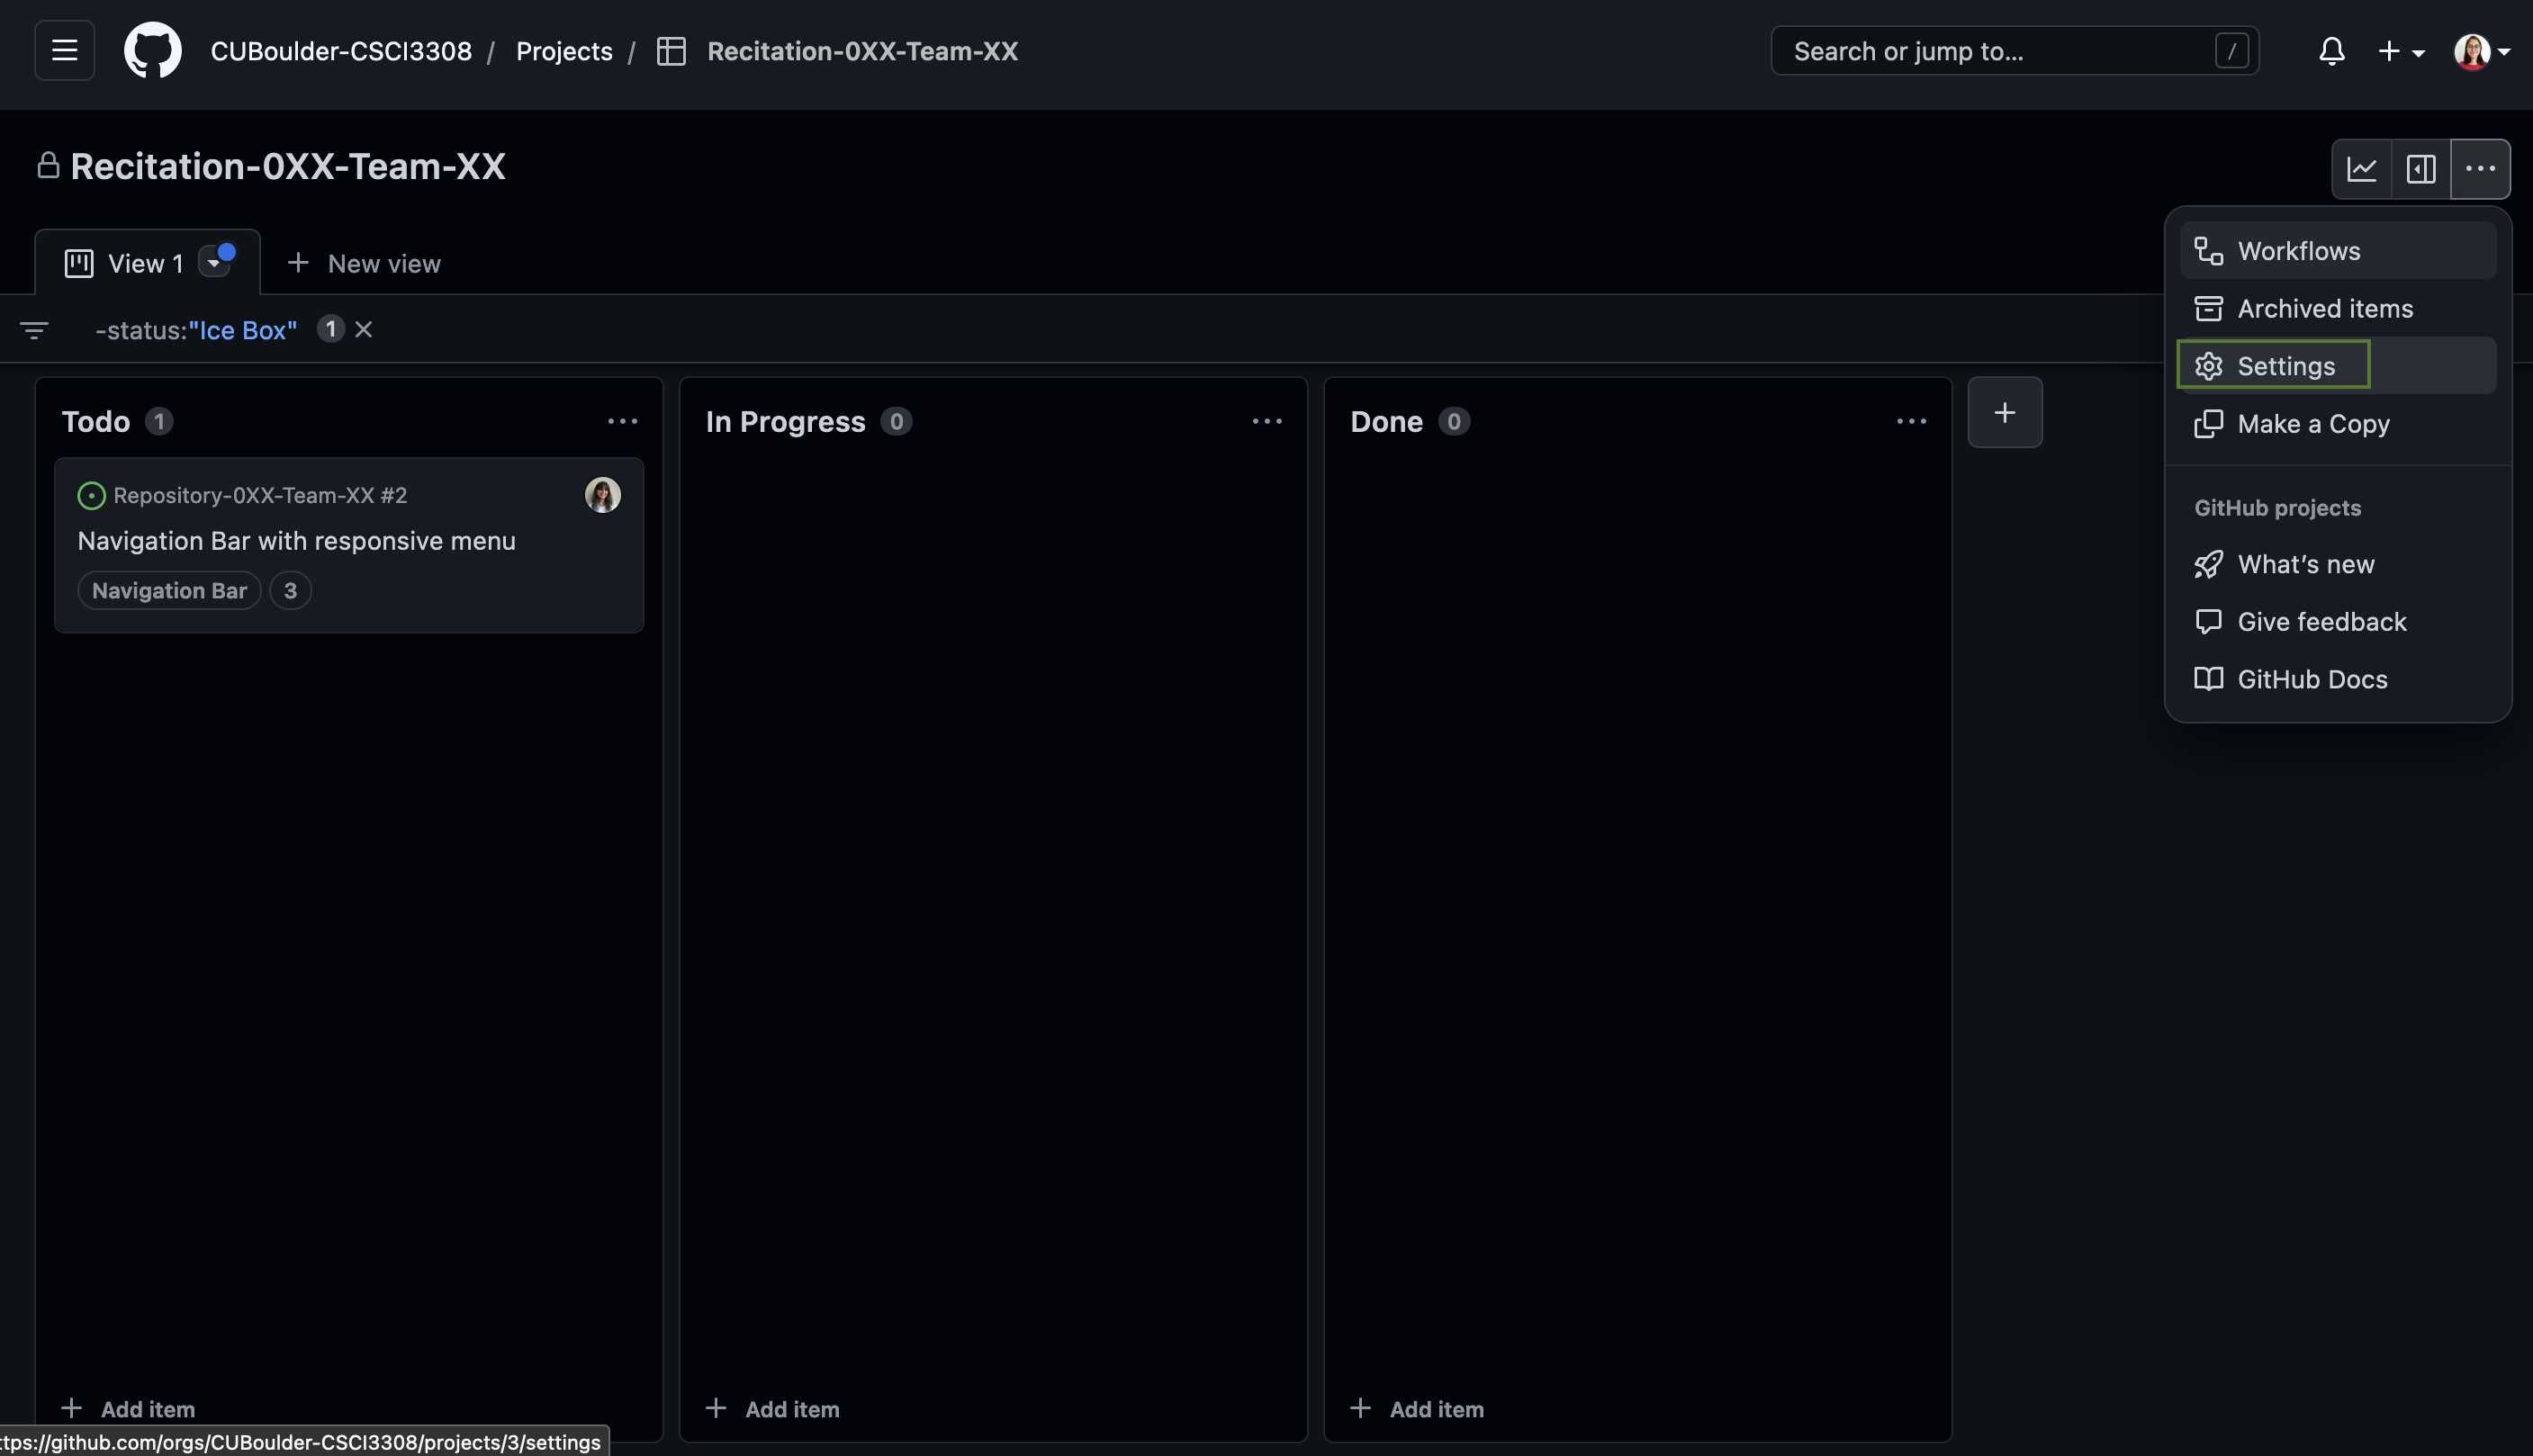
Navigate to the project board. On the top right of the board, click on the three-dots icon -> Click on "Settings", then on the left sidebar, click "Manage access" and add each group member.
Project Planning
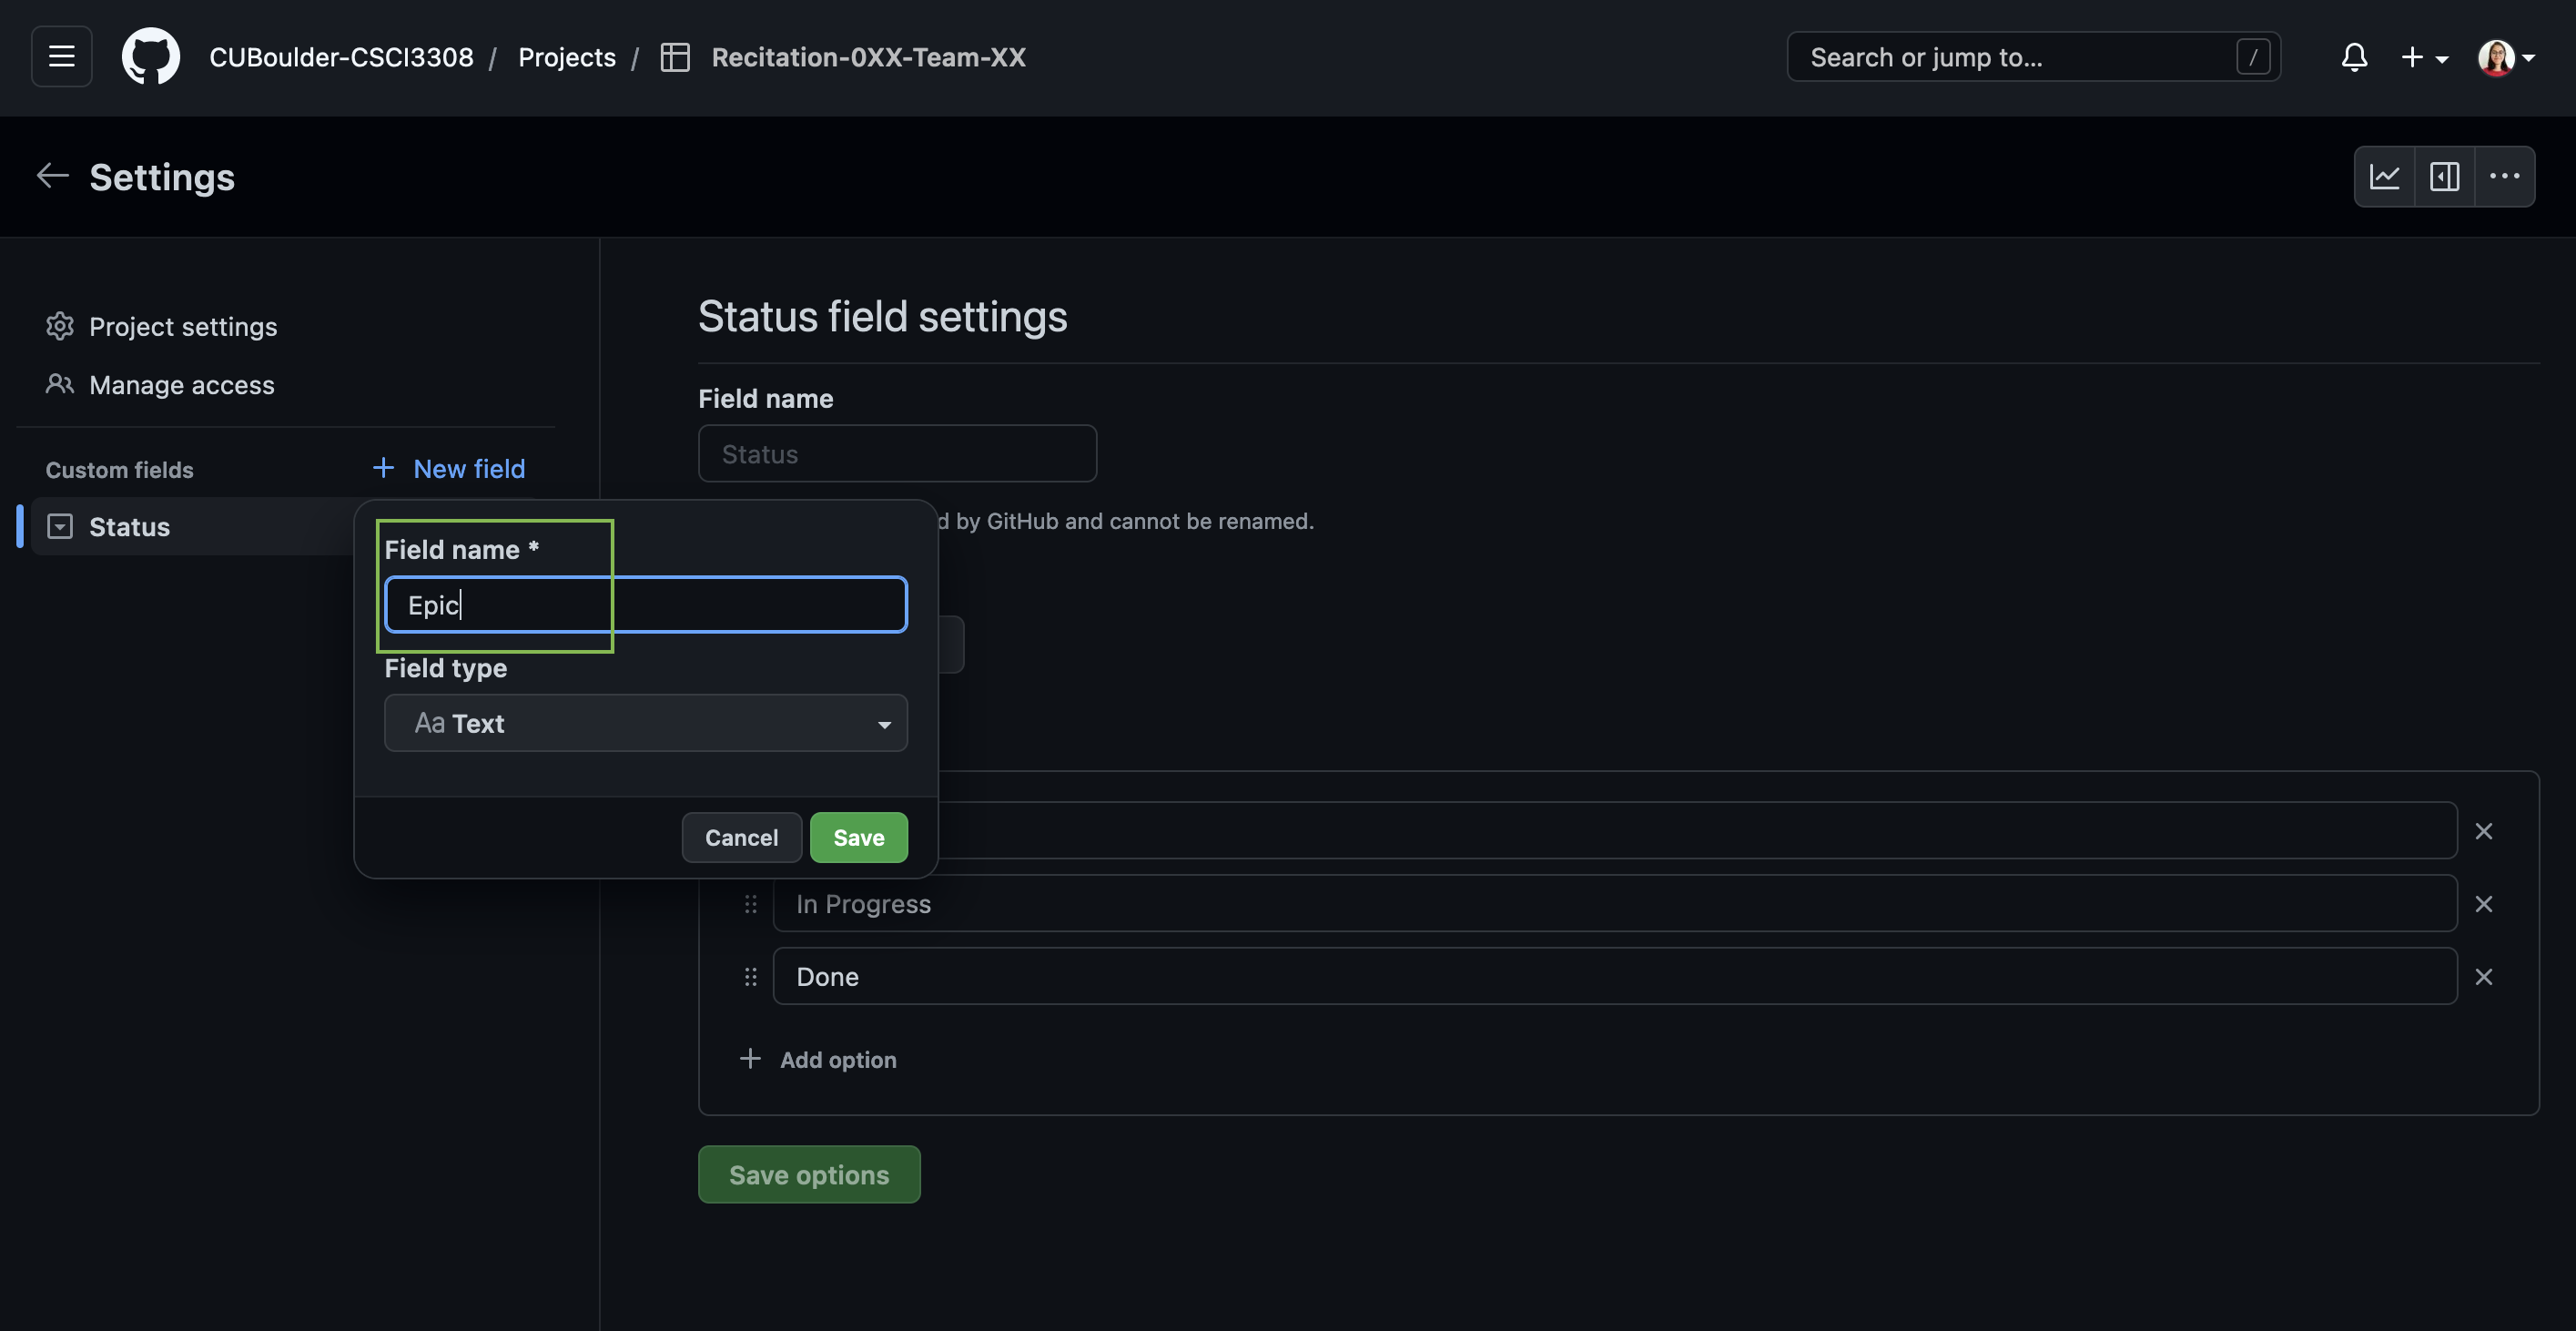
1. Create an Epic
An agile epic is a body of work that can be broken down into specific tasks (called user stories) based on the needs/requests of customers or end-users. Epics are an important practice for agile and DevOps teams. When adopting agile and DevOps, an epic serves to manage tasks.
Here we will be creating a property Epic on the board. This would mean while creating user stories we would be assigning them to an Epic.
Navigate to the project board. On the top right of the board, click on the three-dots icon -> Click on “Settings”
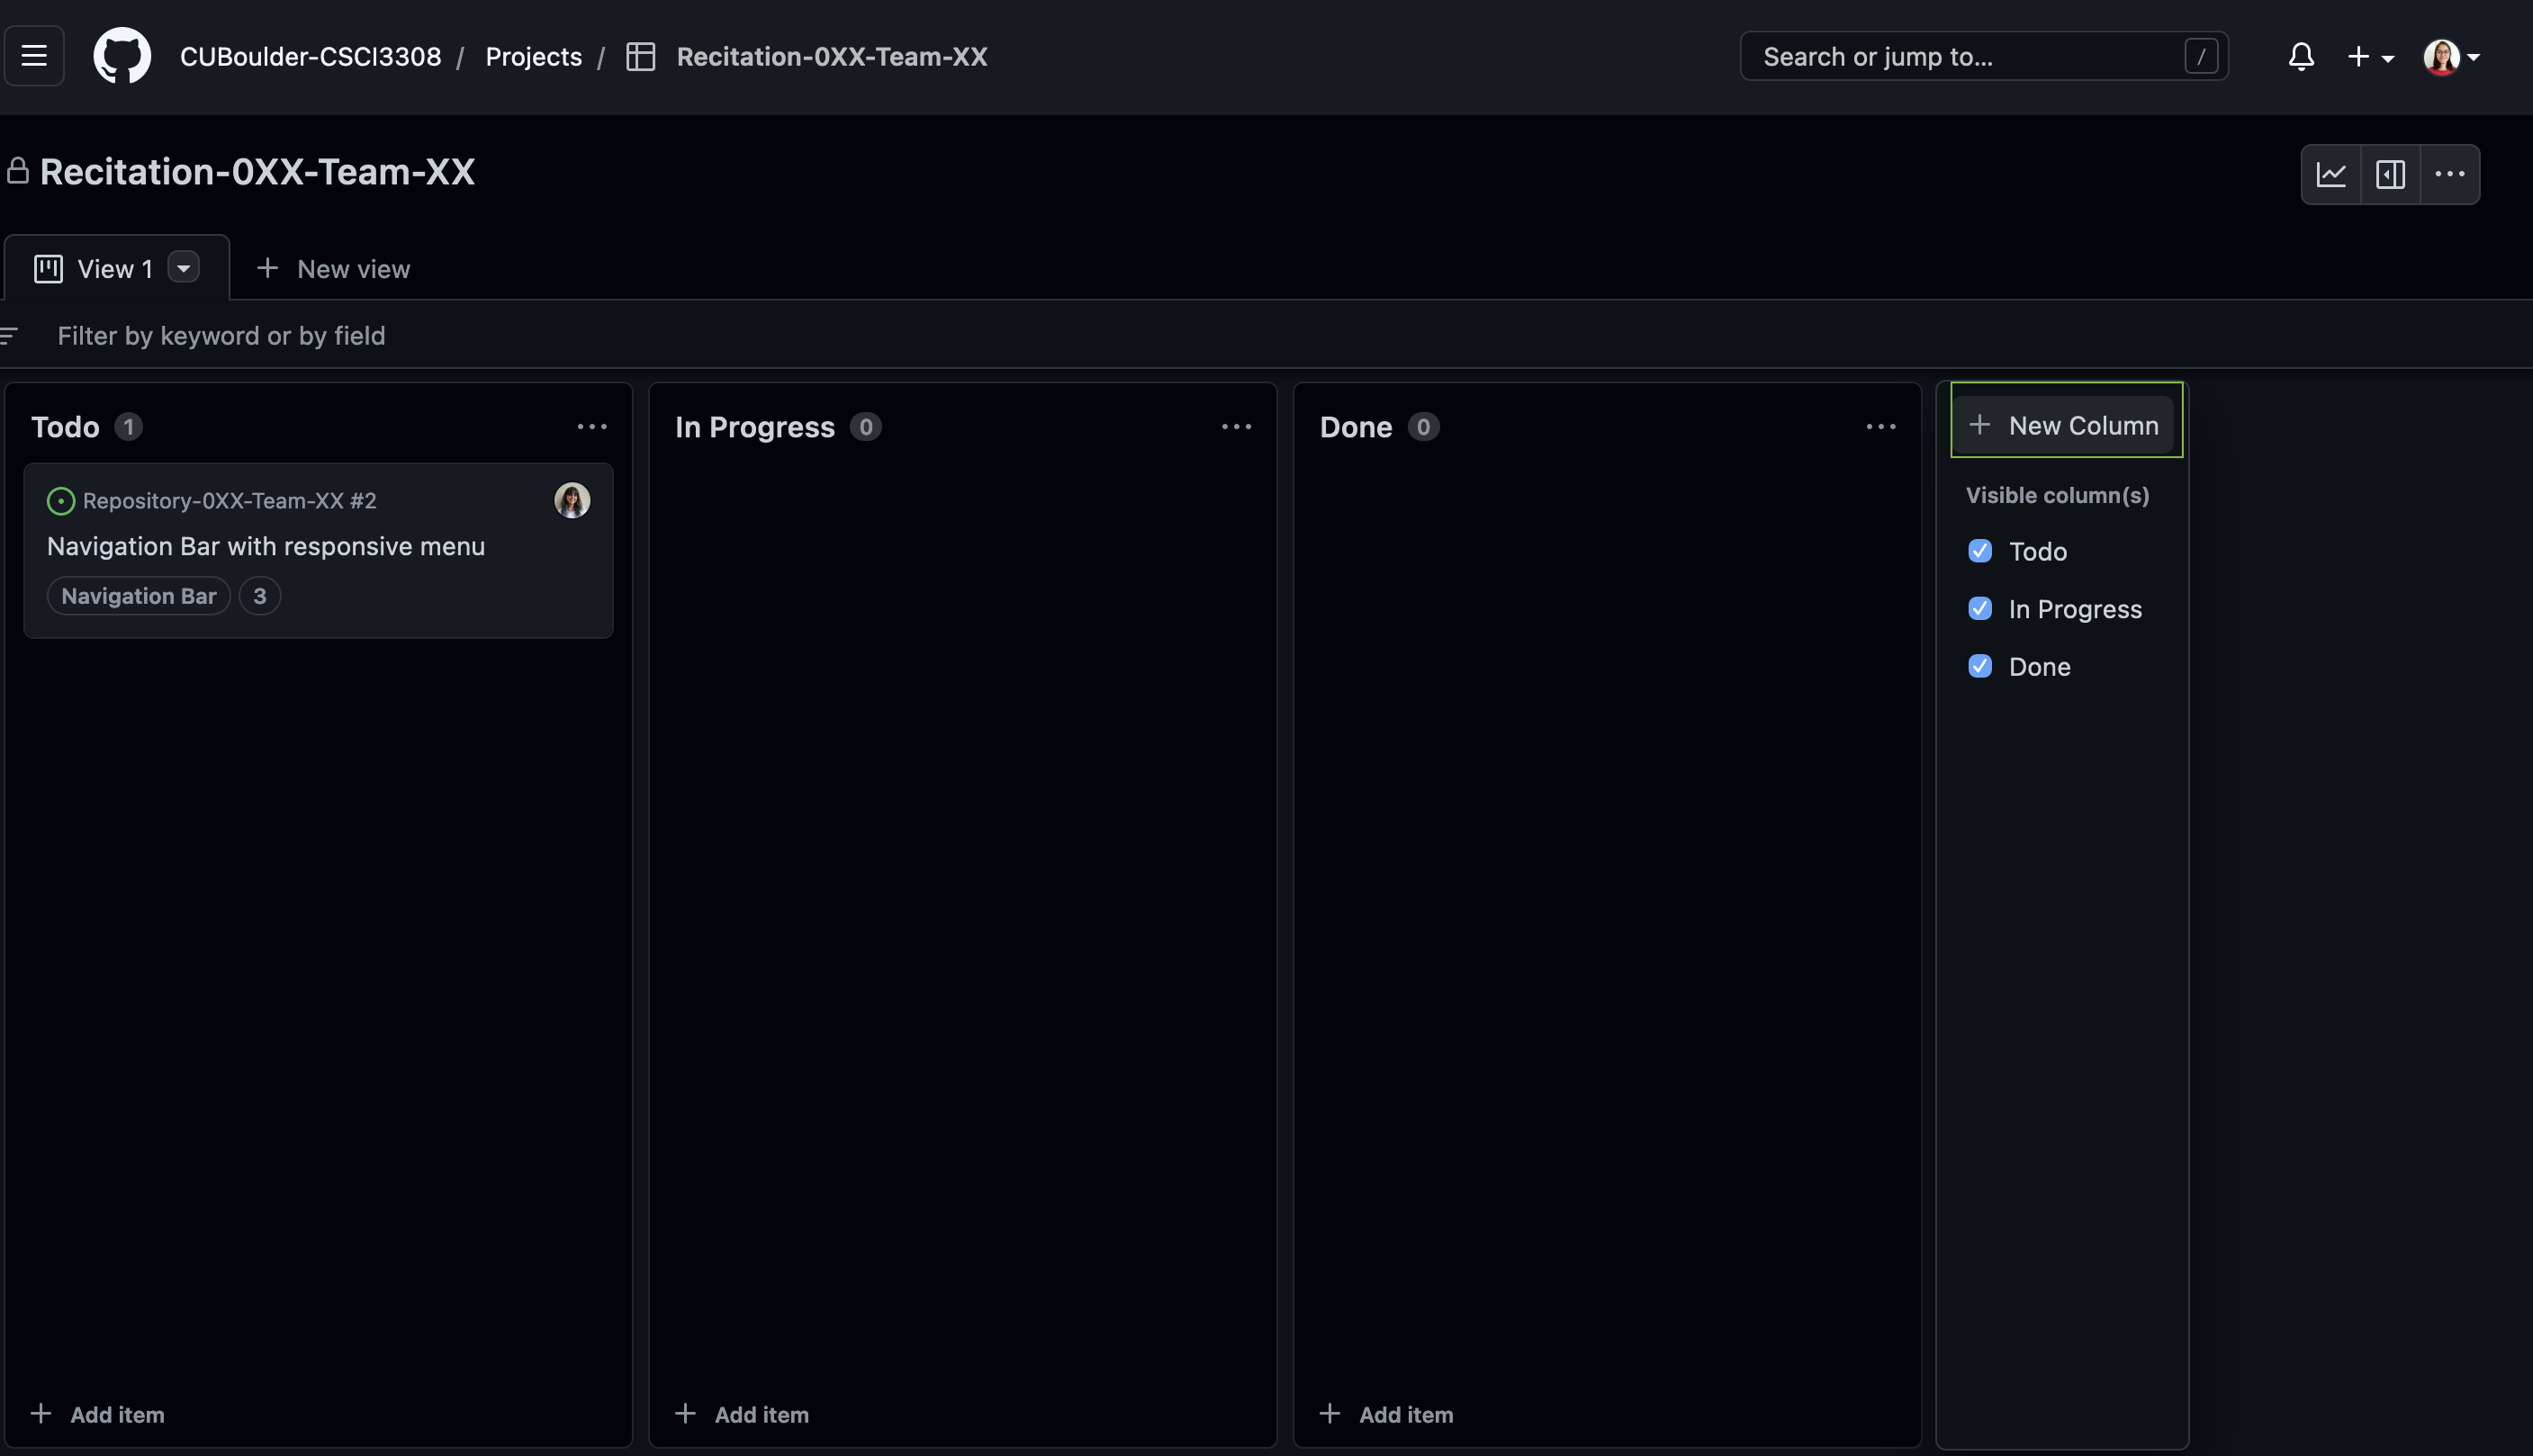
Then go ahead and click on +New Field in the left panel.
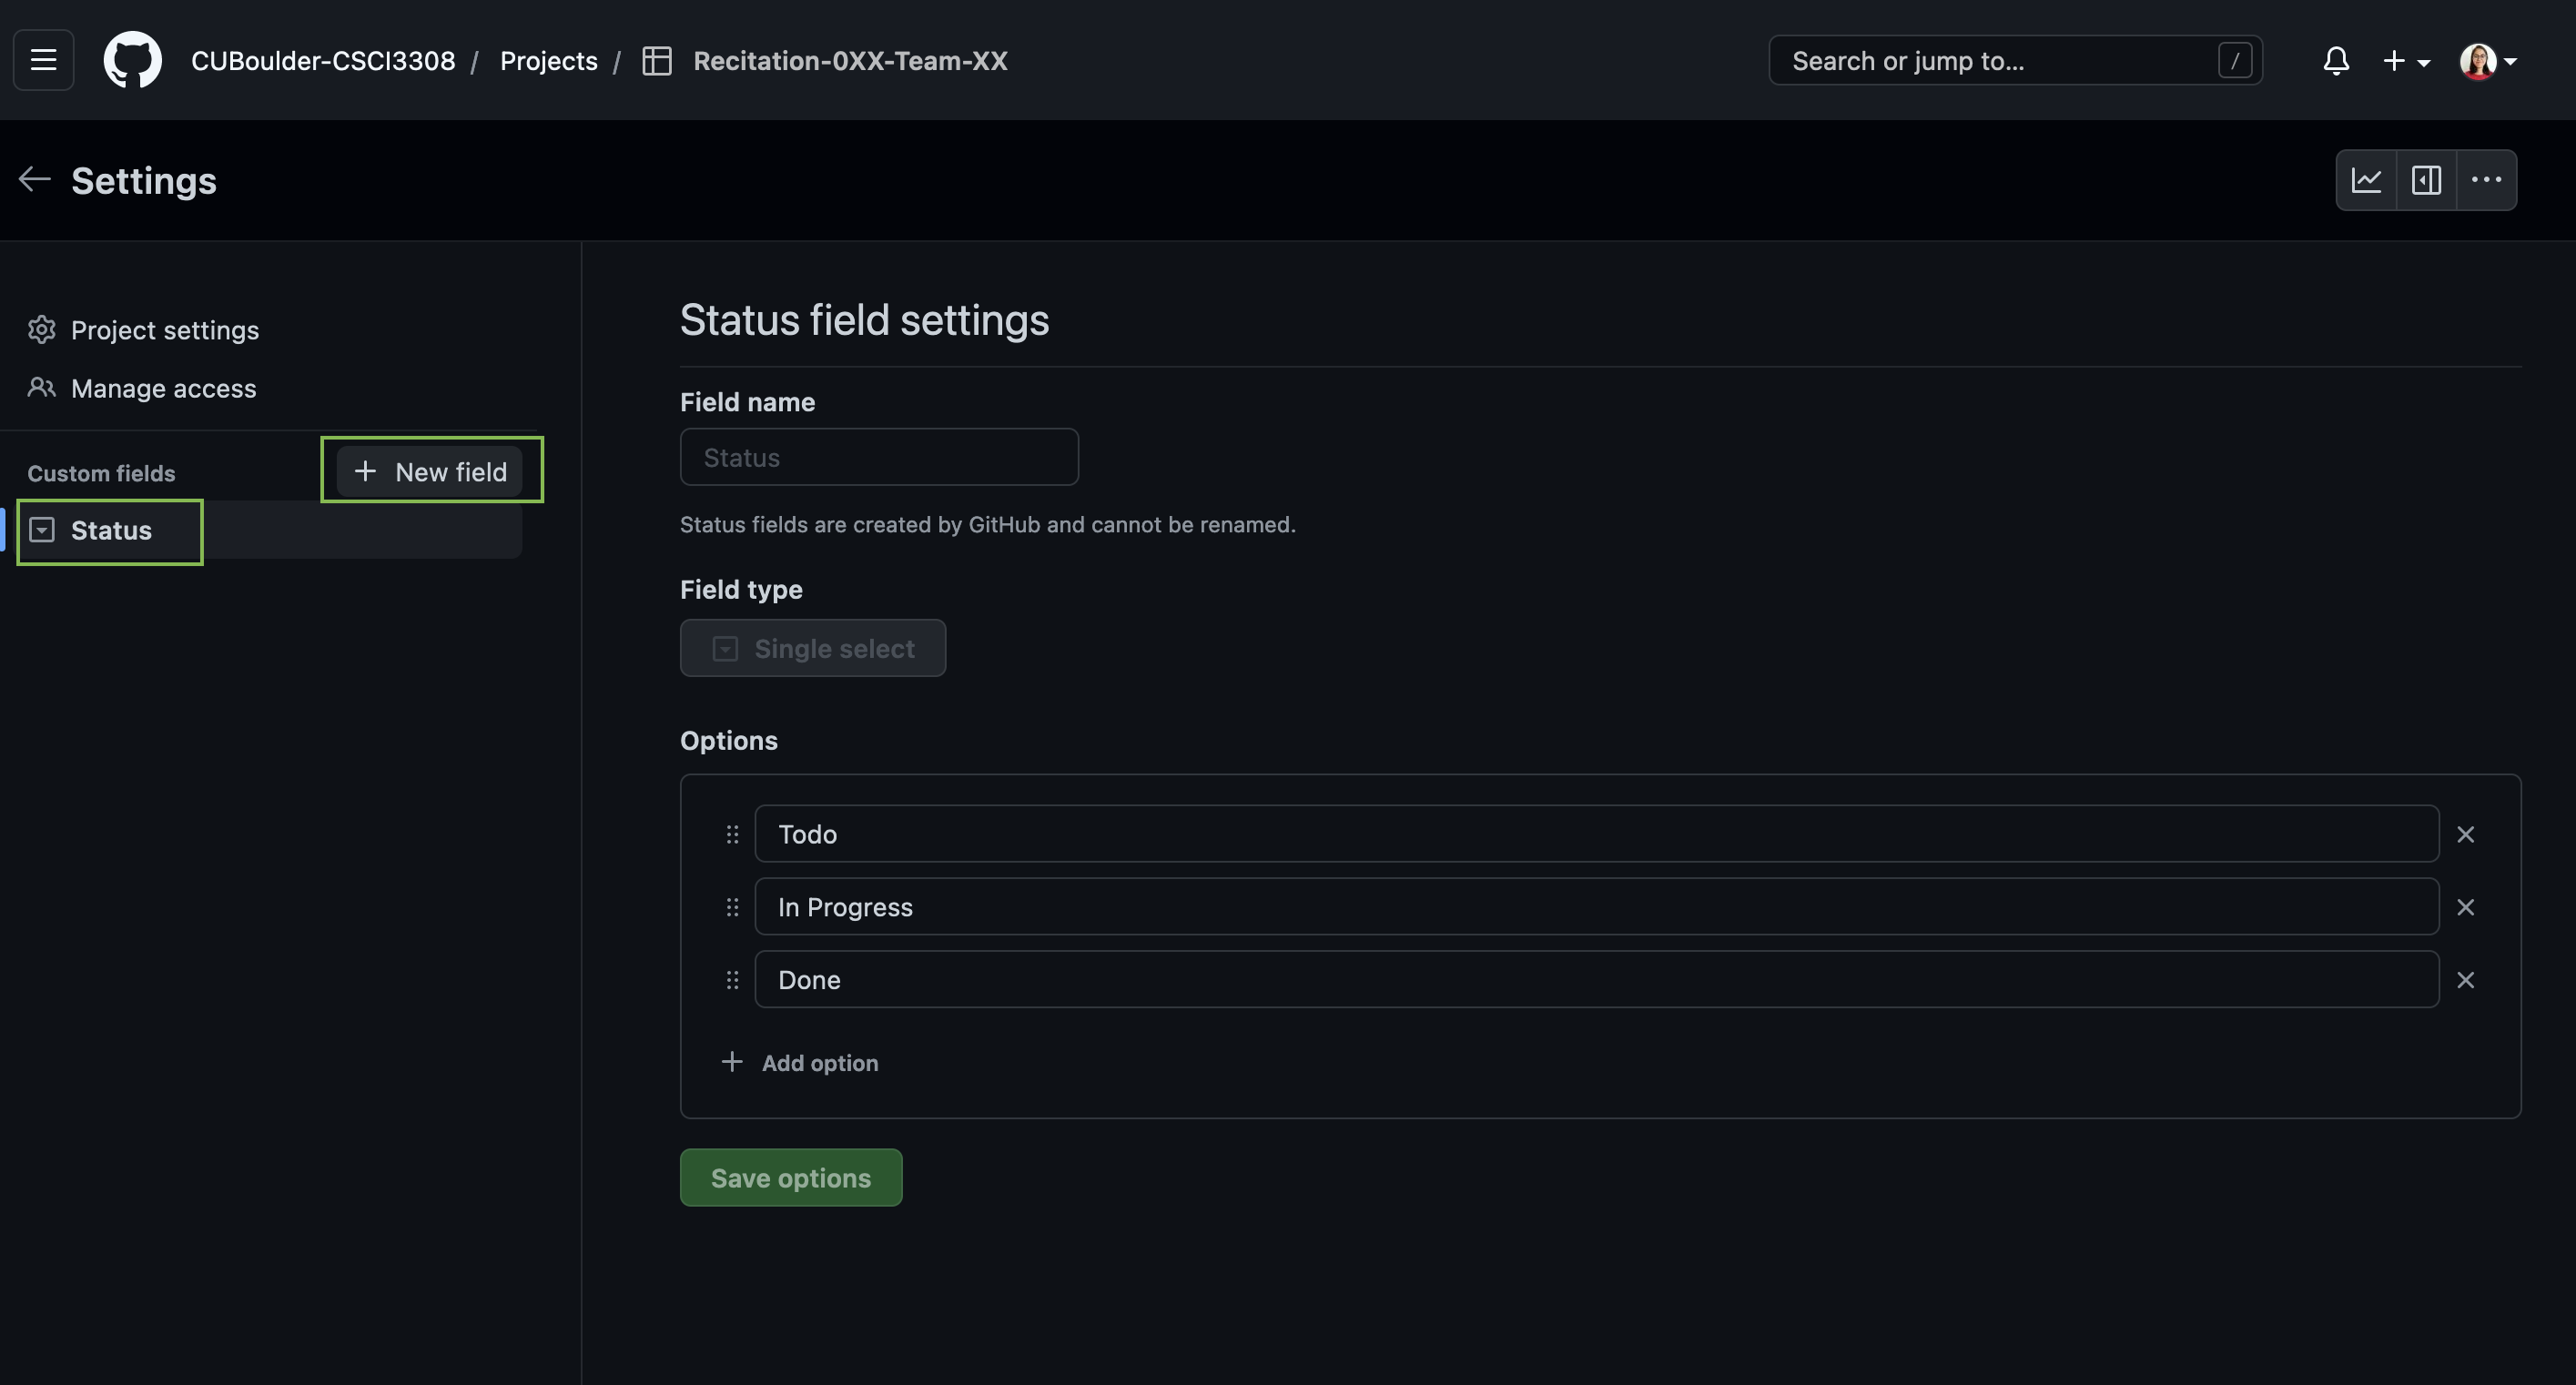
Once you save the changes go back to the board and click on the down arrow icon next to View 1 as shown, then go ahead and click on fields under configuration:
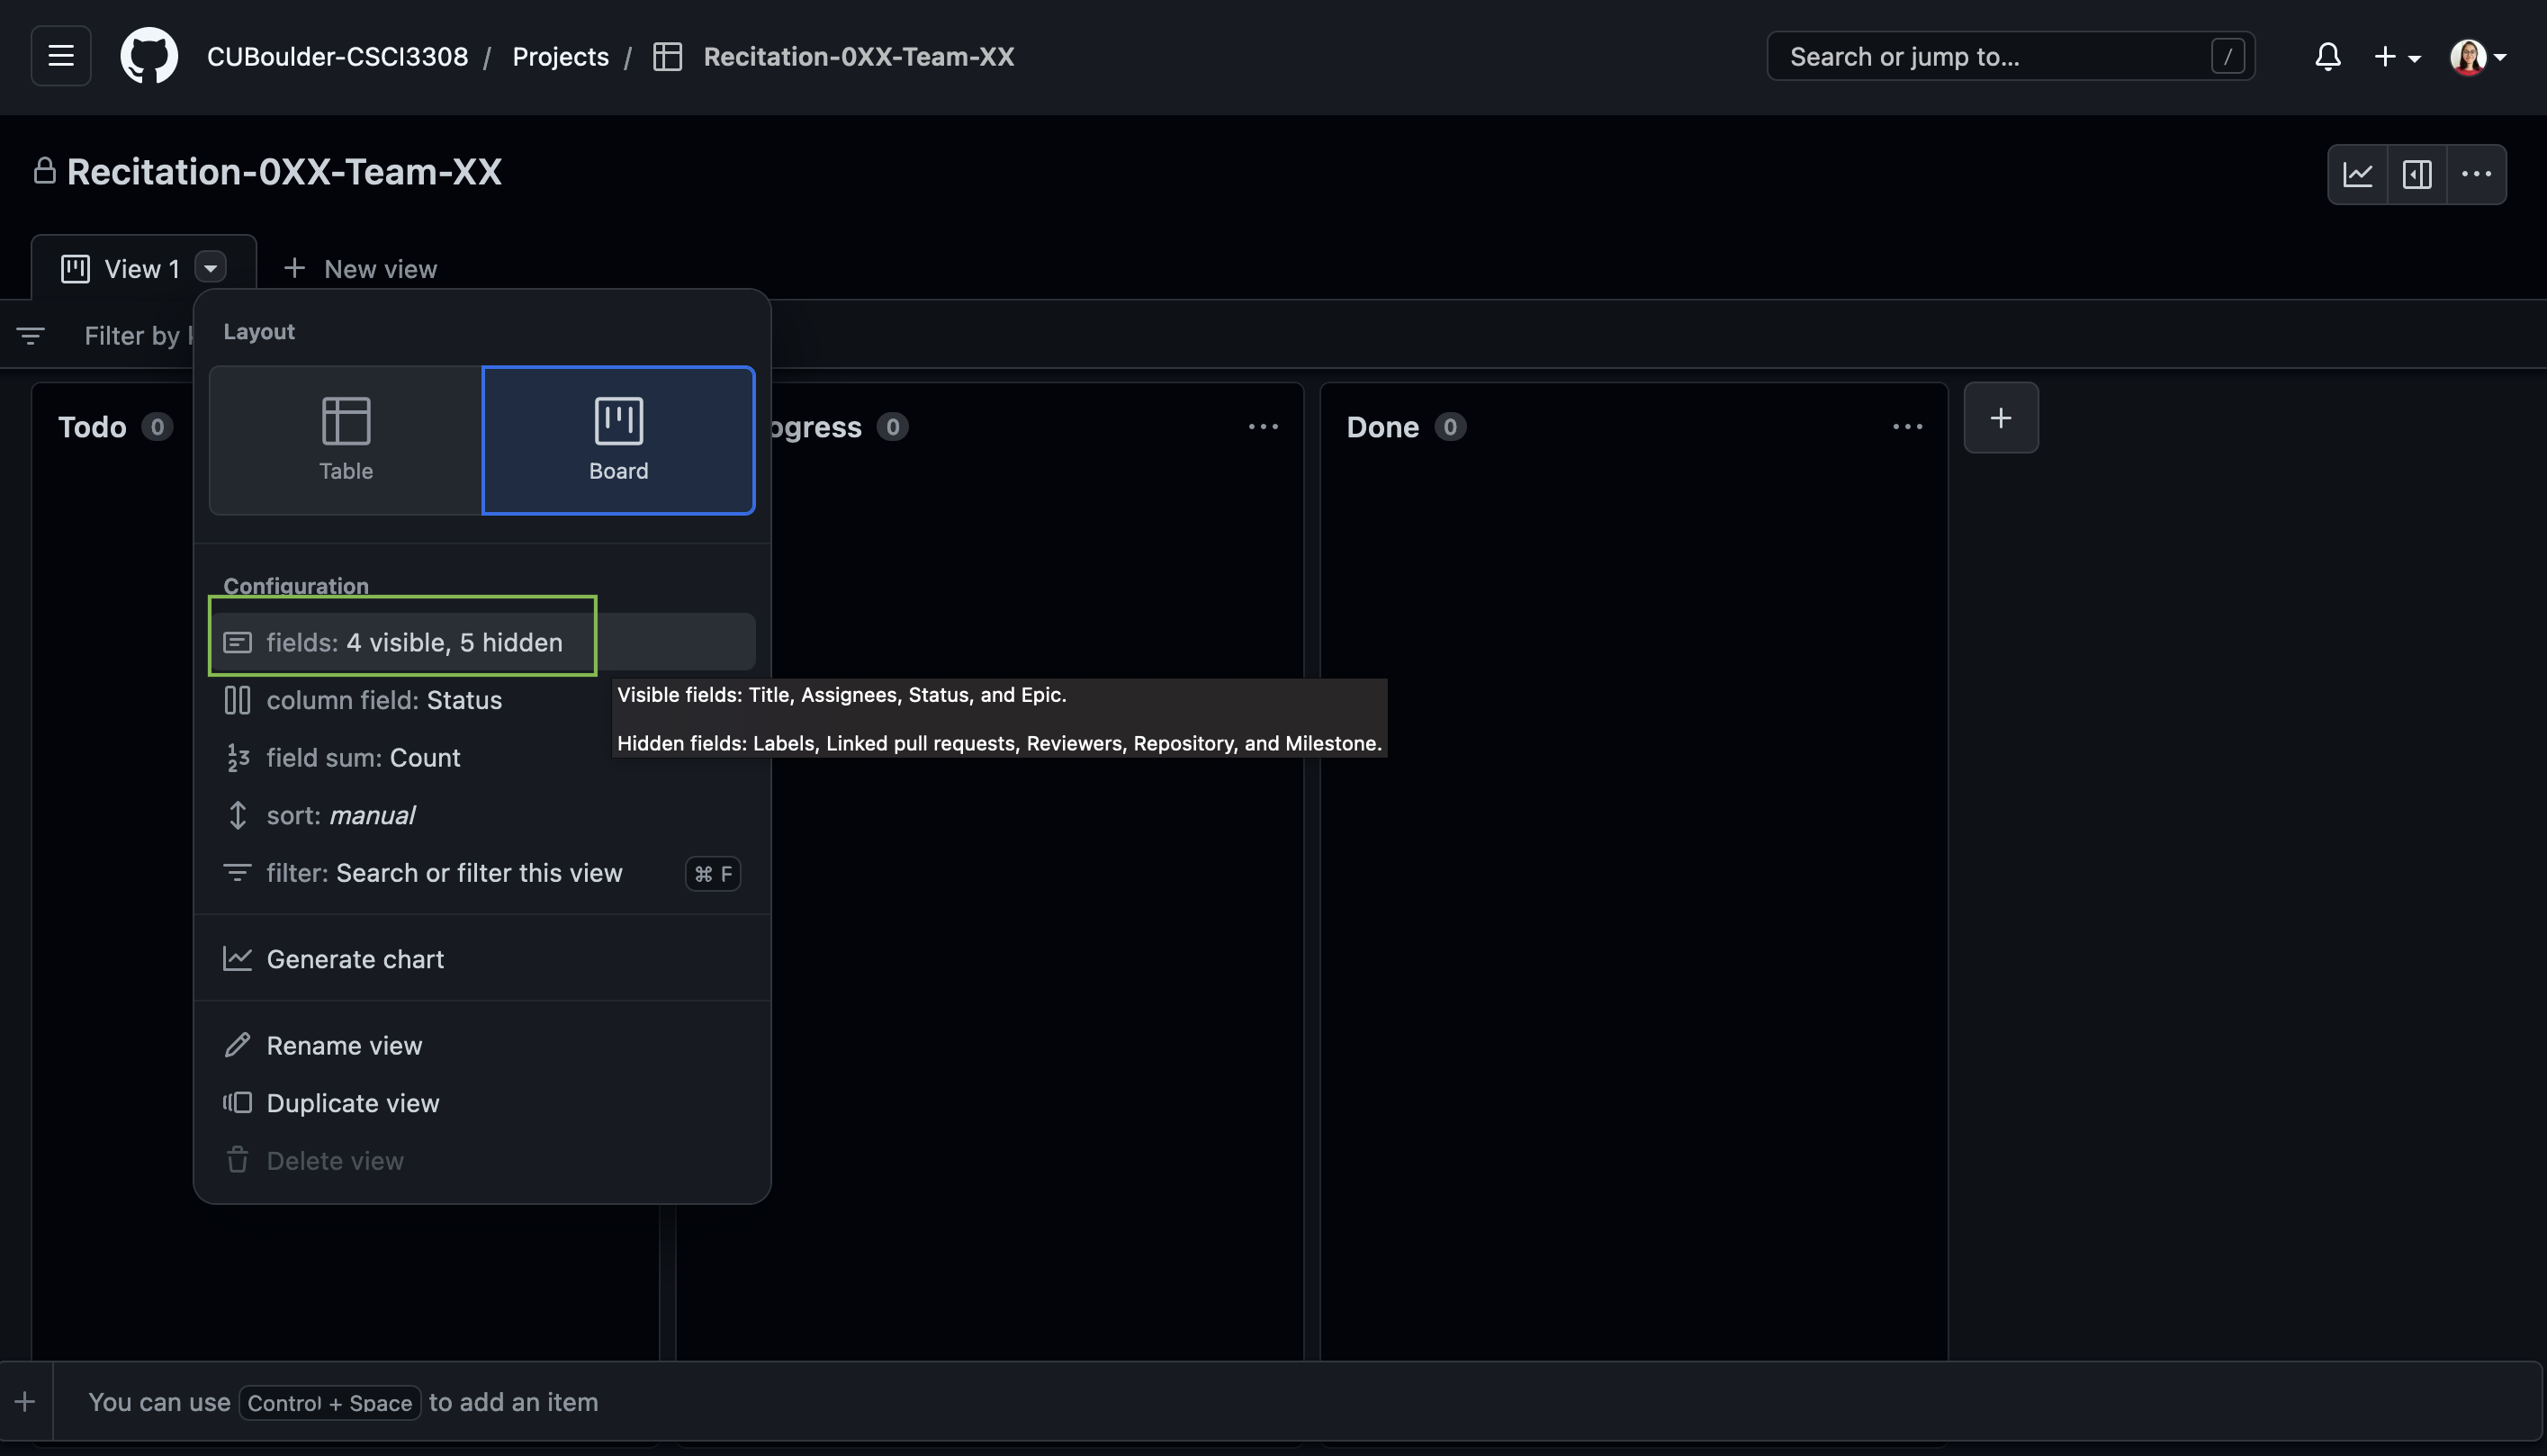
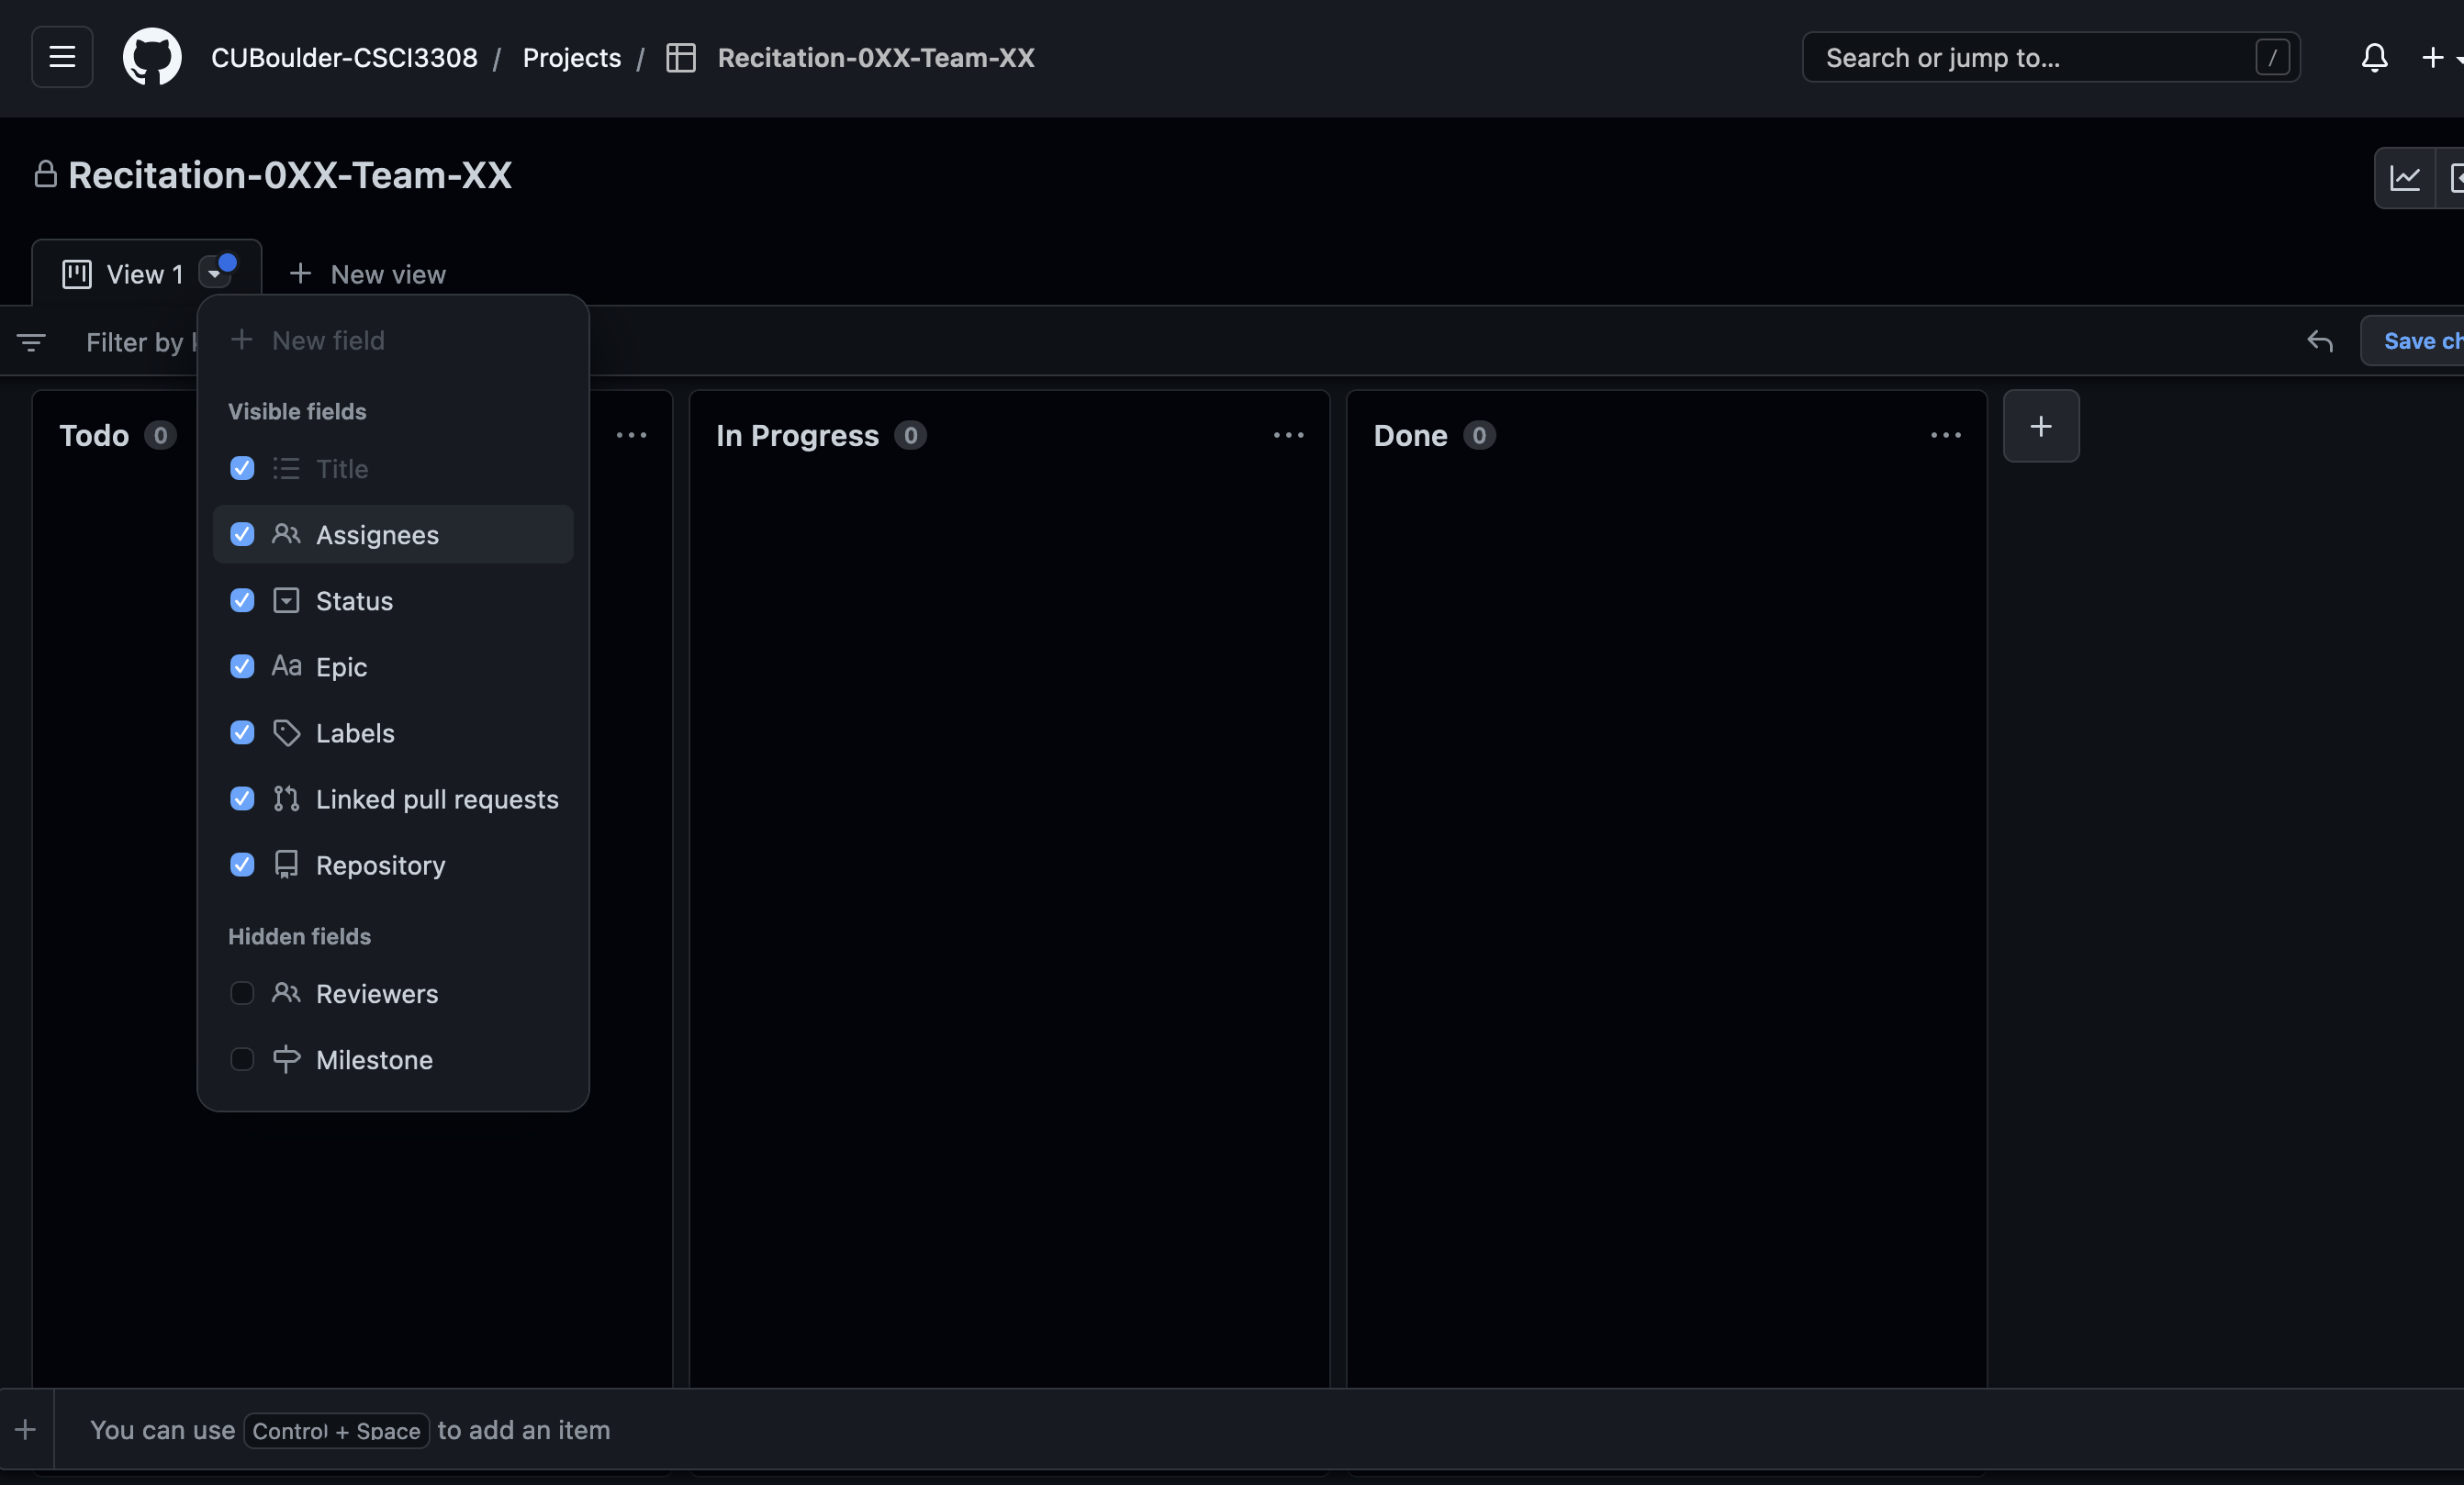
Click on the checkboxes as shown (this is a filter for what we can view on the board):
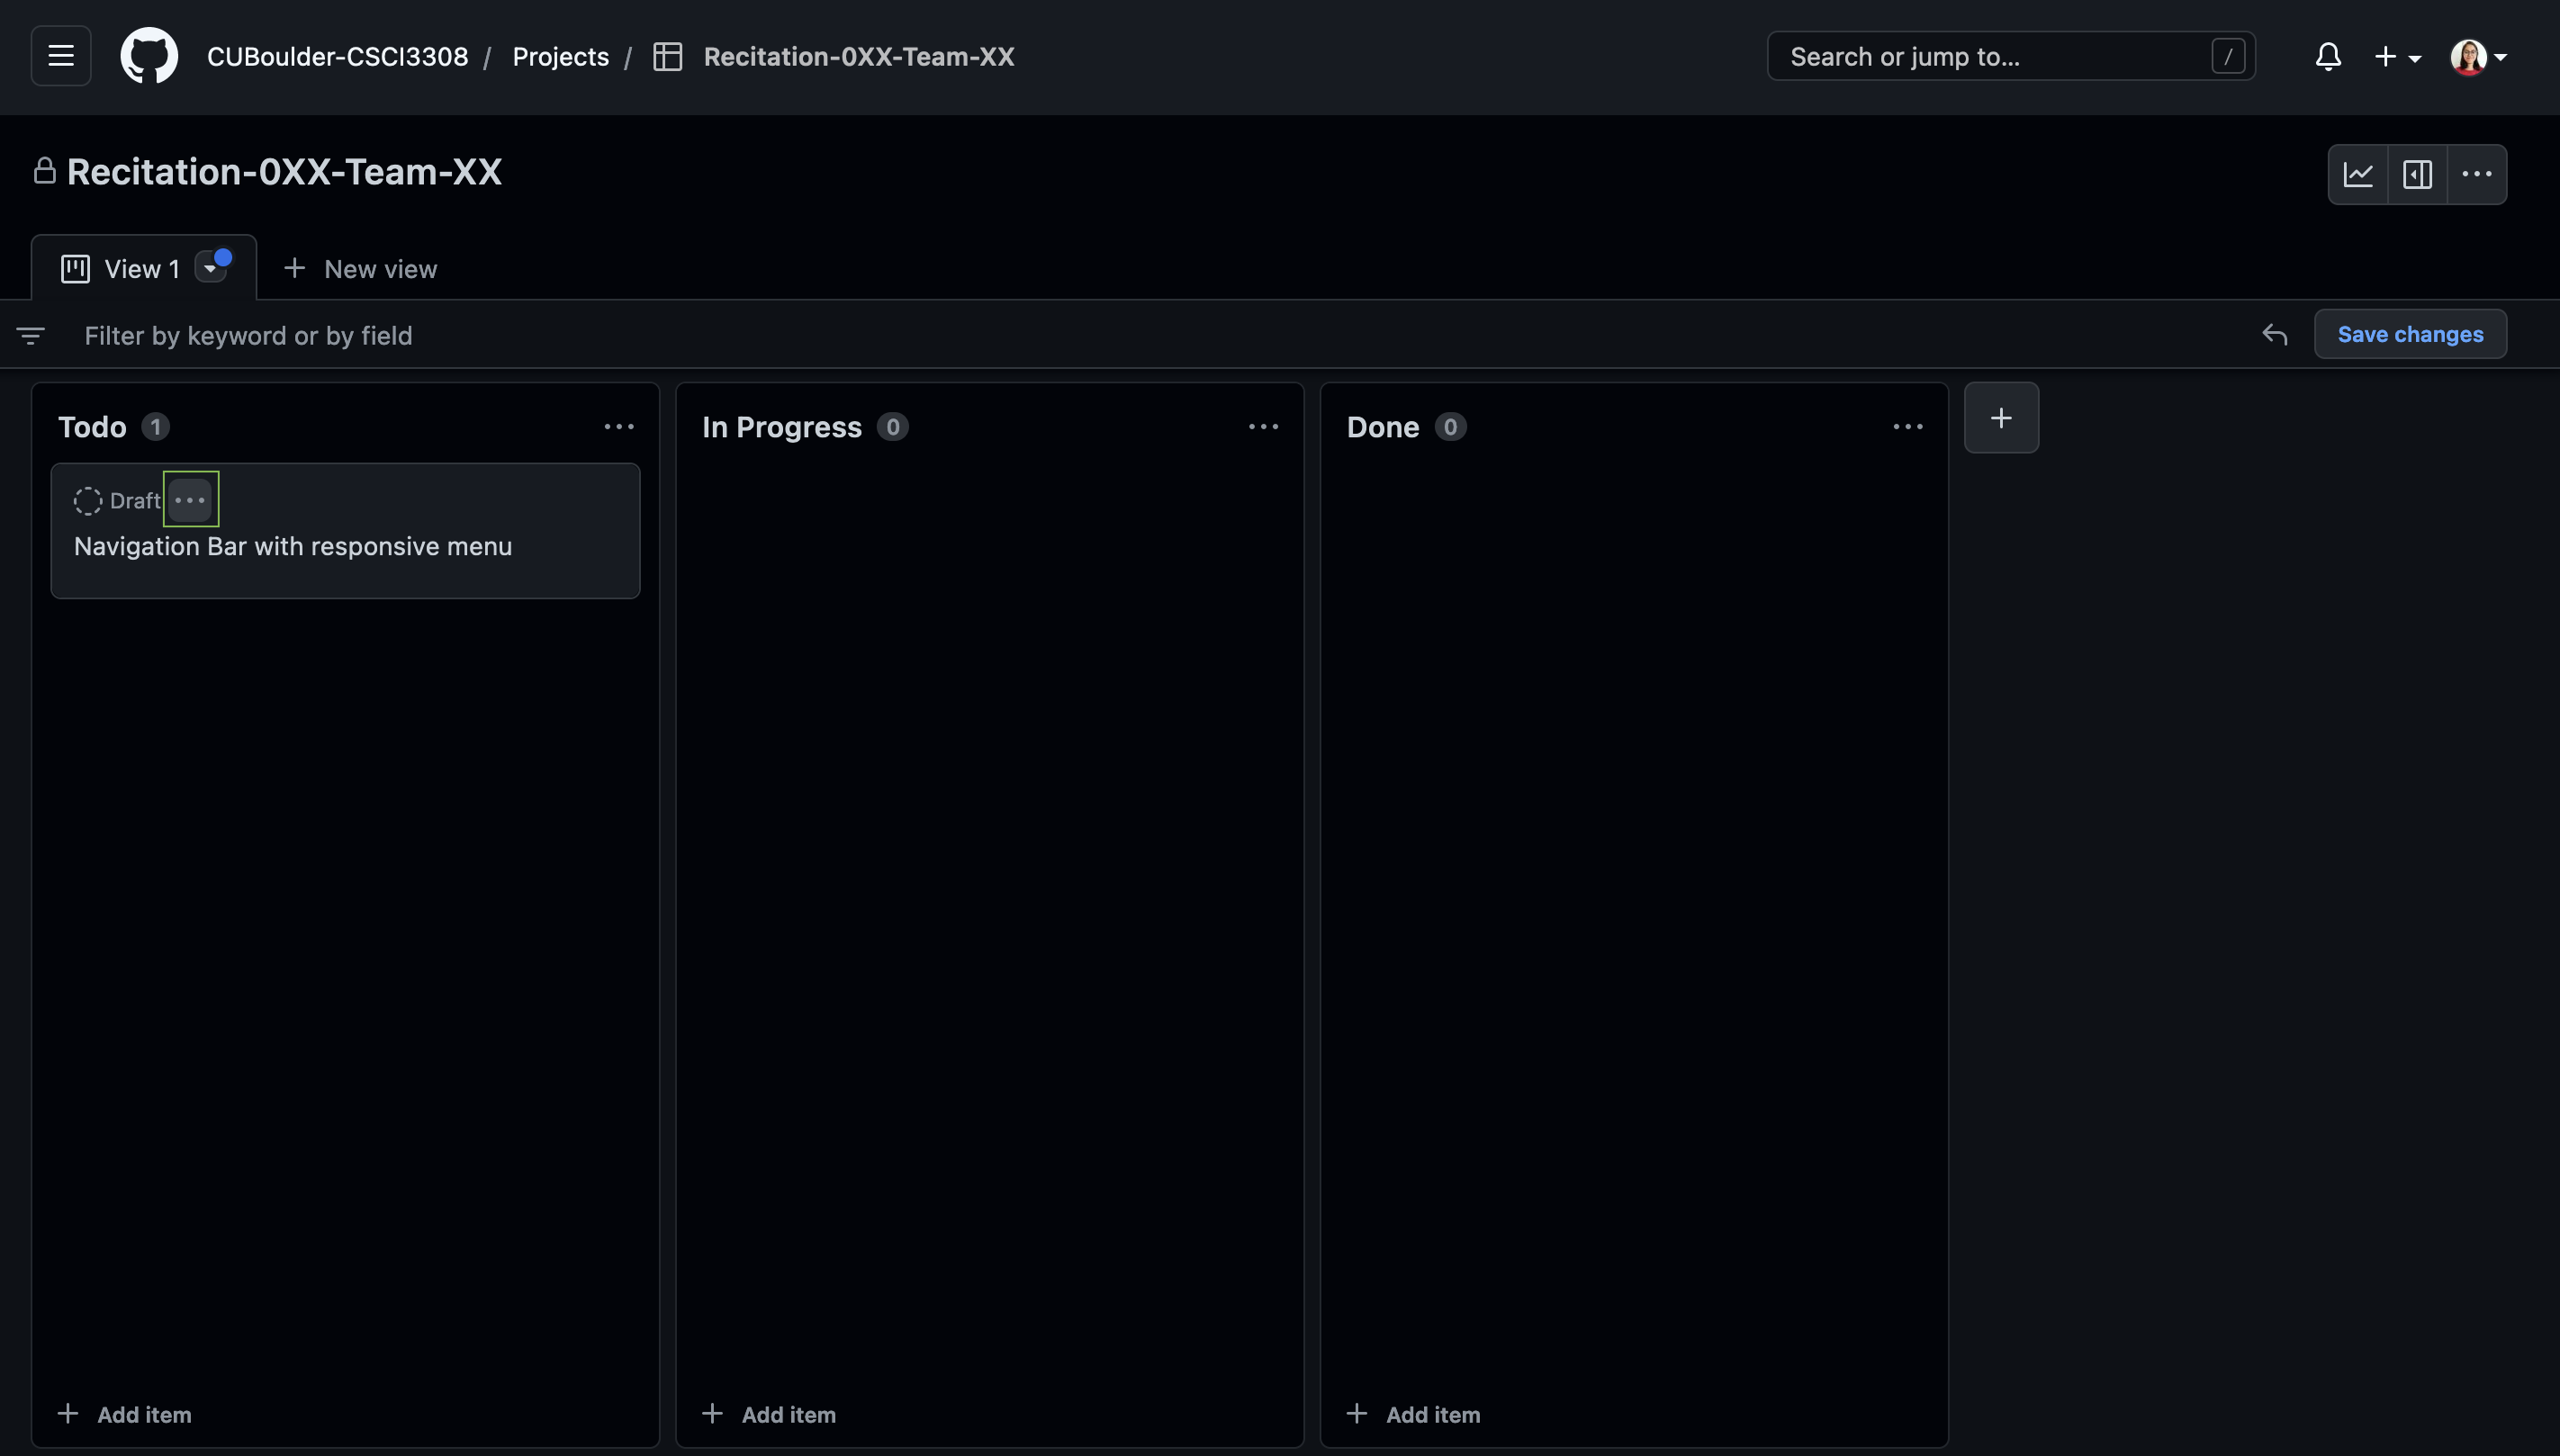
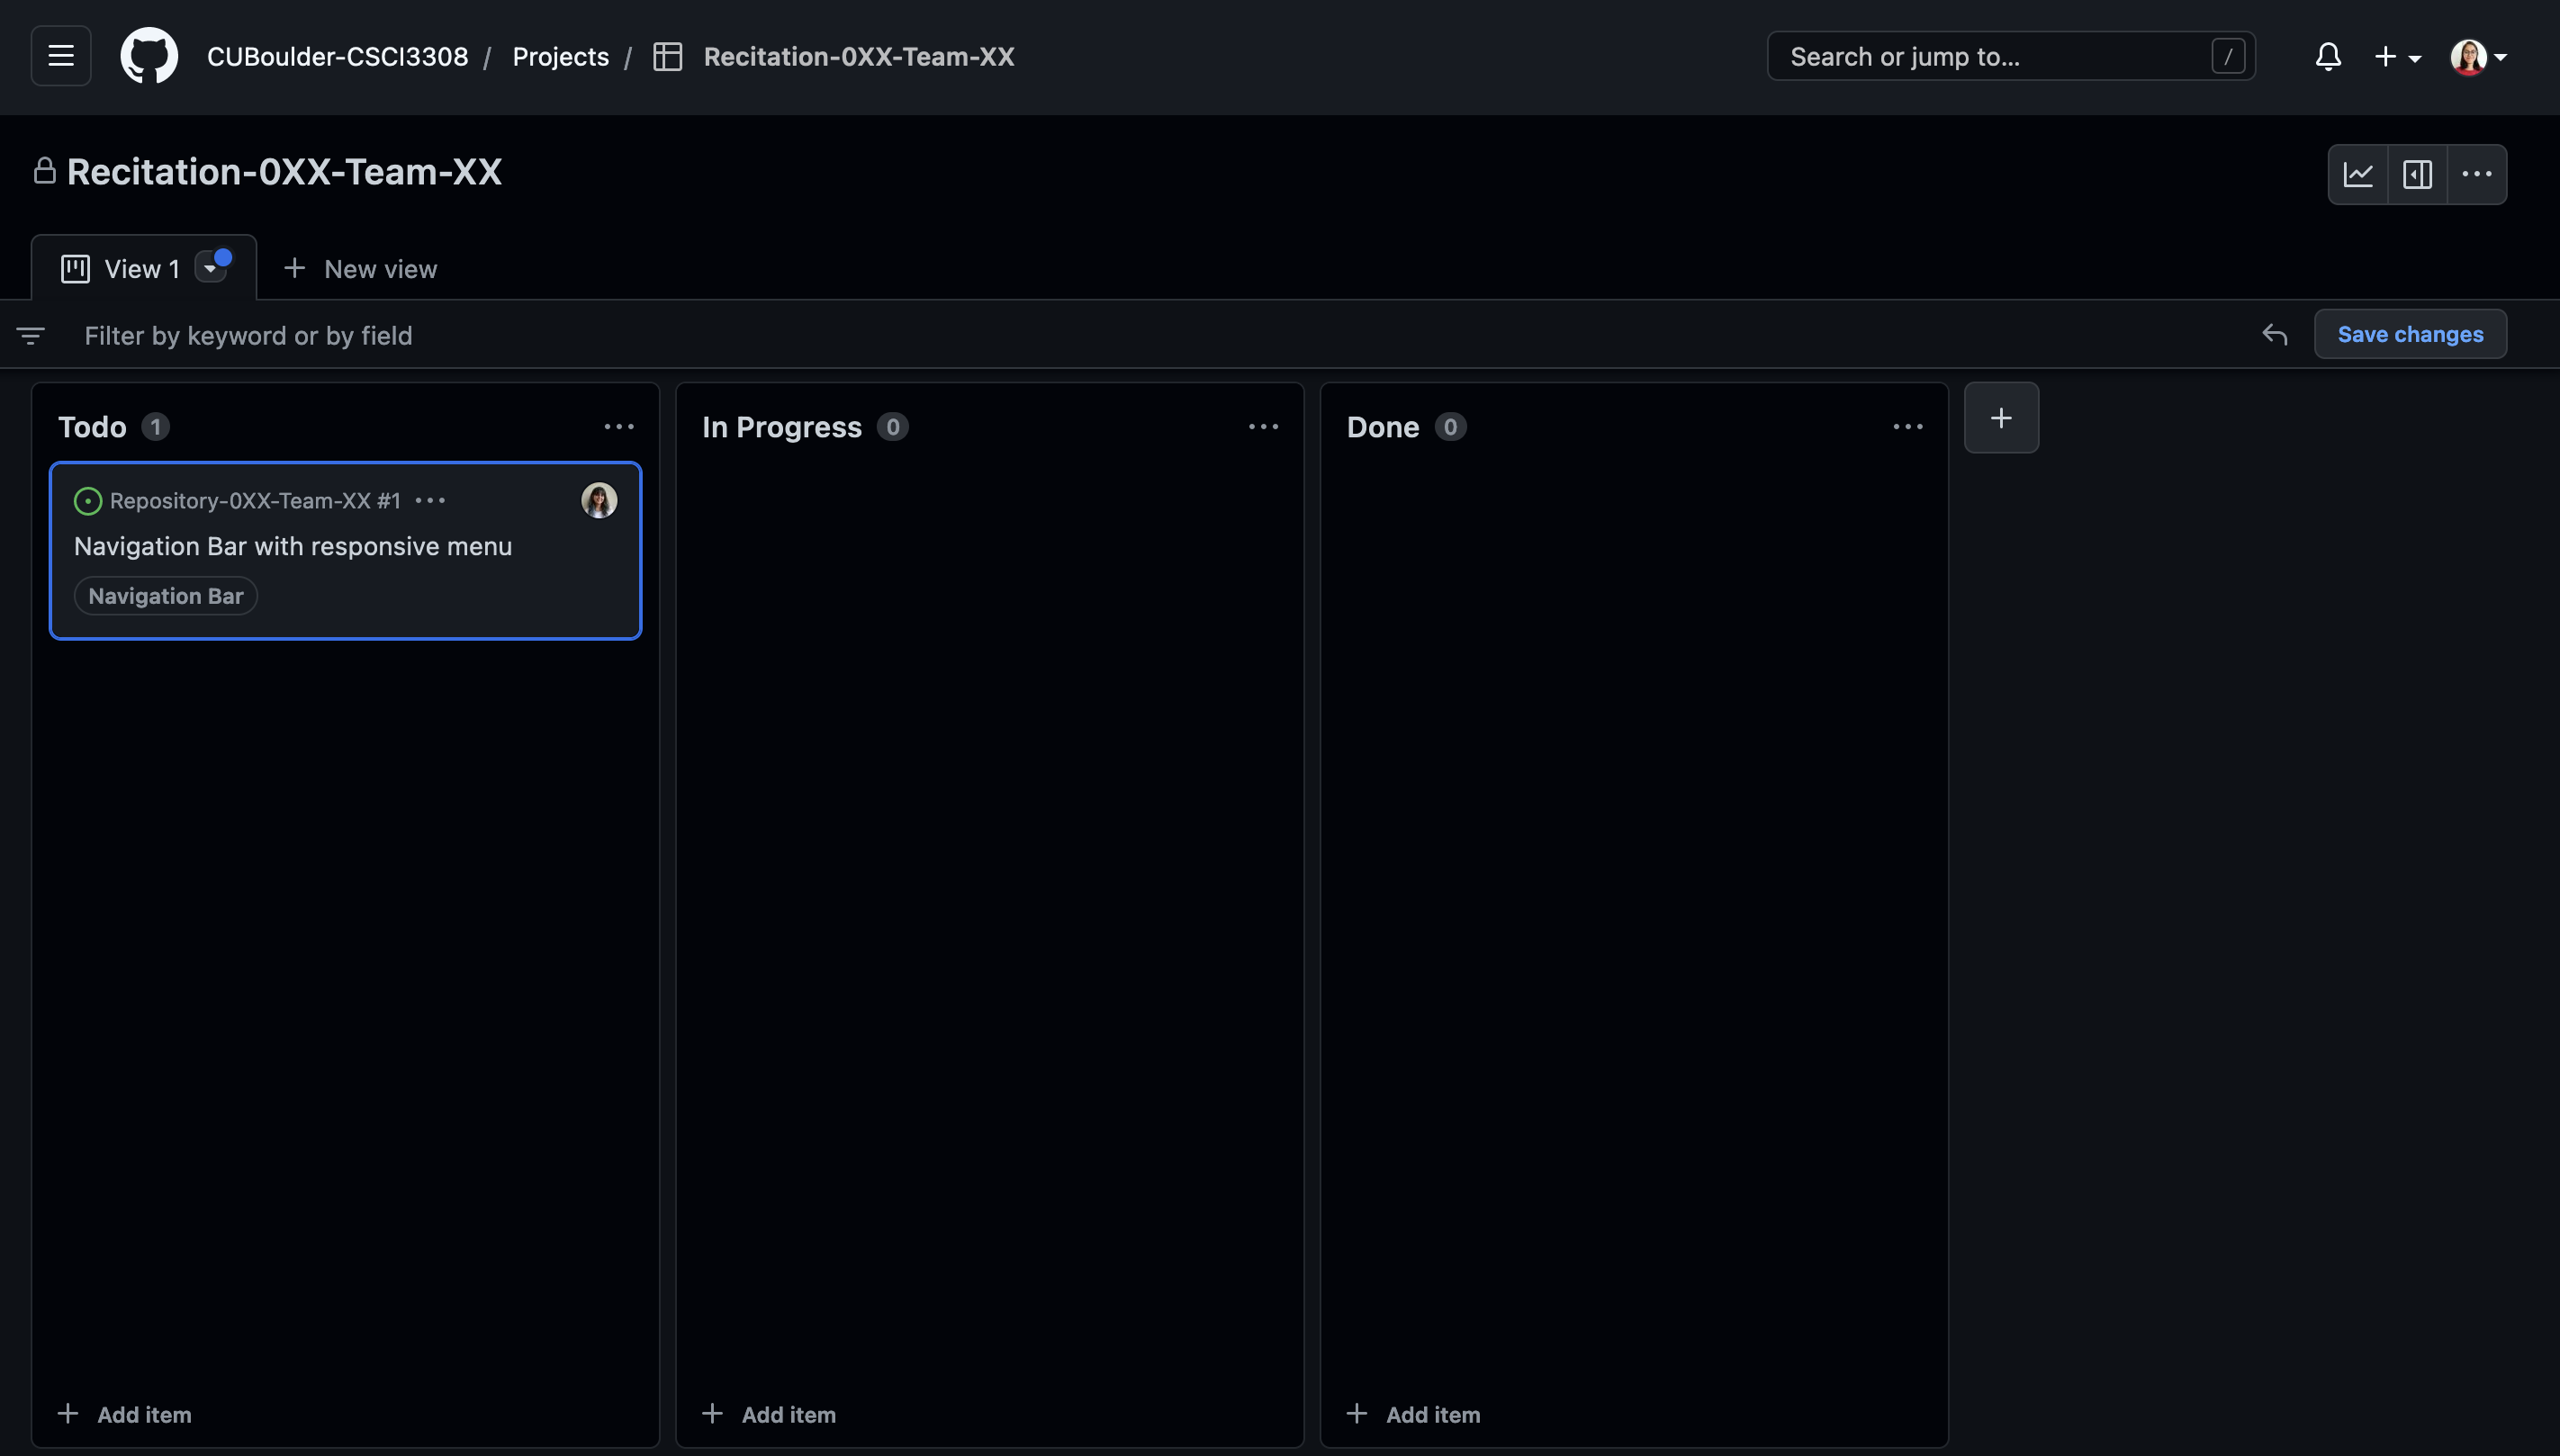
2. Create Issues/User Stories
A user story is the smallest unit of work in an agile framework. It's an end goal, not a feature, expressed from the software user's perspective.
In this lab we will be referring to Github issues as User Stories. Click on the + icon at the bottom of the Todo column and add the User Story summary
Click on Enter once you finish typing.
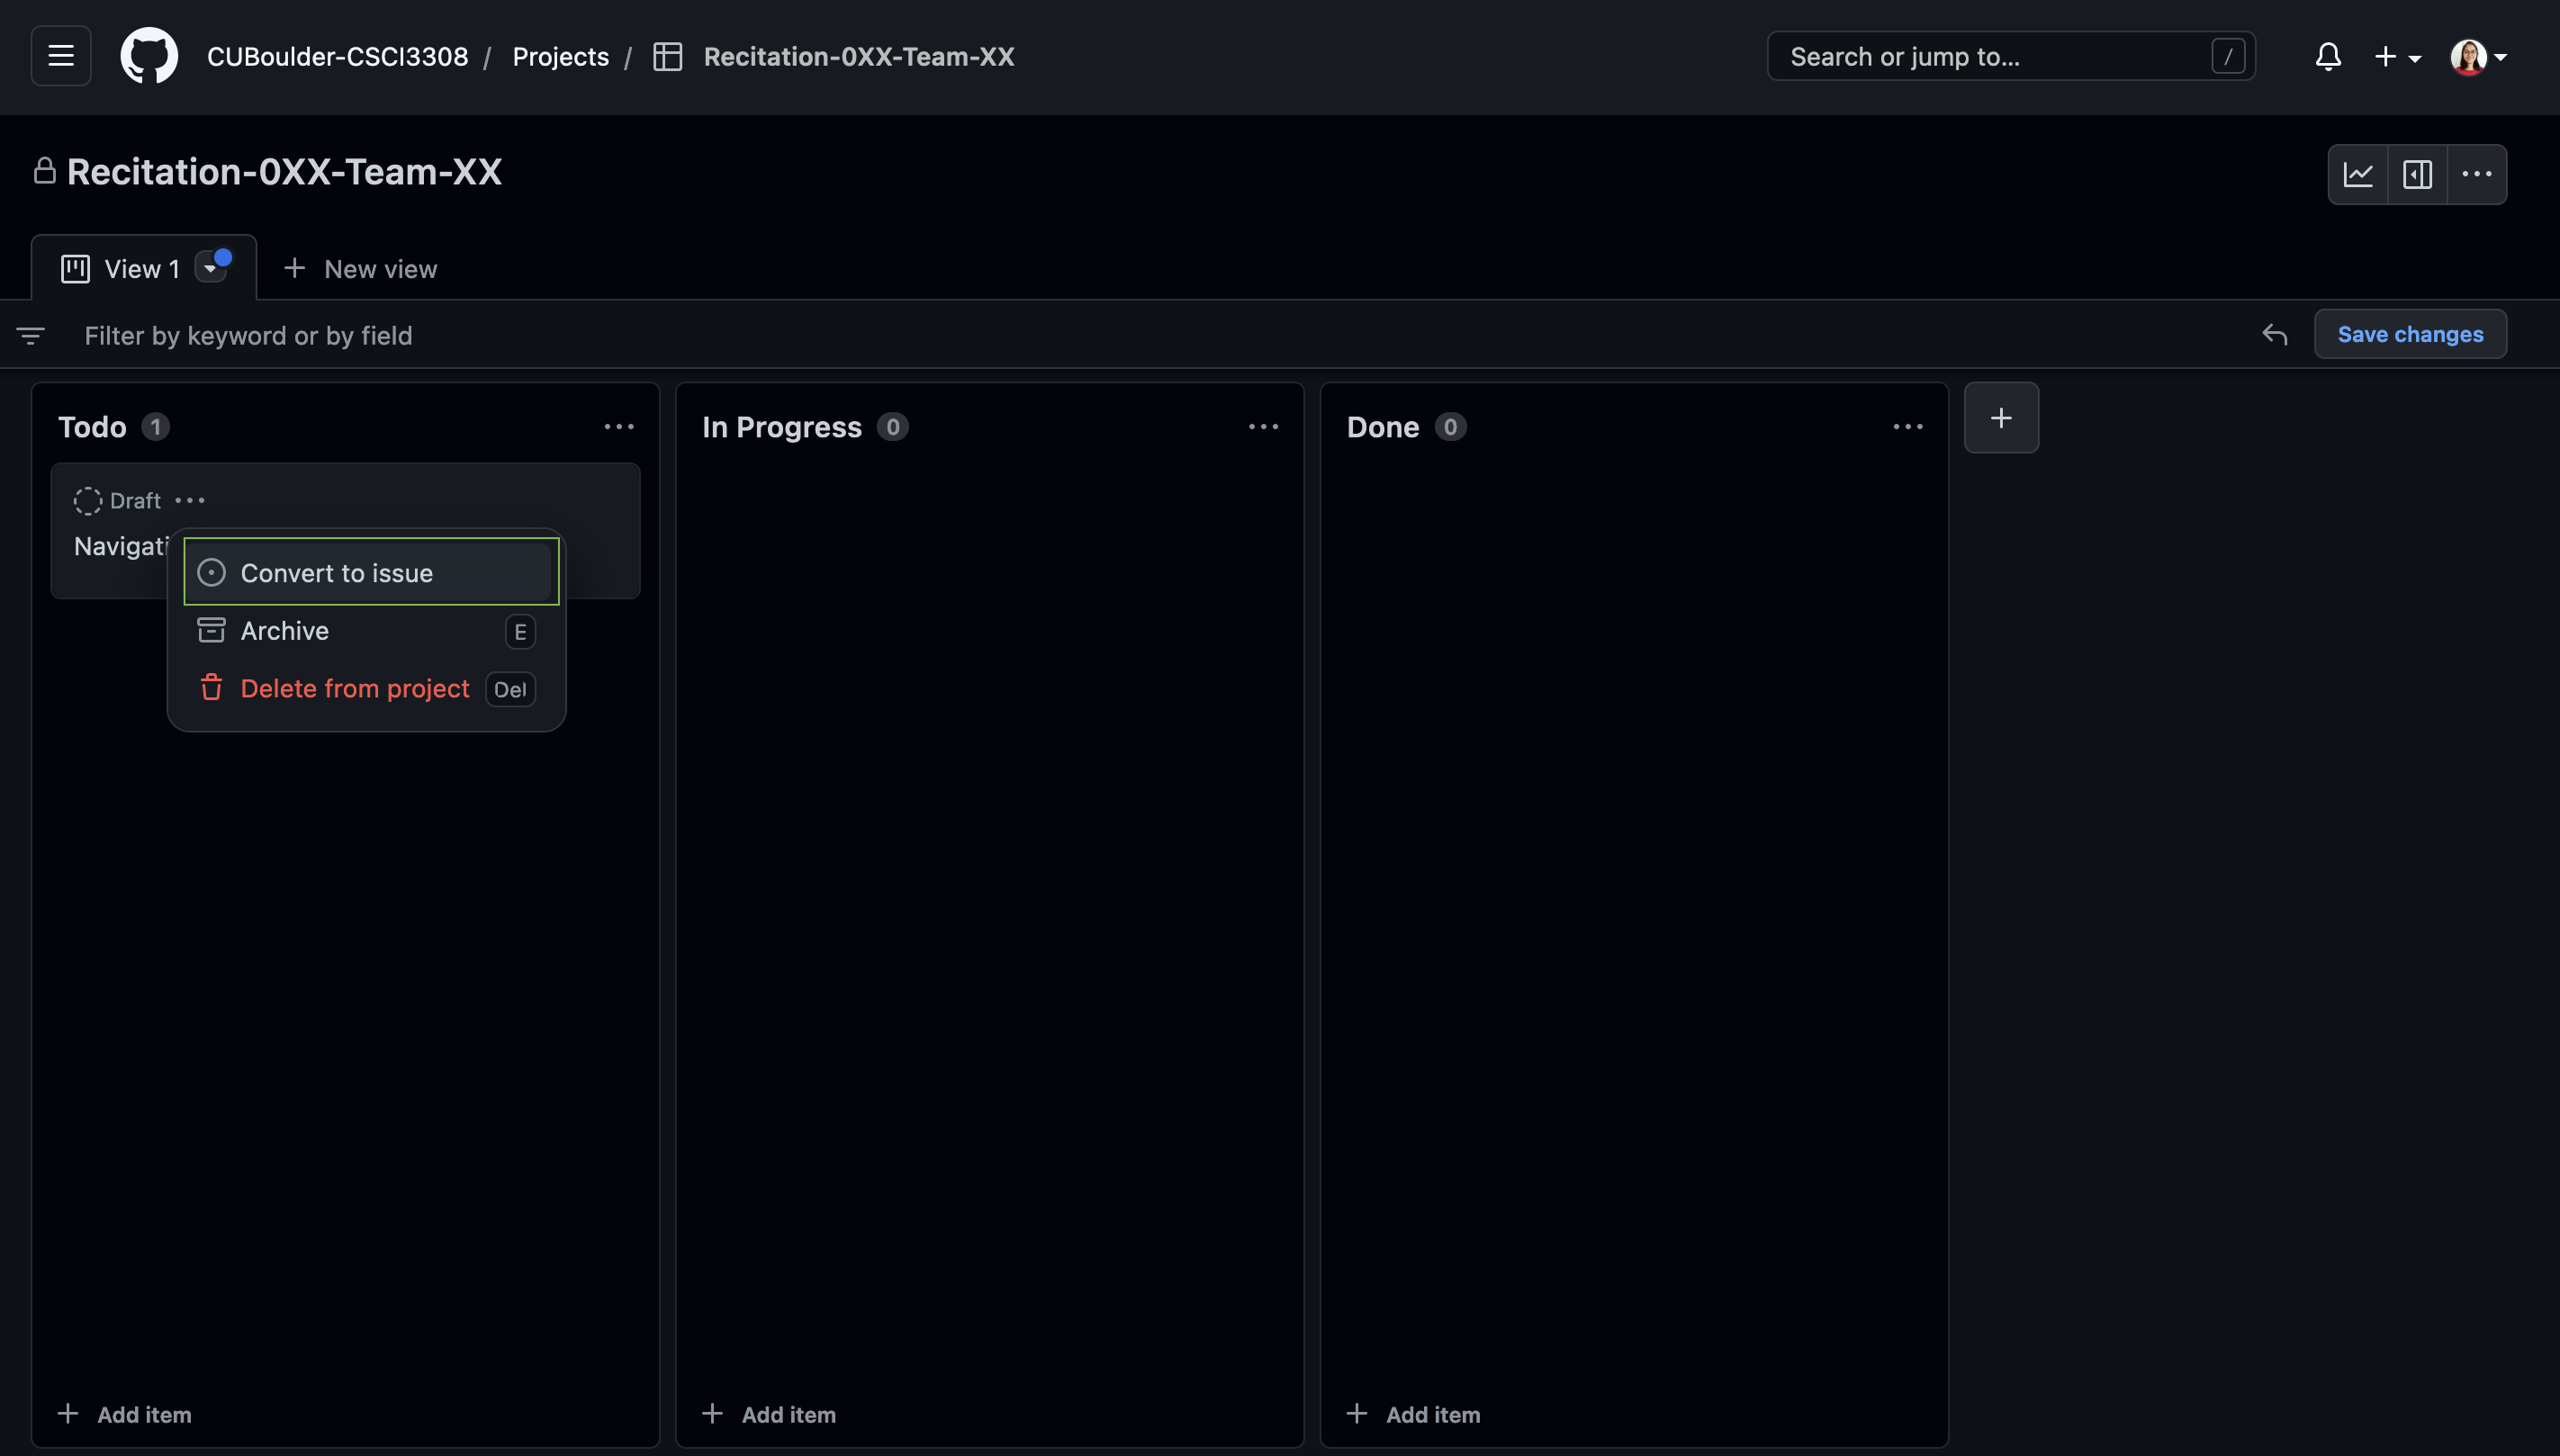
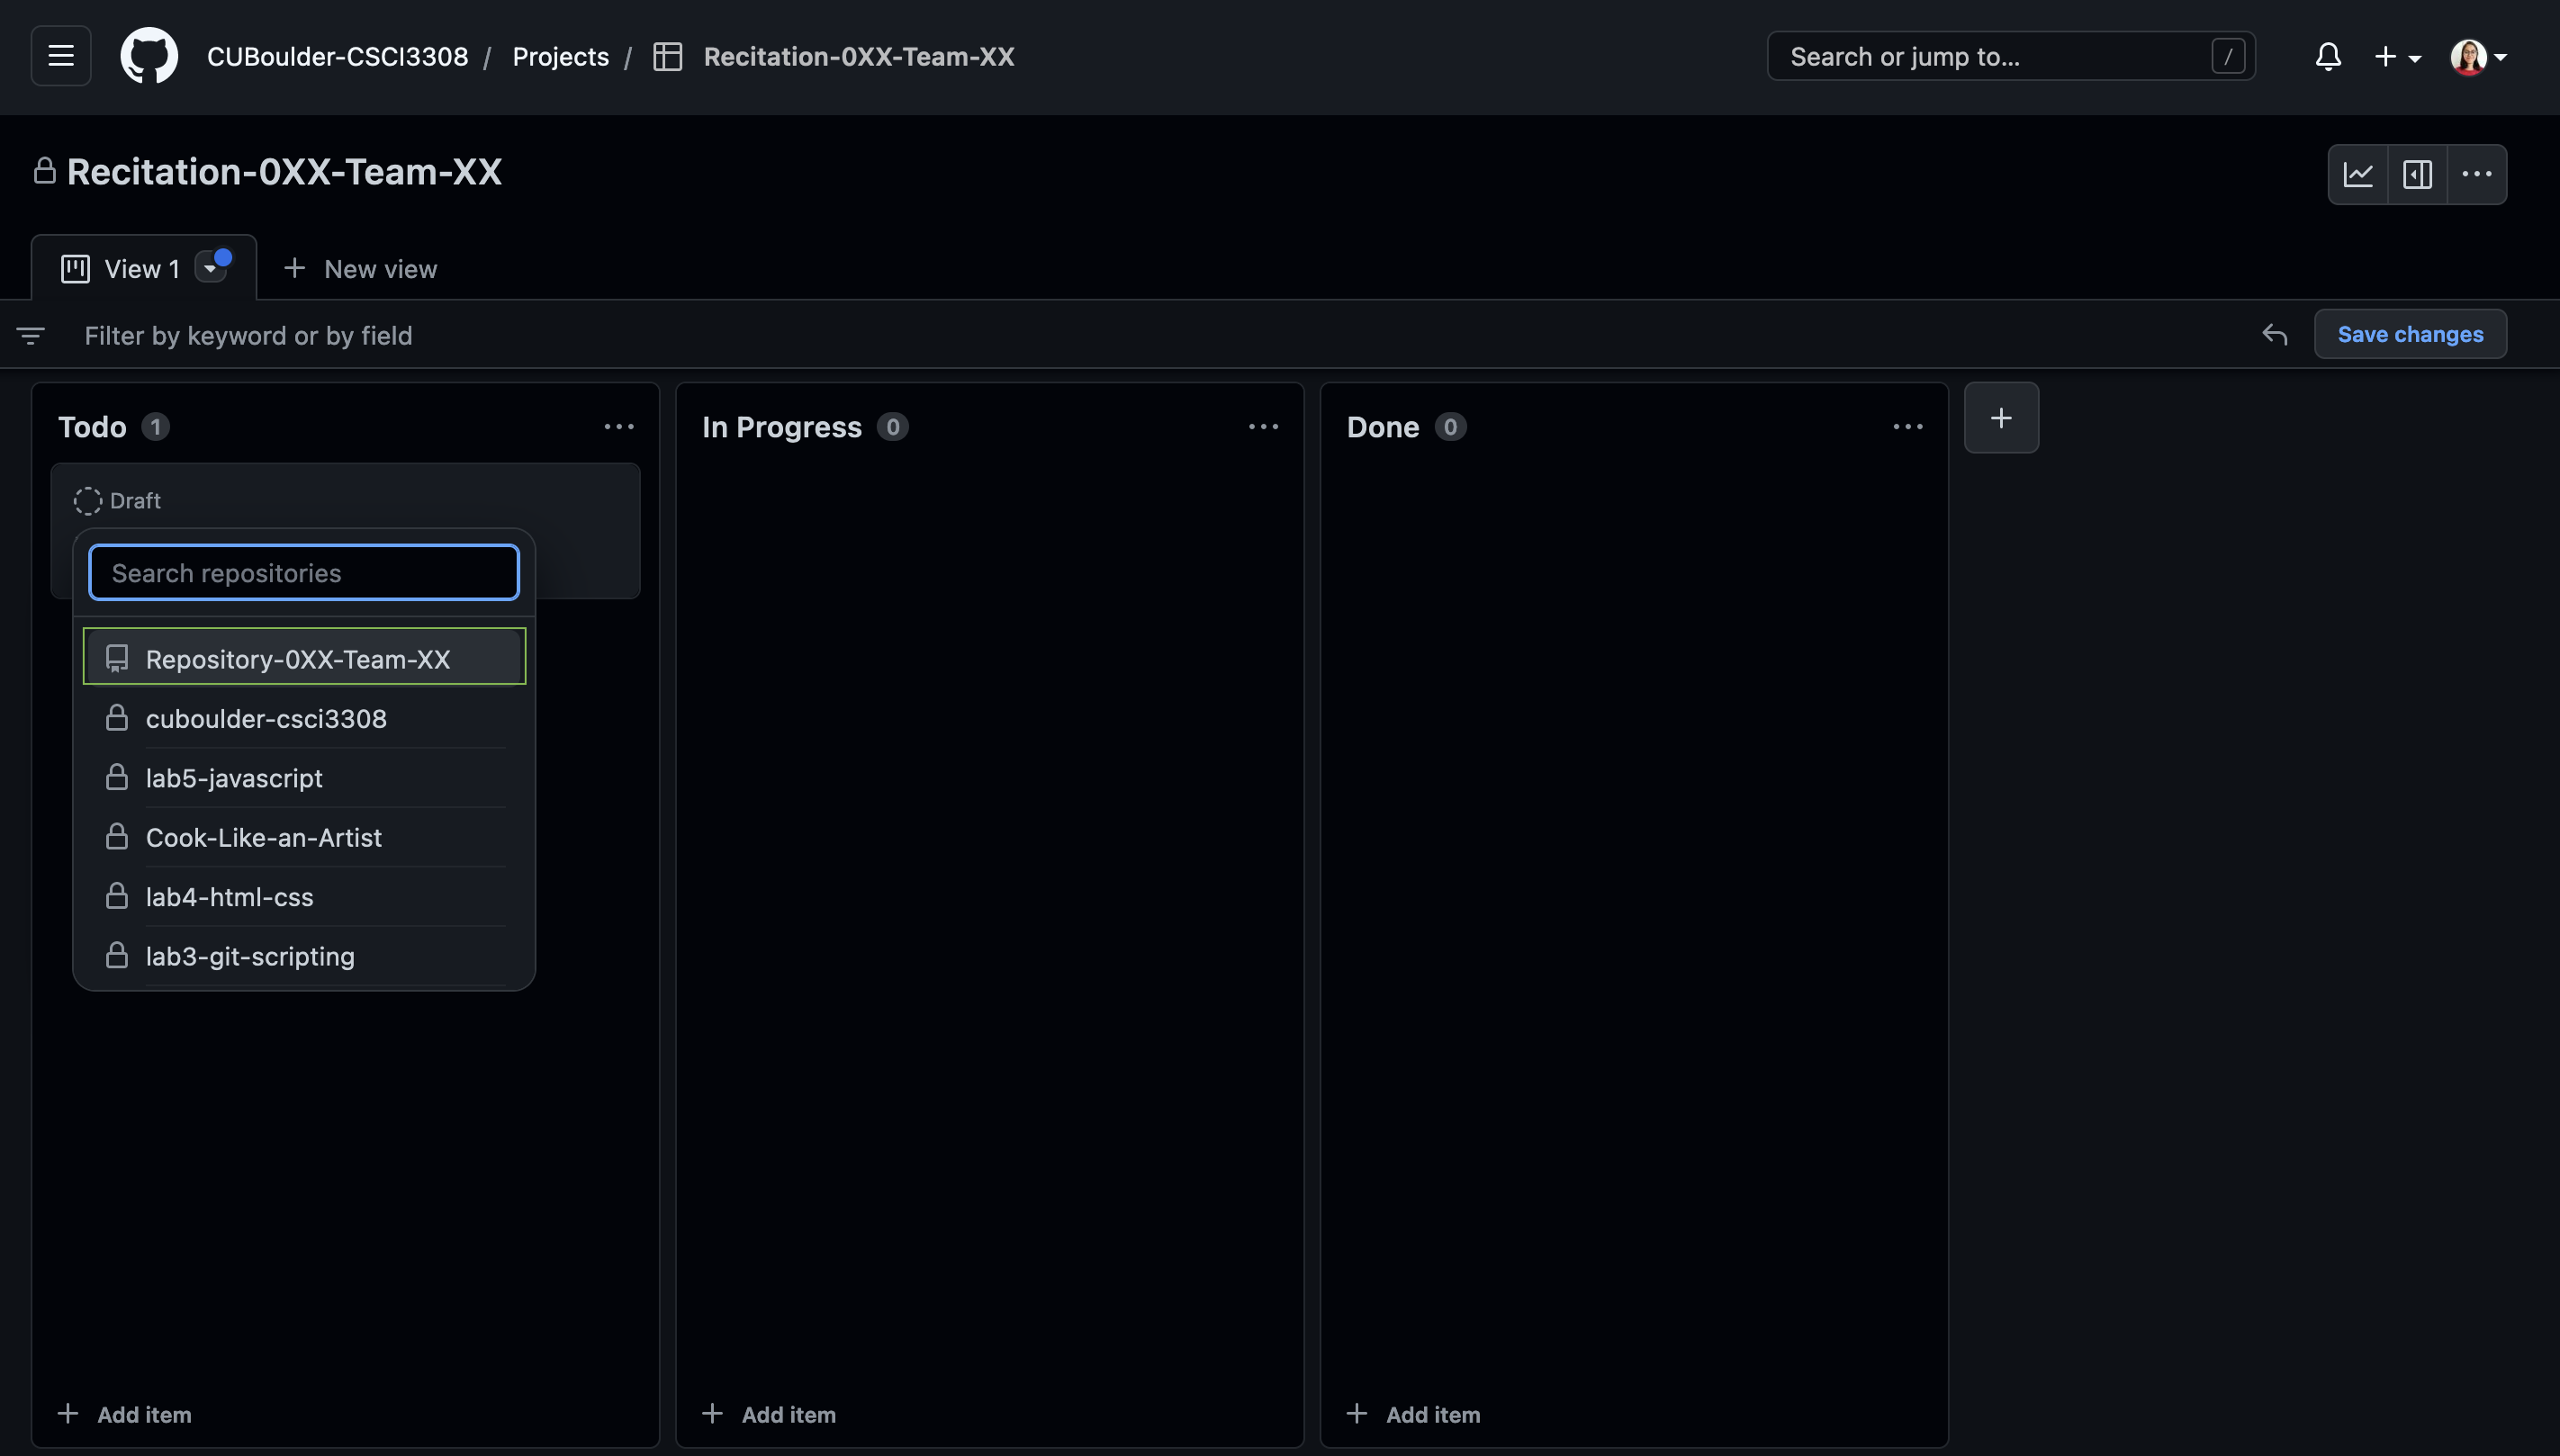
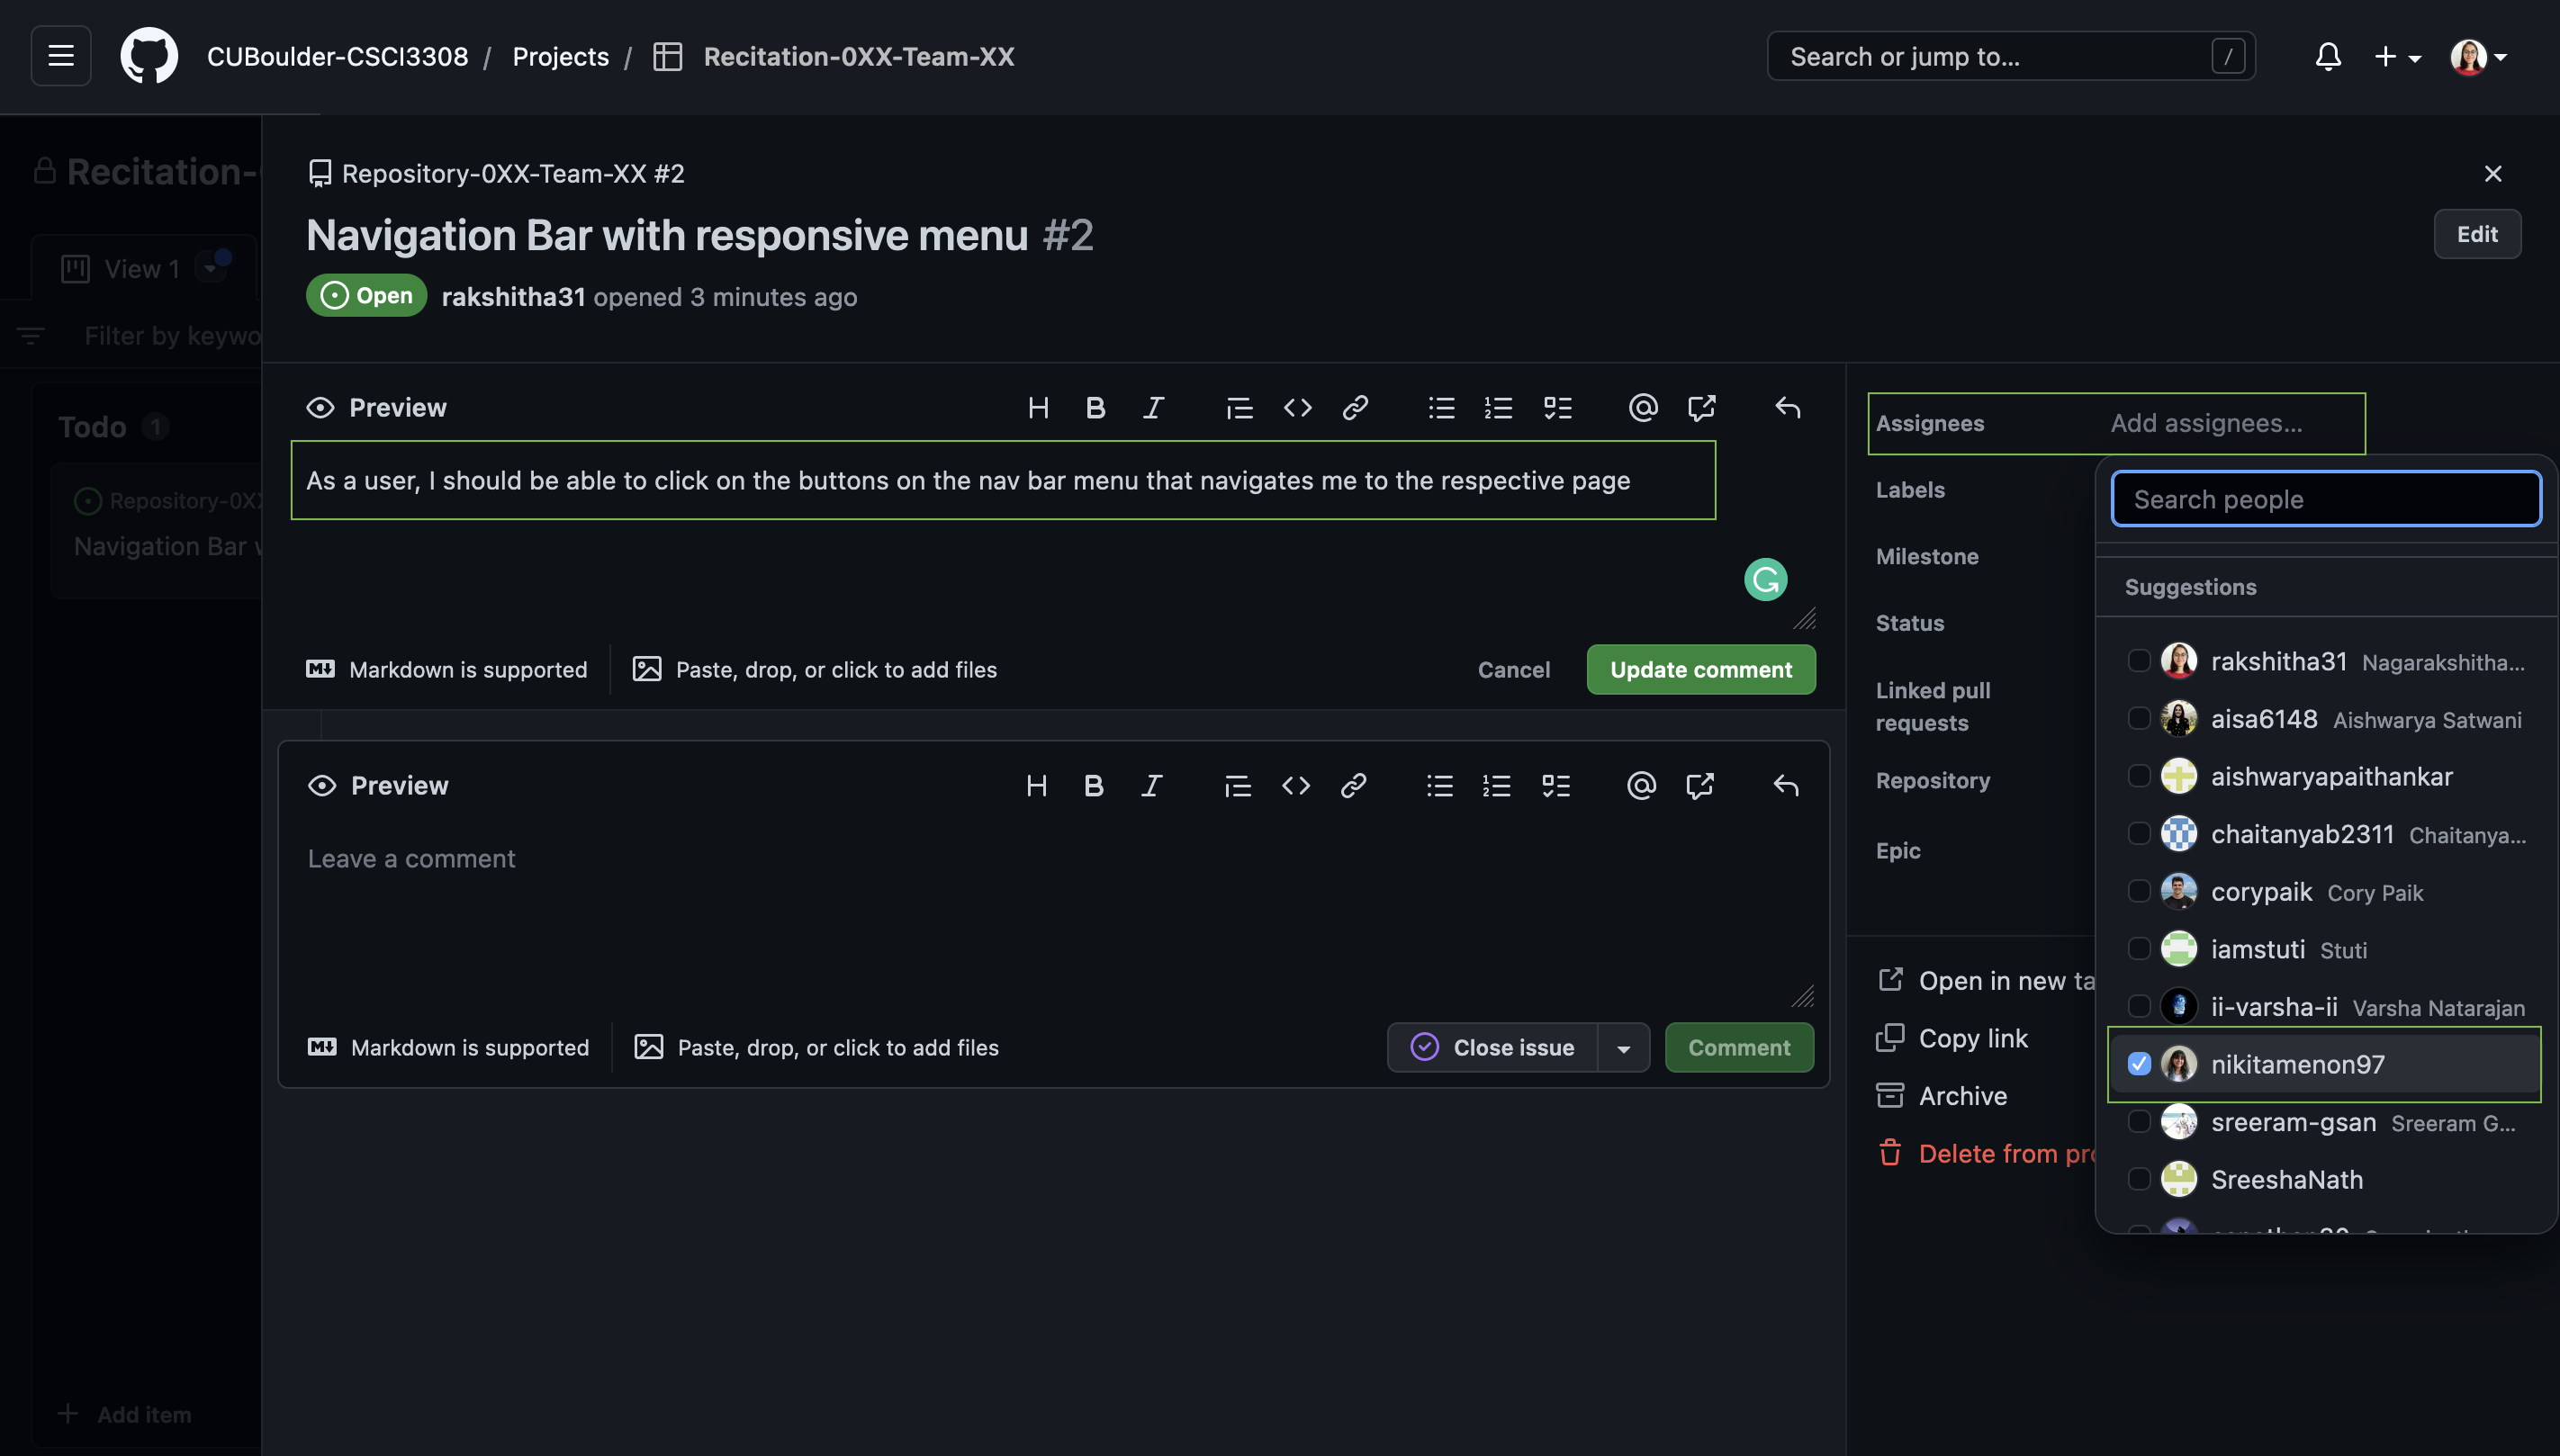
Once the Draft is created, click on the three-dot icon and Convert to issue. Now go ahead and assign it to the repository you just created as a team.
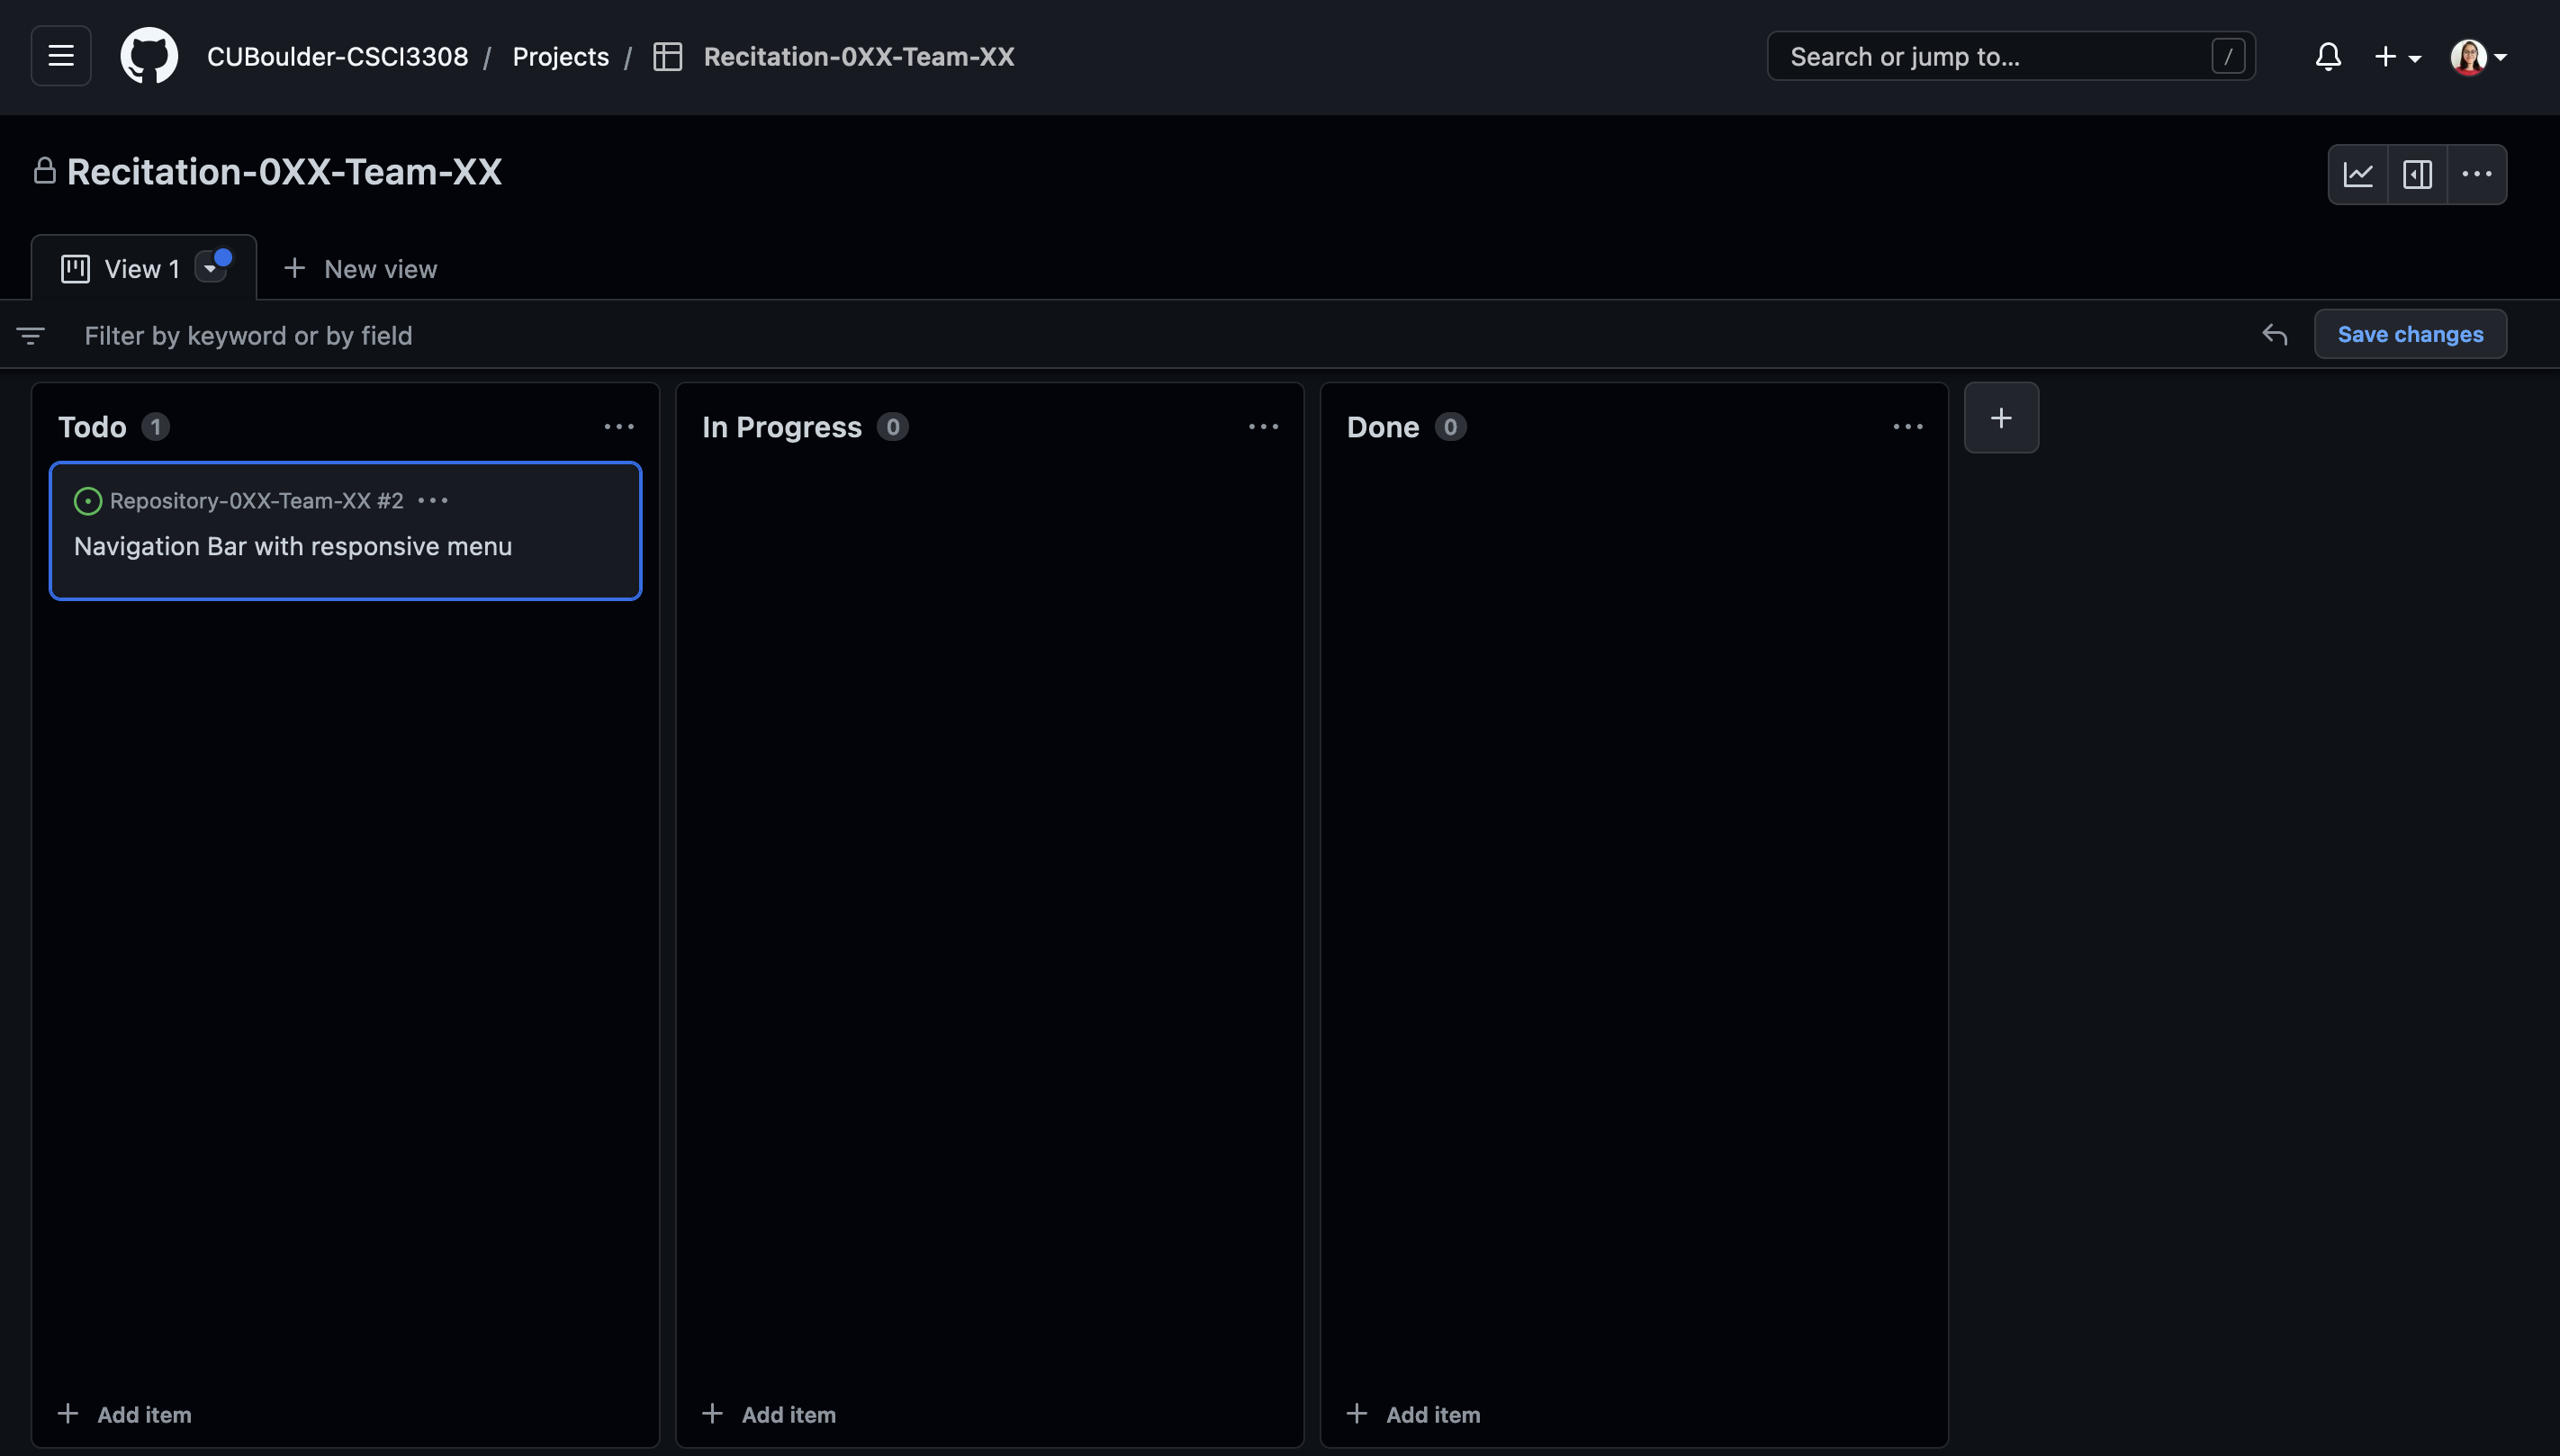
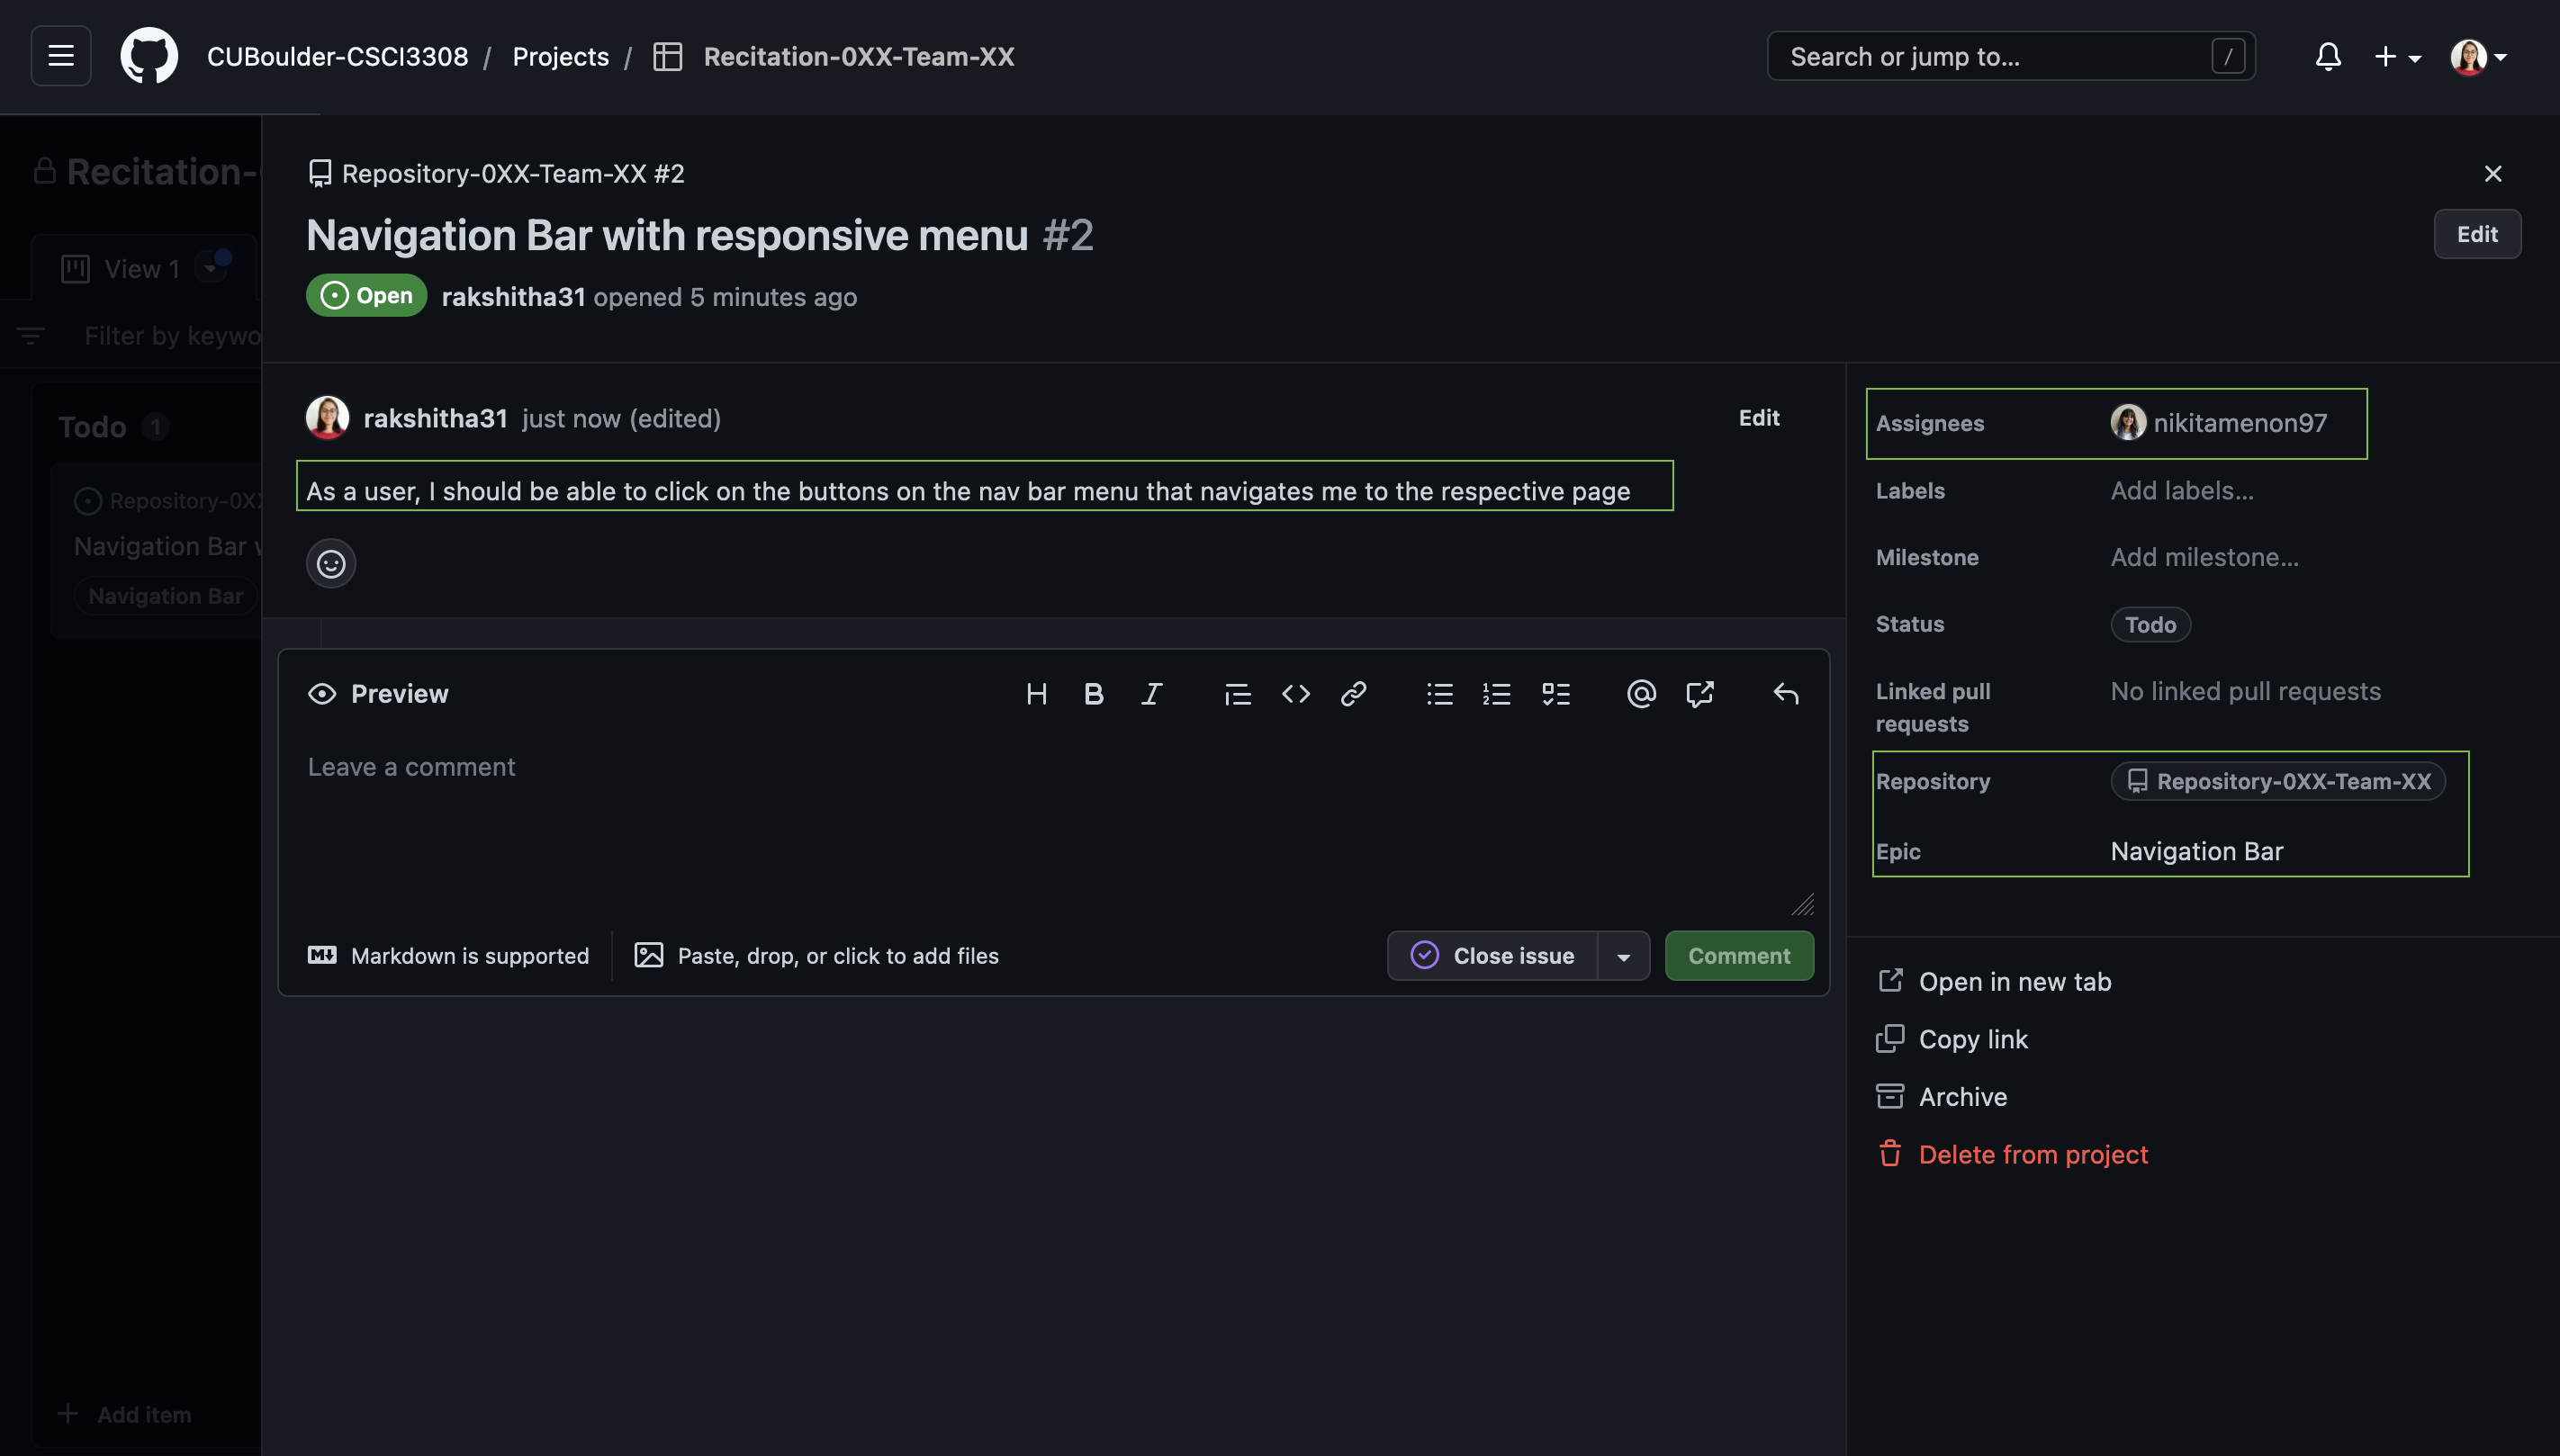
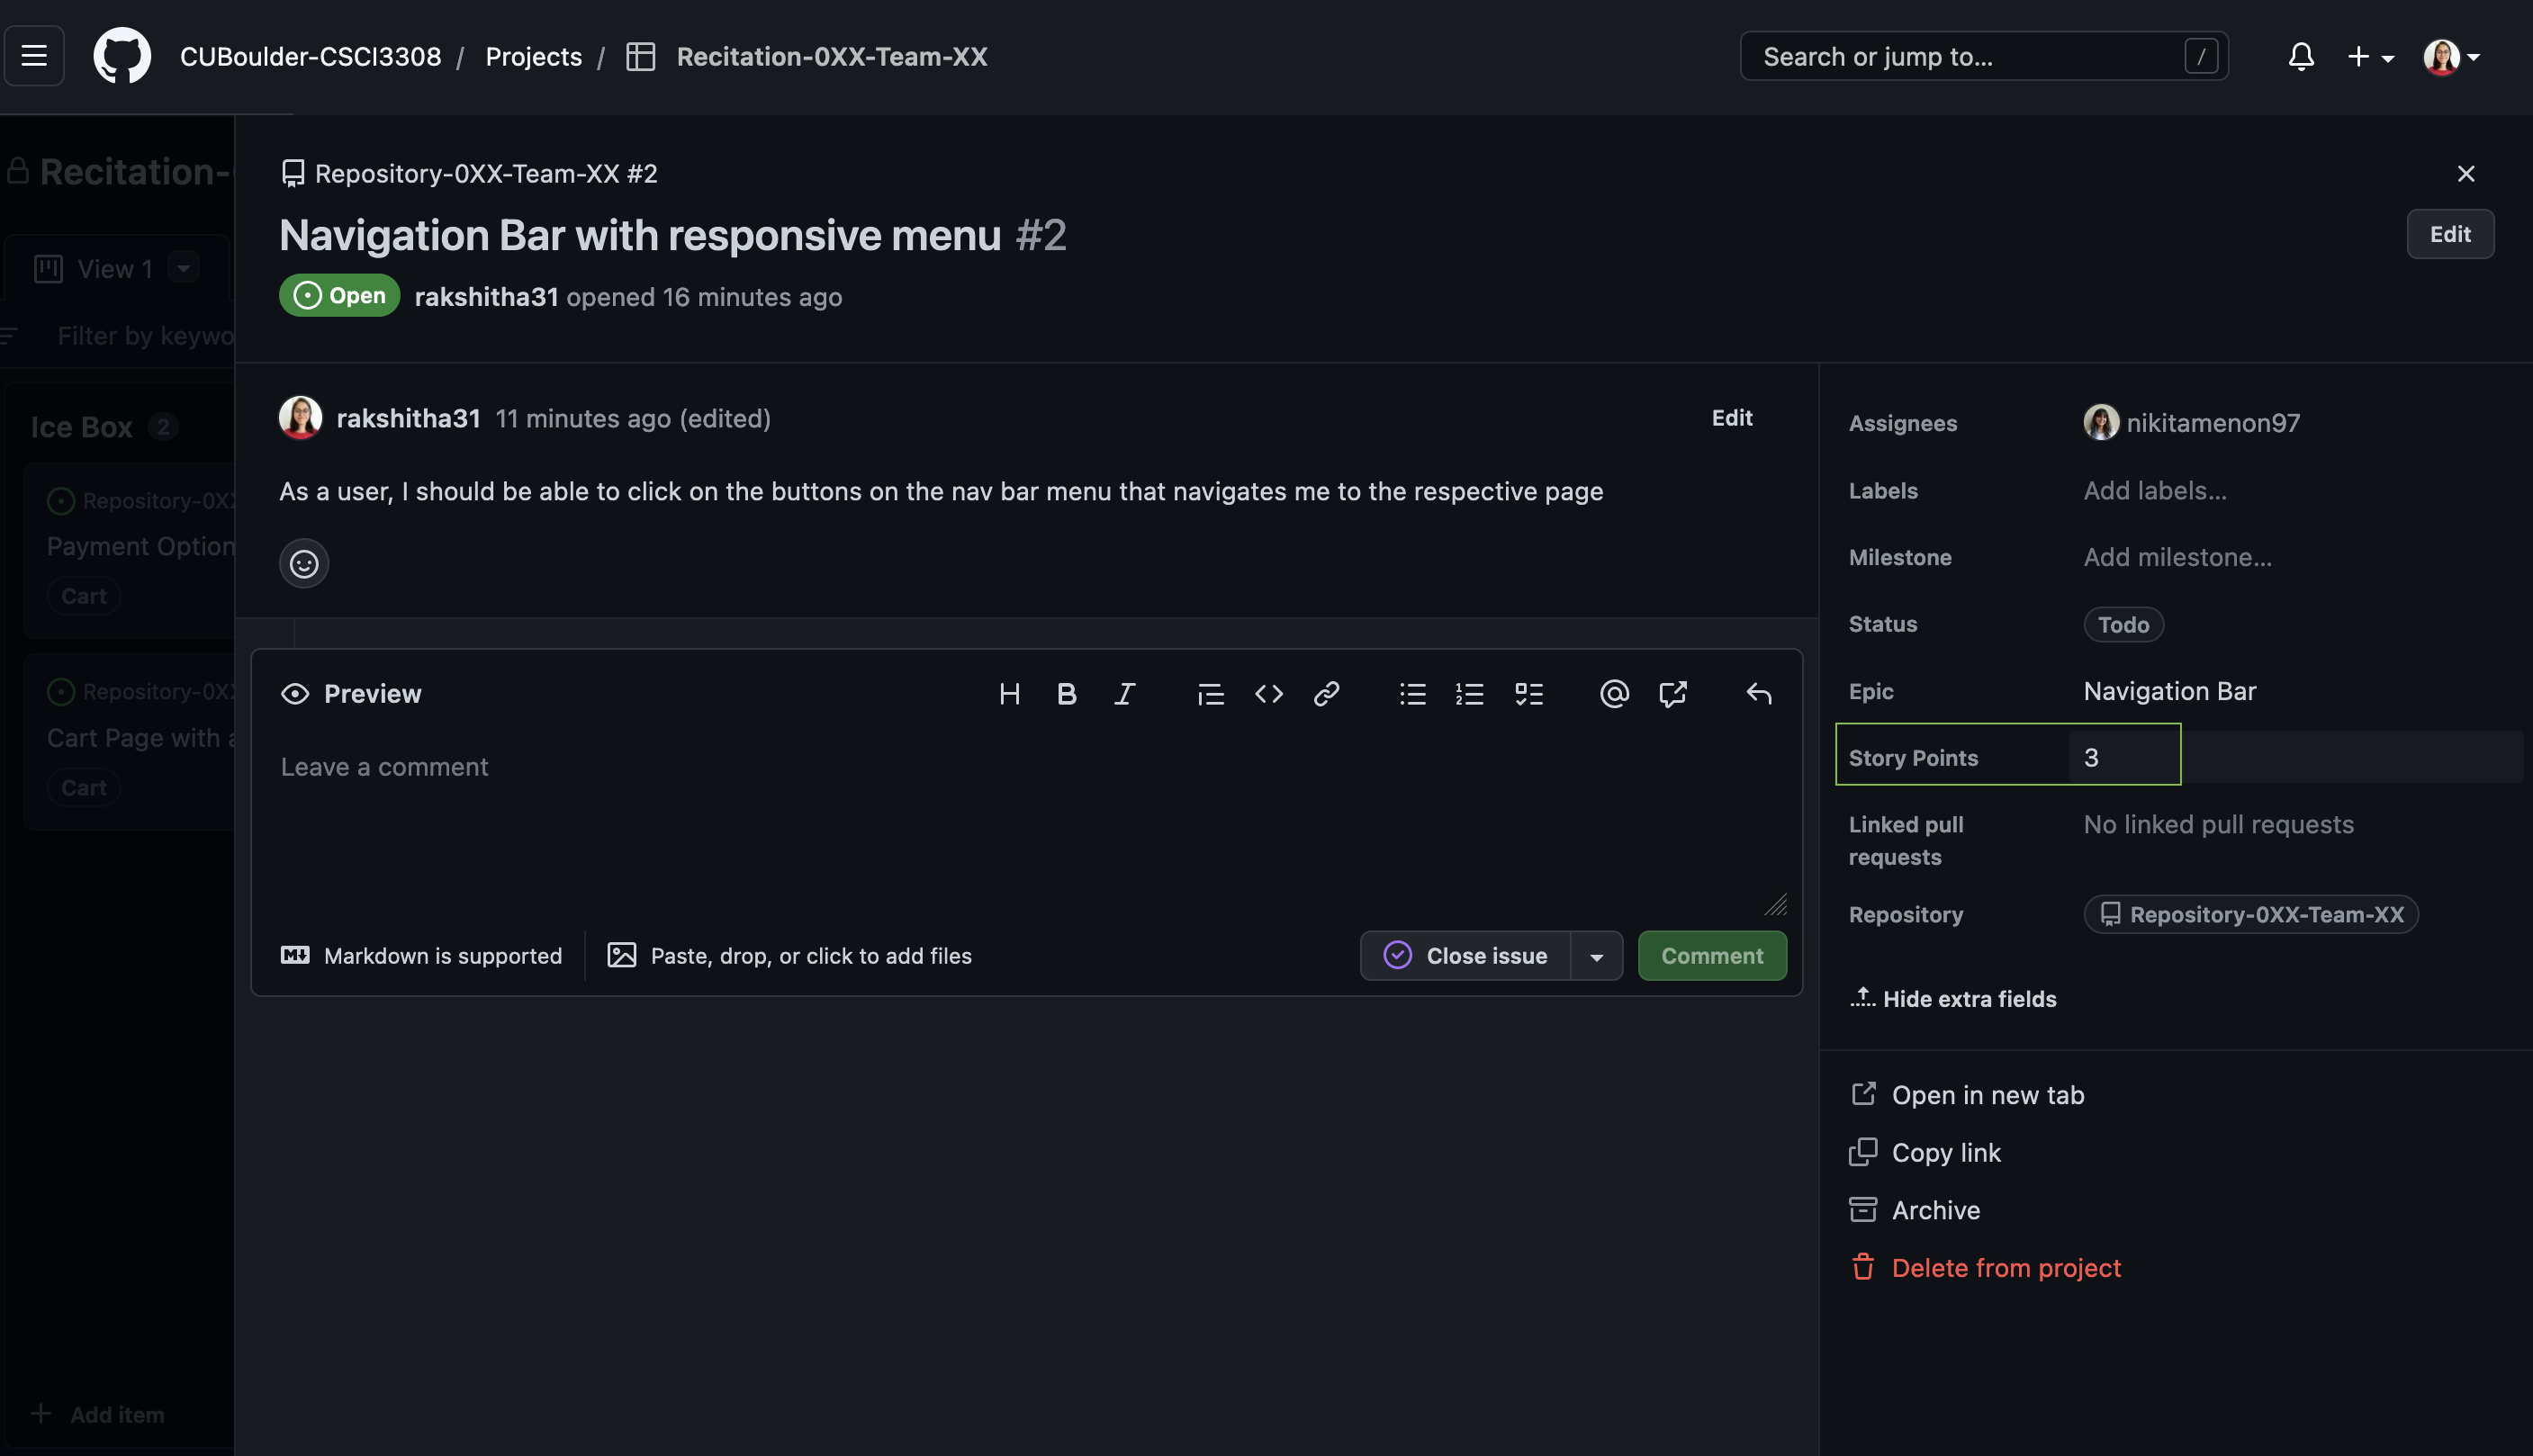
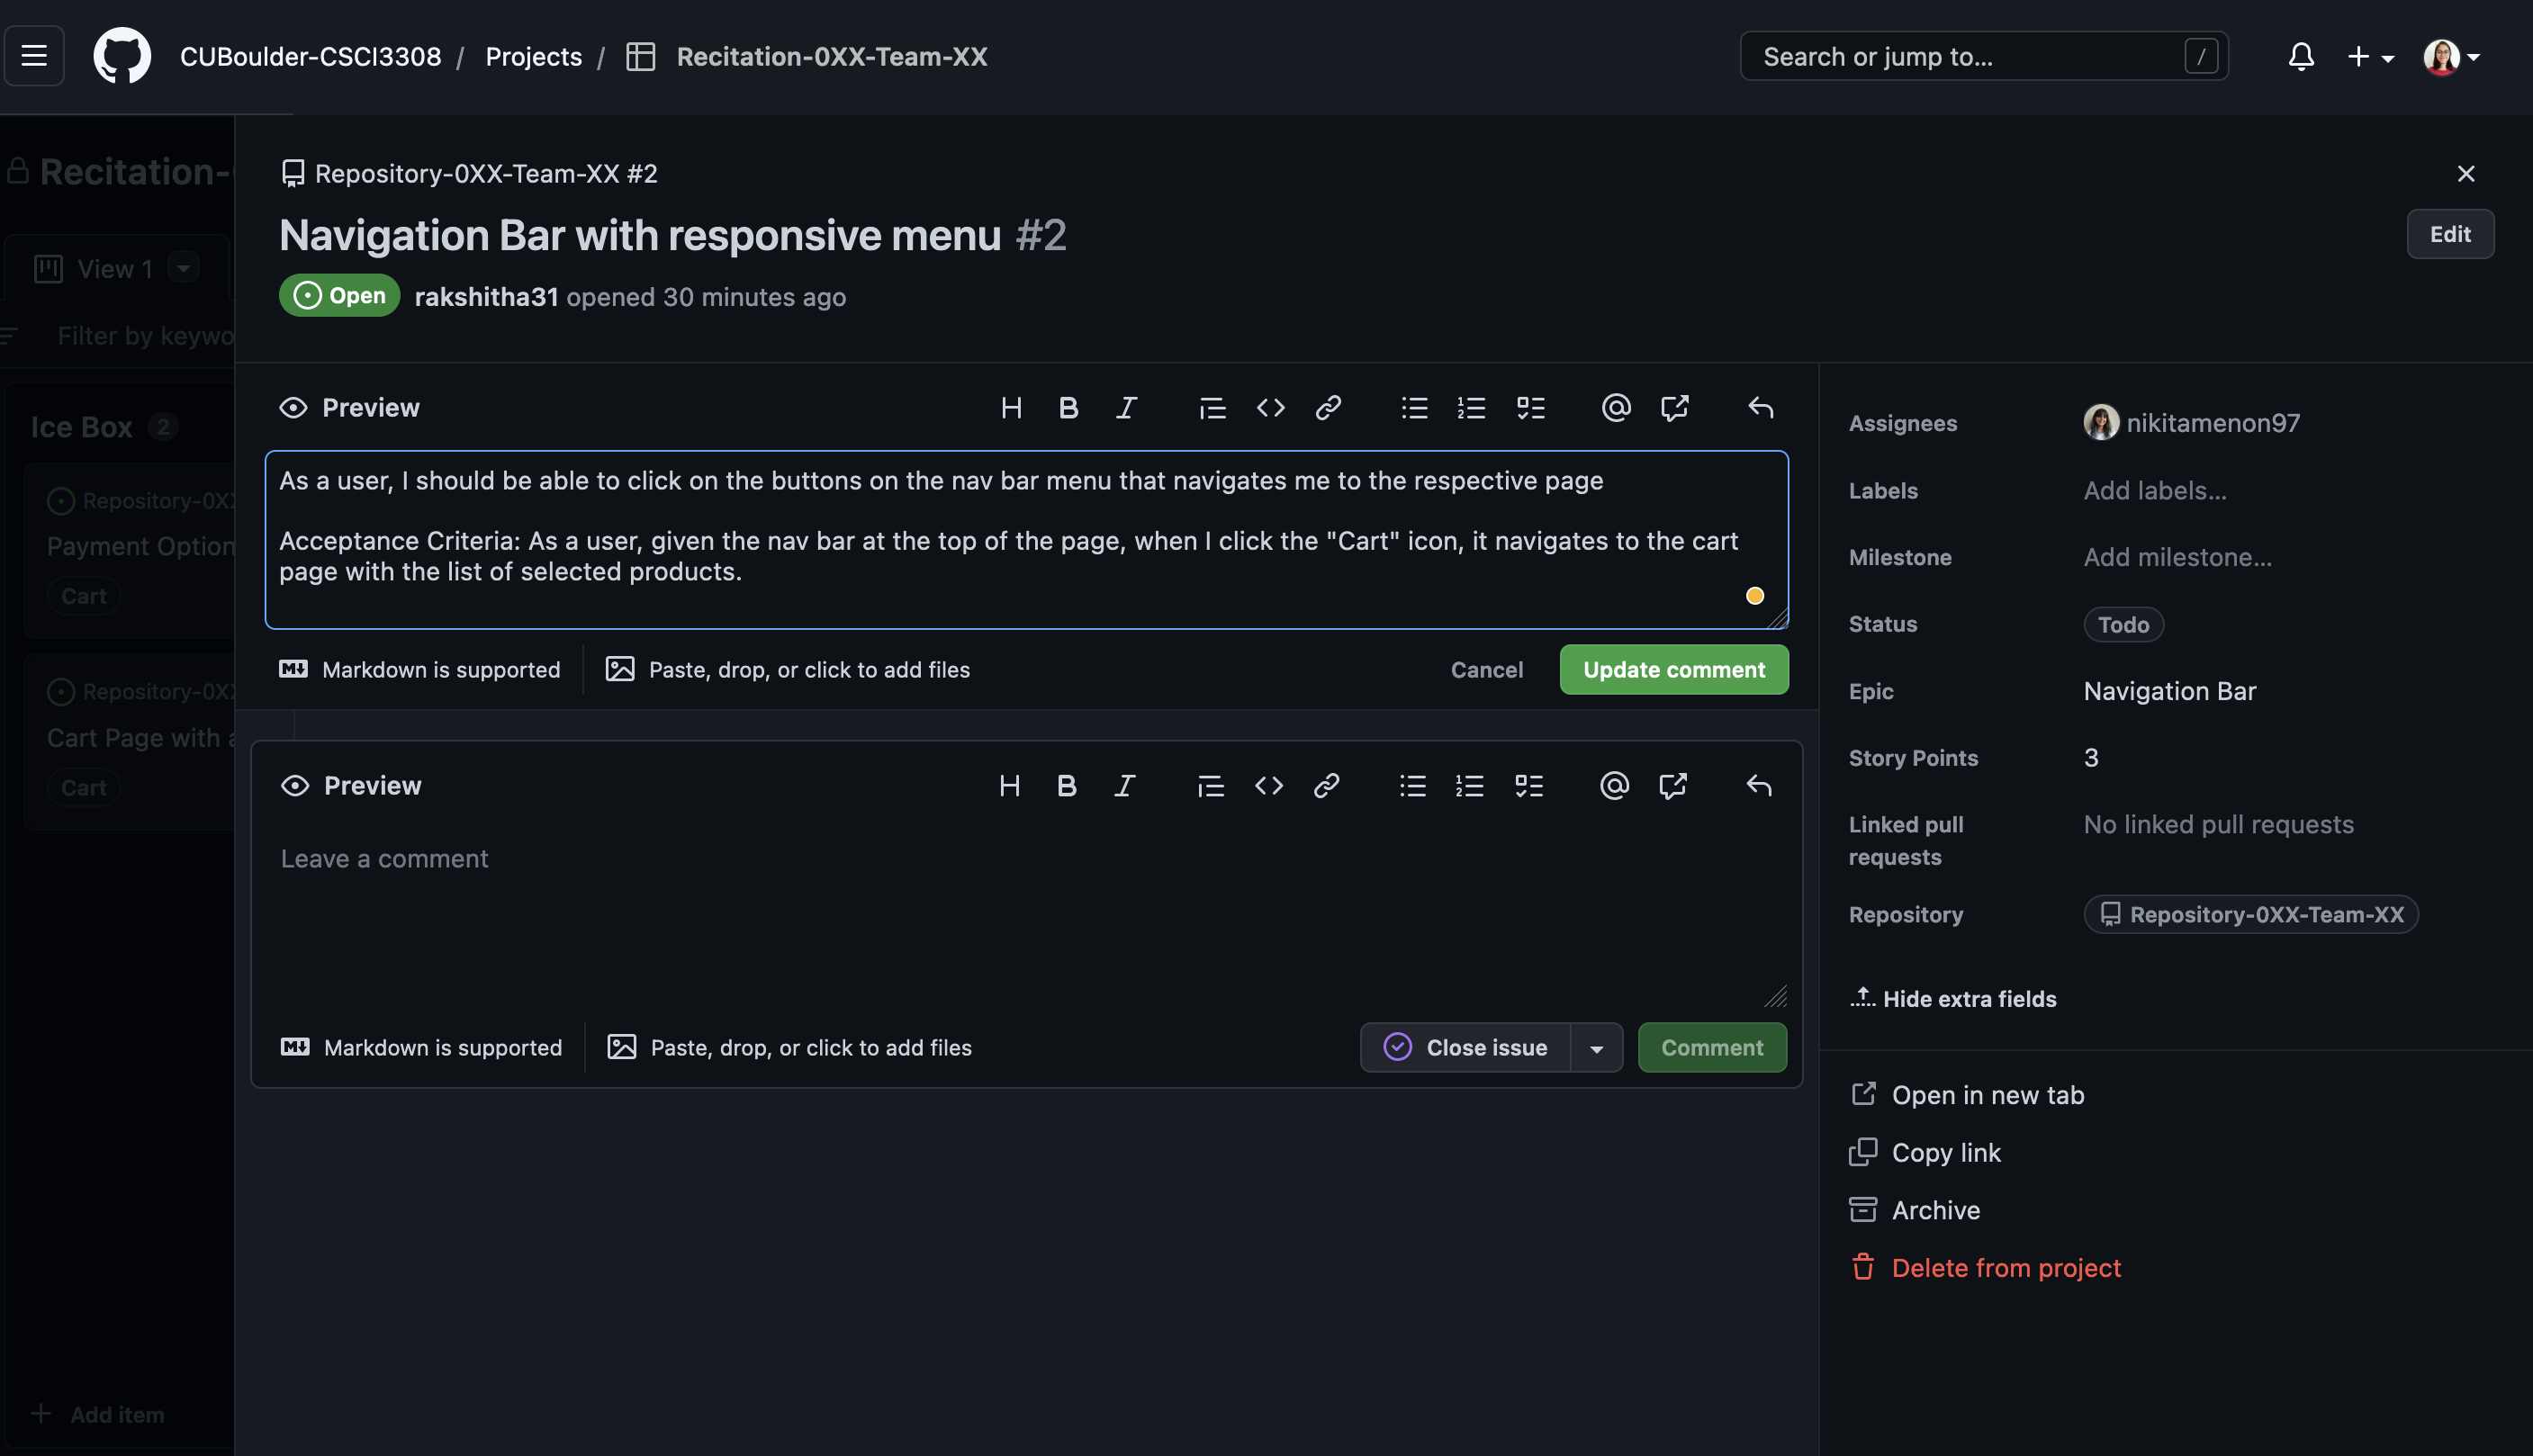
Now click on the issue and add the complete user story in the description. Assign the story to the respective team member and then add the Epic name.
3. Planning Poker
As a team, you will decide how difficult it will be to implement a given User Story/Issue in terms of Story Points. Story Points are an abstract measure of the effort required to implement a User Story. In this step, you will assign Story Points to your user story using a process called 'Planning Poker'. Note that it is accessible for story point allocation to simply reflect your opinion of the amount of time required to implement the story.
Planning poker is a game wherein each individual team member proposes Story Points for a given User Story, the team discusses each other’s proposals, and collaborativality assigns story points to a given User Story. You can watch a short video on how to play Planning Poker.
i. Create your cards
Each individual team member should create a set of cards numbered 1, 2, 3, 5, 8, and 13. These are your set of possible points to allocate to user stories. You can use sticky notes or pieces of paper. Set these cards in front of you.
If you and your team members do not wish to make the physical cards, you can use this resource.
ii. Discuss the User Story difficulty
As a team, discuss how difficult you think the User Story will be to implement. How much time do you think it will take to code? Do you anticipate any challenges with APIs or libraries?
iii. Choose the number of Story Points
In secret, each individual will choose a Story Point to assign to the given Story. It is important that each team member chooses in secret so that they do not influence another team member's choice. On the count of 3, each team member will hold up the Story Point that they think is most appropriate given how difficult they think the User Story is to implement.
Please note, if the Story Points exceed 13 points then you must break the story down further and assign appropriate Story Points to them.
iv. Come to a consensus
- Did everyone choose the same value or close to the same value? Great, you all agree and you can assign the chosen value to the User Story.
- Did some individuals pick significantly higher values than others? Why? Are there anticipated challenges? Discuss your differences in opinion and come to a consensus. You may have to convince someone to change their rating.
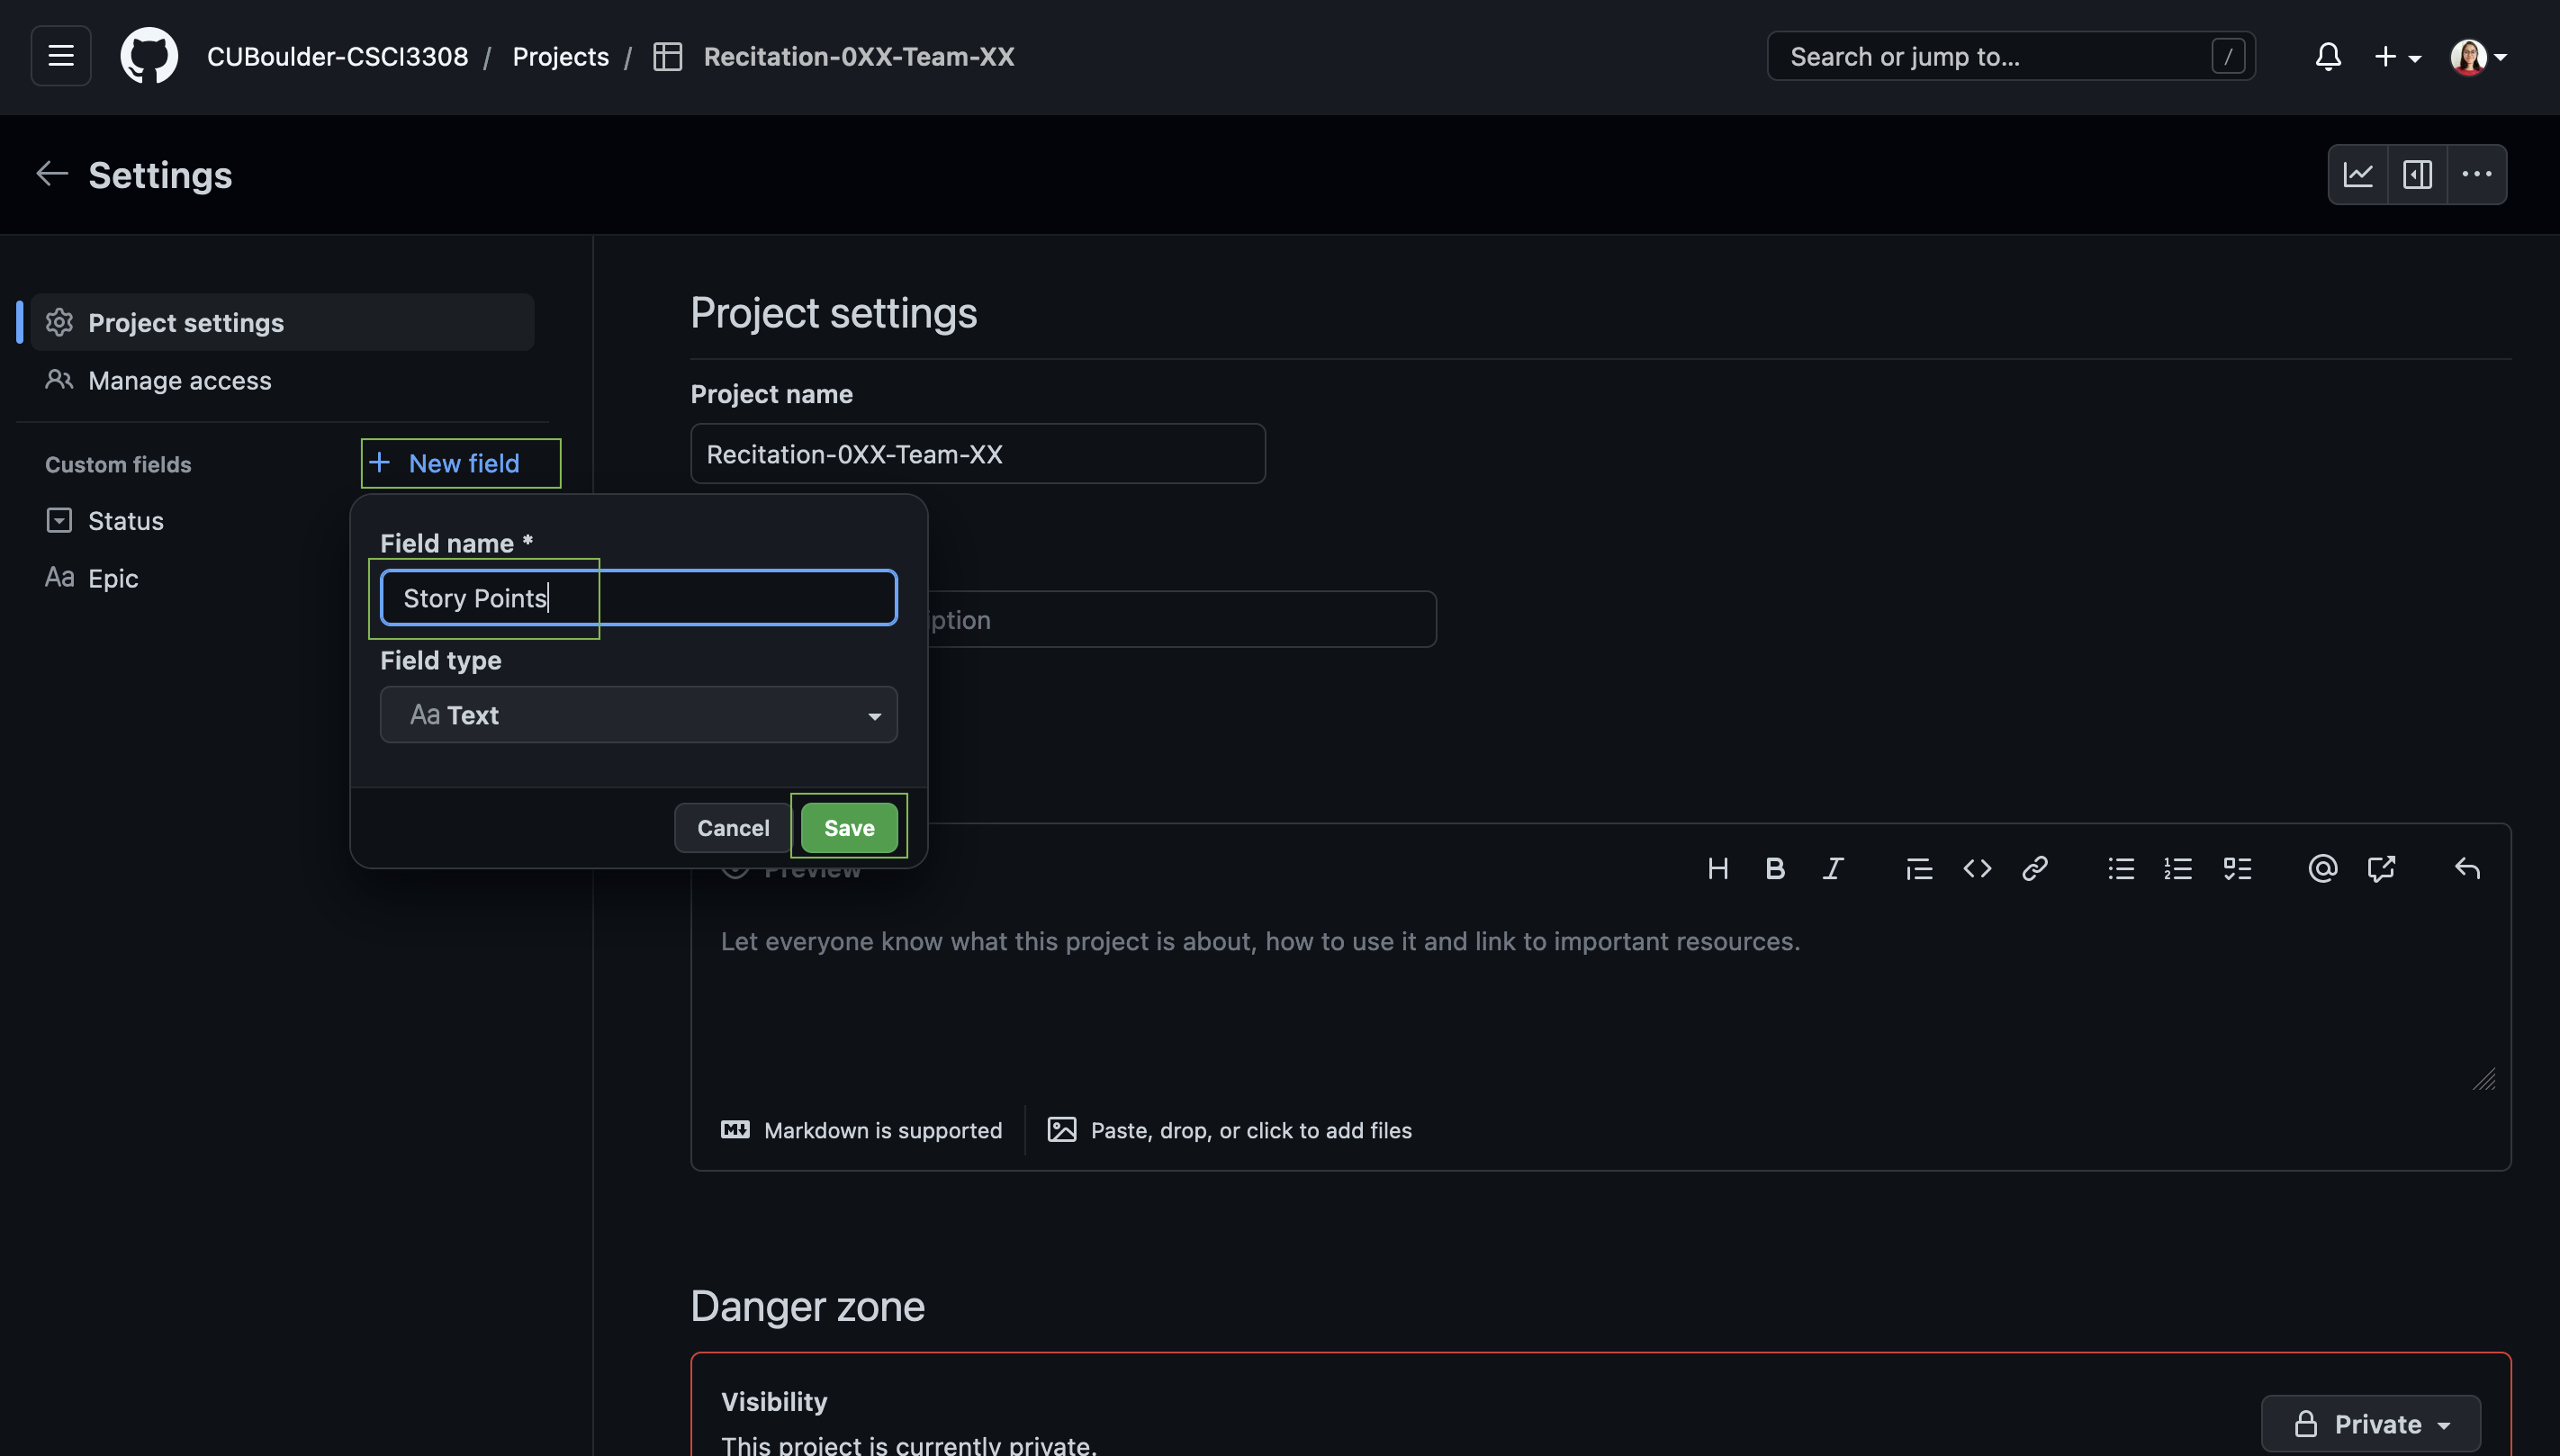
4. Assign Story Points
In your GitHub projects, just like you created a property for Epics, we will now create a property for Story Points. Refer to the following screenshots that guide you through it.
5. Adding User Acceptance Criteria
In Agile, acceptance criteria refer to a set of predefined requirements that must be met to mark a user story complete. Acceptance criteria are also sometimes called the “definition of done” because they determine the scope and requirements that must be executed by developers to consider the user story finished.
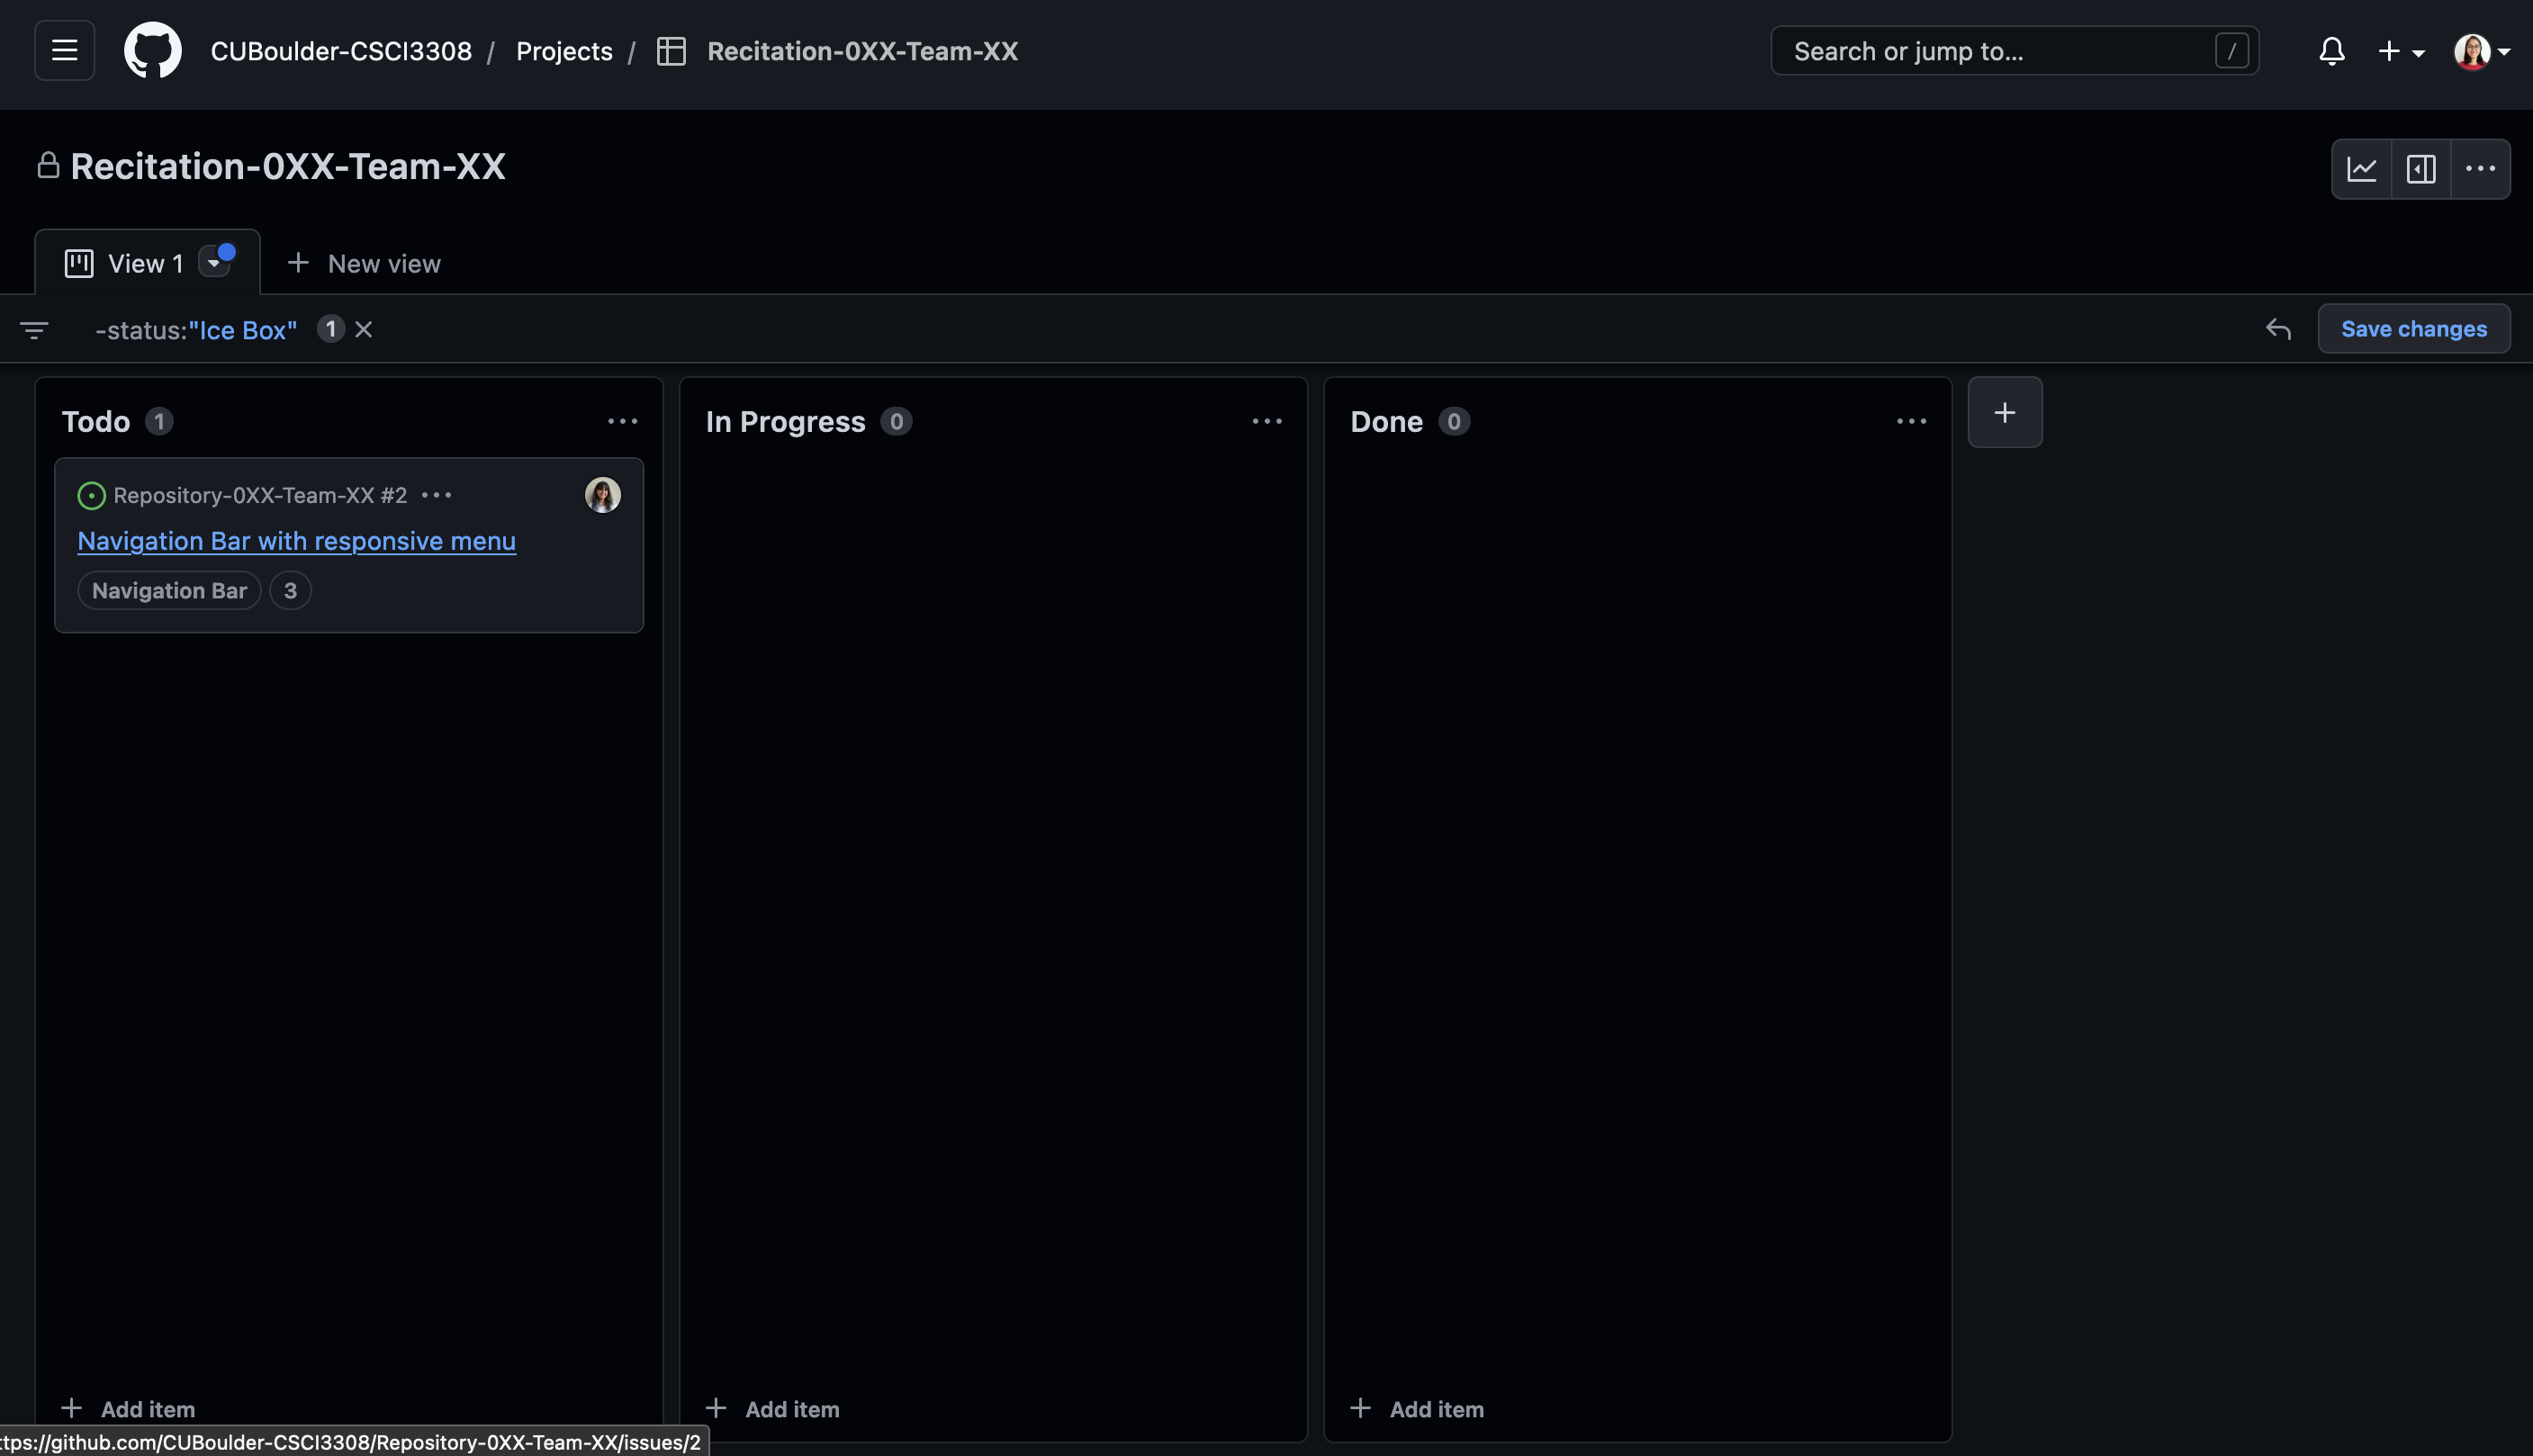
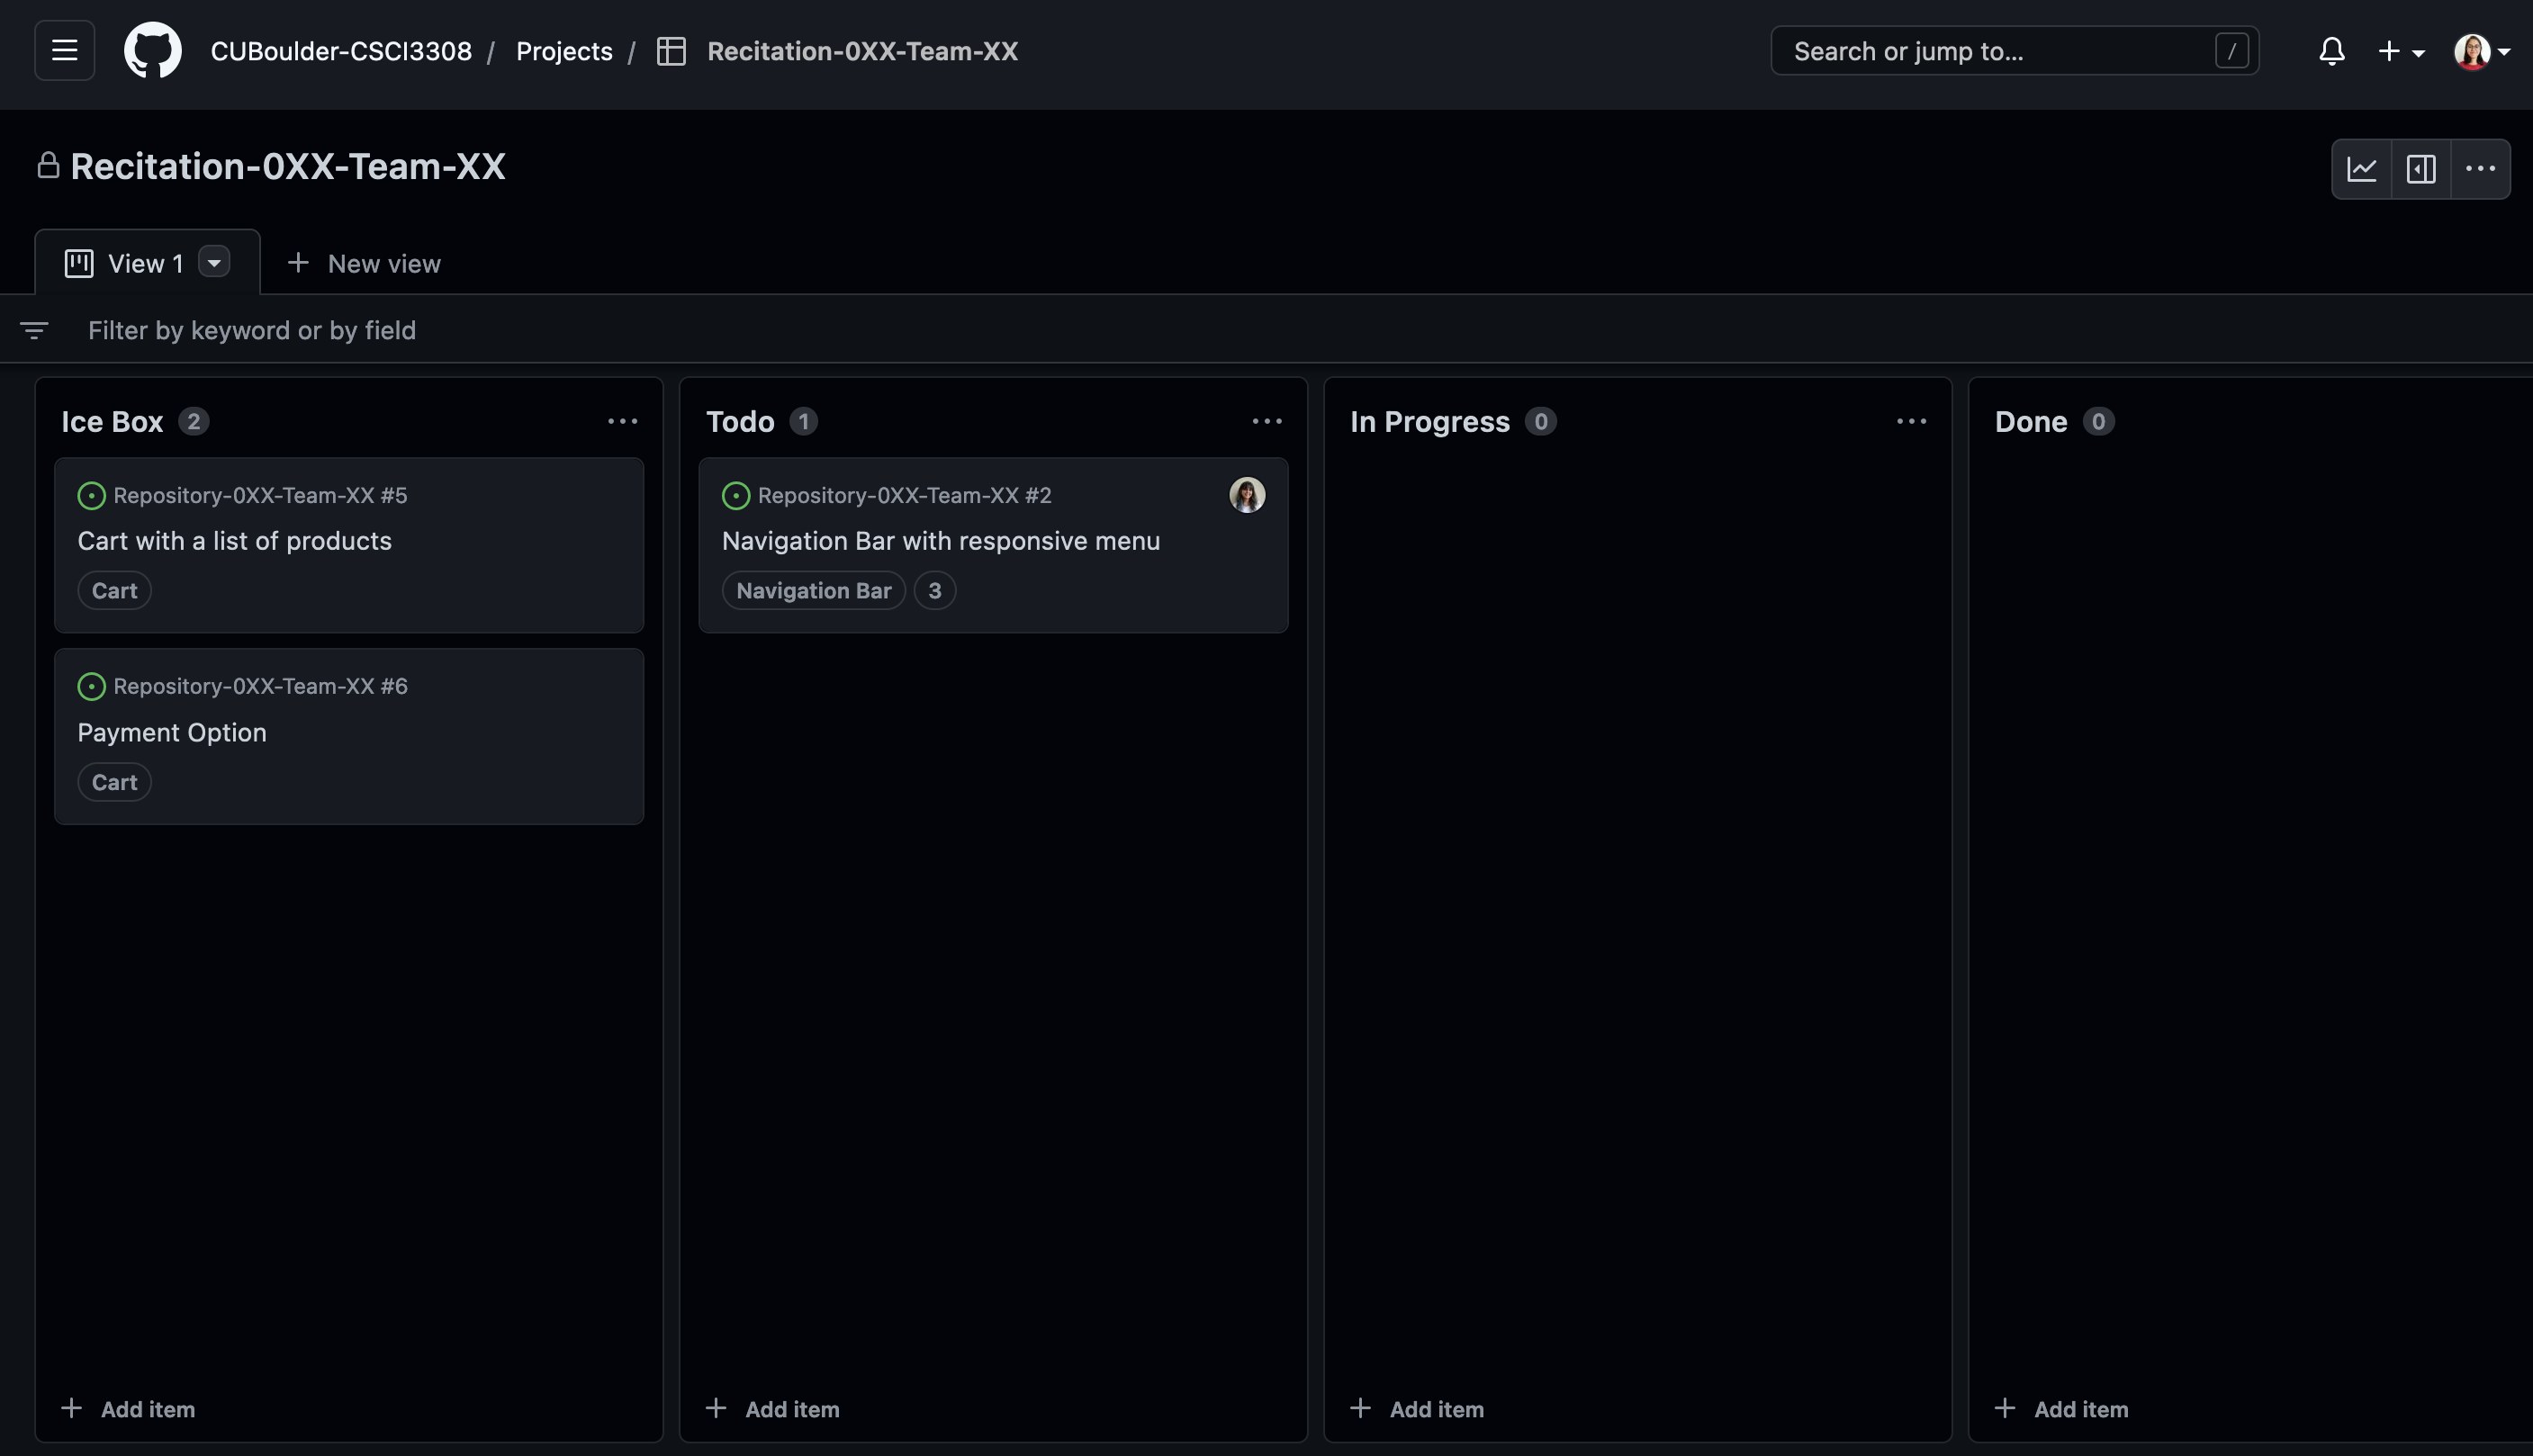
6. Ice-box
Ice box contains the set of stories that are not picked up in the current sprint. These are potential stories for the project to work on in the future sprints.
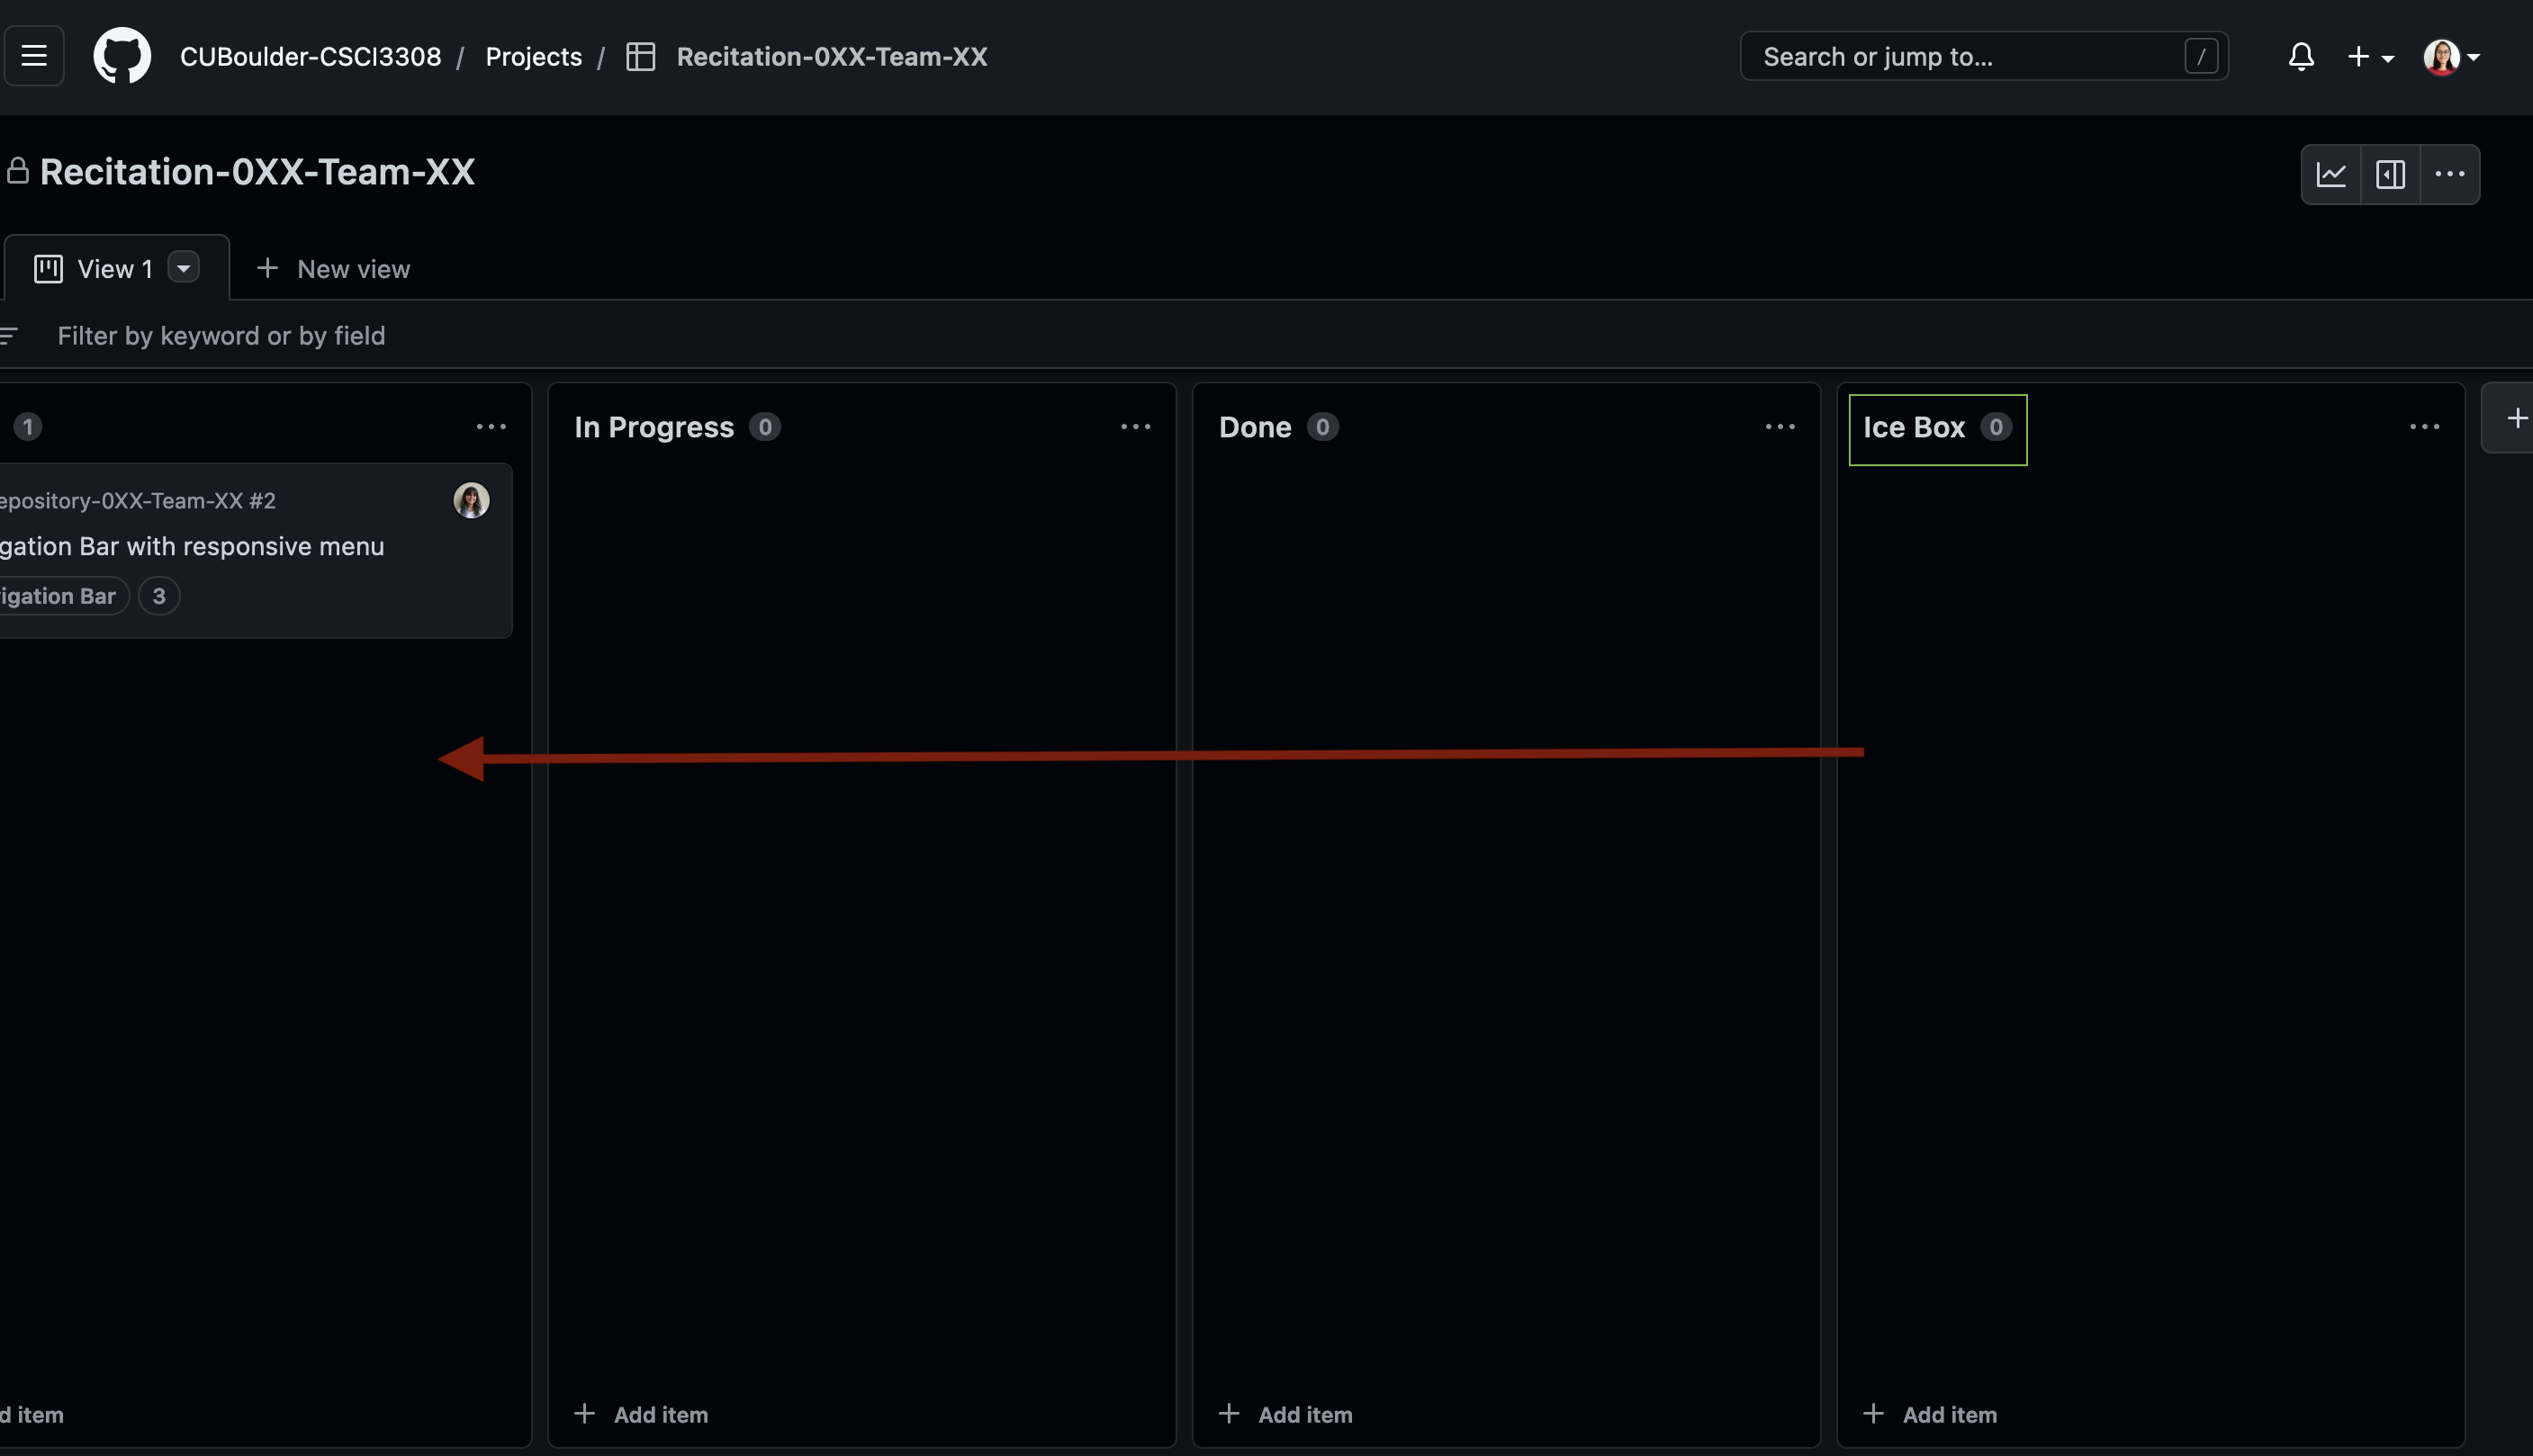
On your board, click on the + icon on the right of the columns and add the name “Ice-box”.
Drag and drop the column to the left most of the board as shown in the images below.
Part B
1. Decide on an Epic as a team
After you have completed Part B, have a quick discussion with your team to come up with at least one new Epic as a team. You may add more as you see fit for the extra credit(Refer to the extra credit section for more details on that).
2. Add 2 User Stories (Individual Task)
Once you are done with the Epic decision, each member must add at least two user stories, with acceptance criteria, to the board for any of the newly added epics. Keep in mind that you are also expected to add the appropriate story points and assign the user stories, you created, to yourself. That is how we can grade you fairly.
Extra Credit
- You have added an additional 2 or more relevant Epics (not including the one in Part B) for your project that you intend to work on within the 4 weeks of the project timeline.
- You have added all the user stories, in the standard template as taught in the lecture, with a complete set of Acceptance criteria for each of them, for the above Epics.
- These should be listed in the ice-box column of the project board if you intend to work on them in the future. In case you start working on them, it's okay to move the cards across the columns on the board
- Every card that is moved from the ice-box should have - a member assigned to it and appropiate user story points
Submission Guidelines
All work for this lab should be done in your group's repository and project board.
To receive appropriate credit for this lab, make sure the project board is public, properly linked to the repository. DO NOT delete any of the epics, user stories, or issues you created as part of the lab. You should still move them on the project board as you make progress and close the issues as you work on your project but do NOT delete them.
Submit a link to your GitHub project board to Canvas. Only 1 person per team needs to do this.
Regrade Requests
Please use this link to raise a regrade request if you think you didn't receive a correct grade.
Grading Specifications
| Criteria | Not Attempted | Below Expectations | Meets Expectations |
|---|---|---|---|
| Overall Attempt | • Lab not attempted OR • Student did not attend without prior approval | — | — |
| Attendance & TA Review | — | • Did not attend full lab duration OR • Work not reviewed by TA OR • Attendance not recorded on Canvas | • Attended full lab duration AND • Work reviewed by TA AND • Attendance recorded on Canvas |
| Submission Presence | — | • Work not completed in group repository/project board OR • Project board not public OR • Project board not linked to repository OR • Epics/user stories/issues deleted | • All work completed in group repository and project board AND • Project board is public and properly linked to repository AND • No epics, user stories, or issues deleted AND • Items are updated appropriately (moved across board, issues closed as progress is made) |
| Submission Quality | — | • Submission does not represent a genuine attempt | • Submission reflects complete and appropriate effort |
| Epic Creation | — | • Epic not added to project board | • One Epic added relevant to the project |
| User Story Creation | — | • No user stories created for Epic | • At least one user story created for the Epic |
| User Story Completeness | — | • Missing details (description, acceptance criteria, story points, or assignment) | • Includes description, acceptance criteria, and story points |
| Ice-box Column | — | • Ice-box column not added | • Ice-box column added for future ideas |
| Additional Epics | — | • No additional Epics added | • One additional Epic added |
| User Stories per Student | — | • User stories not added OR incomplete | • Each student adds at least 2 user stories |
| User Story Completeness | — | • Missing key details (description, acceptance criteria, story points) | • Each story includes all required details and is assigned |
| Extra Credit – Advanced Planning | — | — | • Meets all Meets Expectations criteria AND • Added 2 extra Epics AND • Includes complete user stories for each Epic AND • Follows correct template AND • Well-defined acceptance criteria AND • Appropriate story points AND • Assigned to team members |